Archive for September, 2010
As it has started to get a little chilly I became fixated on my favorite fall dish: stew. The process for making stew is simple. Buy some beef, cut it into small pieces. Get some veggies, either bought small or cut into small pieces. Find some herbs. Brown the meat, and add all of the chopped stuff into a pot or slow cooker with some beef broth and the herbs. then let it cook for 12 hours or so (18 hours never hurt anyone).
But, before I could start I needed a pot. I left my well used slow cooker back in Minnesota two years ago and while it might be moving to New York with Fayaz, I wasn’t willing to wait until mid-October. Still I didn’t want to get another slow cooker, potentially ending up with two in the house. Over the summer Meg had gotten an amazing Le Creuset enameled dutch oven. So before my stew making I headed out to look for a similar pot.
I started my search at Whisk, a fantastic cooking store in Williamsburg. I found the Le Creusets colorfully sitting in the front of the store as always, but the prices seemed about $40 more than they should have been. I next somehow ended up at Create and Barrel. The only enameled dutch ovens they had in the store were the Mario Batali line. Now I loved Batali on Iron Chef, but the whole celebrity chef branding thing kind of annoys me. But more than my annoyance, the Mario dutch oven just looked much less substantial than the Le Creuset. After a little foodie message board research I found a few complaints about the Mario line cracking—not the dutch oven I was looking for.
So I next headed to William–Sonoma. Walking in I remembered how dangerous that store can be, how everywhere I look I see something else that I “need.â€Â With the help of a sales woman I found the Le Creuset I was looking for, the 5-qaurt yellow oval dutch oven. But, as the manager went to the back to get the dutch oven I’d been looking at, the sales woman told me I might want to check out Staub.
I coincidentally had seen a debate on Staub versus Le Creuset on the boards while evaluating the Mario dutch oven. The conflicts, in my mind, came down to personal opinion. Some thought that, over the years, the Le Creuset’s cream colored interior stained. The Staub camp felt the dimples in the Staub lid helped self-baste the joys in the pot. In the end, I was persuaded in part by the dimples and in large part by the price and got the Staub.
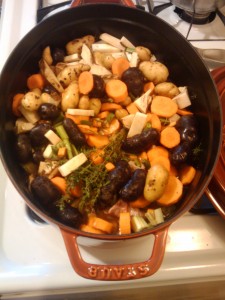
For the Stew I first hit the farmer’s market. I feel the heart of any stew is the potatoes, so I got three kinds: blue, red and yellow fingers. I kept the potatoes I purchased small so pre-cooking cutting would be unnecessary. In addition, I got some great small onions, a rainbow variety of carrots, some celeriac (celery root, which is great because I don’t like celery in my stew and it gives the celery flavor without the need for nasty celery), some herbs. For the herbs I got a one bunch of savory and one bunch of thyme.  I also got some stewing beef (aka “low quality†beef chunks) and beef broth from Key Foods.
To start the stew I browned the outside of the meat (NEVER cook it all the way, that makes it too chewy) added the beef broth and veggies (chopped where necessary), and the herbs.
When the stew first got started I was very worried I had gone too strong to the hoop with the thyme and savory. The smell of these herbs filled the apartment and in the past when I’ve made stew I’ve used a similar volume, but greater diversity of herbs. But, as time went by, the fragrances of the herbs in the apartment diminished.
As the stew cooked the bright colors of the potatoes and carrots diminished. The dark blue of the potatoes, the red of the other potatoes and some the carrots faded.
But even faded, these colors added a great visual element to the stew (and at a increased cost of only about a $1.50 for the whole pot, relative to the normal boring colored ingredients).
When the stew was done, I fished out the stems of the herbs (where I more fancy I would have used an herb bag—someday).
The end product was great; the perfect stew for a cool fall day. It was far more than Nick and I could eat in a sitting. But it kept well in the fridge.  What couldn’t be eaten from the fridge we froze. While not ideal—freezing made the veggies became overly soft—freezing still gave us great stew over the coming weeks.
Overall, I had a great kick off to fall cooking. Yes, with the 80 degree heat in New York, I’ll need to wait a bit longer, but soon my new pot and I will be back to some great work.
 My dear god, I don’t know how many more games like that I can watch. You know, you get a couple 7-8 beers in you and fire up the grill and get ready to watch the game with friends, and then… pick after pick after pick. They showed Favre walking into the stadium before the game and I immediately texted a few friends, “Favre looks old, brittle, and gimpyâ€. That visual was enough to give me pause and make me wonder if we weren’t in for another brutal game and yeah, verily, it came to pass.
This week’s football recipe is much more blue collar than the goat cheese jalapeno poppers from last week. You will need: chips, salsa, hamburger and velveeta. Given how ridiculously easy this is, it almost feels like cheating to put it up for a recipe this week. On the other hand, its realllllly good and people always seem to love it when it’s brought to parties. It also meets one of the big tests for great football food: it does not distract from the game. You just throw everything in the crockpot, and stir it every 10 minutes or so. A few years ago I hosted a Superbowl shindig and between cooking 3-4 different things, I’d say I missed about 40% of the actual football game. NEVER AGAIN, I SAY!
First off, take your hamburger, about a pound, and brown it in a pan. To season it, you’re gonna want some salt and pepper, and possibly something else. Maybe some chili powder, or chipotle, or garlic powder. Don’t go nuts with the flavoring though, otherwise the meat won’t play nice with the other ingredients in the dip. Drain the grease off completely; you don’t want any of it in the dip. When that’s done, add the meat to the crock pot. Now cut up the velveeta and add that to the crockpot. I use the usual large brick size, I dunno if that’s a pound or 1.5 lbs, but it’s the main size and the ratio should be at least one to one with the beef. Finally, add the salsa. For this, I’m usually using a regular jar of medium Pace salsa, for a few reasons: one, Pace has a good consistency. There’s a good amount of veggie chunks and it’s not too watery. Second, it’s cheap. There’s no reason to buy nice habanero salsa just to throw it in cheese dip.
So, combine the “cheeseâ€, meat and salsa in the crockpot and turn it on high. Stir it every 5-10 minutes and it should take about 30-40 minutes for everything to melt together. Once its melted, turn the crockpot to low and let people help themselves as the game goes on. You’ll want to check on it every now and again because if it sits for a prolonged period it will get an unpleasant skin over the top. If this skin does show its ugly face, just stir vigorously for a bit. Serve with tortilla chips. Recommended beer pairing: something cheap. Save the high brow stuff for fancier meals, grab yourself a Grainbelt if you’re in Minnesota or an MGD if not, and enjoy the game!
VIKINGS PREVIEW SECTION:
I really think the Lions might beat us in Minneapolis for the first time in a decade this weekend. Even without Stafford, they put up 30 some points on Philly last weekend, and this Jahvid Best kid looks like the real deal. I certainly wish we had him instead of the Great White Flop, Toby Gerhardt. But I am not, at this point, ready to completely give up the Vikes.
I think this weekend they finally get their heads out of their collective asses and realize its gonna take some effort to put up points. I see a heavy dose of AP this weekend, especially if Percy is out for the game because of his migraines. Plus, our defense has given up 21 points over two weeks! As long as Graybeard can remember to throw to the guys in purple instead of honalulu blue, we should be fine riding #28 to victory.
Final Score: Vikings 17, Lions 10. Sad Fact: if the Vikings manage to put up 17 it will be our best offensive production of the season.
 Arthur Two Cents: I have had this tried and true recipe with Loren many a time. A quick cooking item is just what you want for what should be the first non-gut-wrenching game of the season. [For a beer pairing here on the East Coast I would recommend the Yuengling.]
After last week, I see why there were so few long pass attempts in the first game. Maybe a little more conservative playing is what we need with the old man until he refinds his stride.
Hopefully this game will be a low key chance for Favre to make-up for all of their absence from training camp and Percy Harvin’s miss of the preseason. With the Vike’s D having been strong, the end results against the Lions should be OK. I see the end score Vikings 14, Lions 6.
Still, if Farvre collapses in this one, I say we pull him for the season put in Tarvaris Jackson and call this season a rebuilding year. (Not really, but kind of.)Â But I don’t see that happening, Loren let me pick the pics for this week’s post and I decided to go for the glory we still can have this season!
Well that last game sucked huh? If you would have told me that the Vikes would hold New Orleans to 14 points and have only one turnover, and STILL lose, there’s no way I would have believed it. Oh well, at least my fantasy team seems to be doing well. Hopefully I won’t have to console myself this way all season long.
I hope you liked the buffalo chicken dip from last week. This week’s offering will be even more tasty, if for no other reason than it contains BACON! I absolutely love these little buggers, and every time I have made them they received rave reviews and inspired prolonged nagging that I should make them again. I like to make these when I’m going to a party or someone else’s place because you can make them completely beforehand and then just throw them in the oven when you get somewhere…. And also because I would eat the whole batch by myself if someone else wasn’t around.
Ingredients:
- 6 large jalapeno peppers
- 5 oz cream cheese, room temp
- 4 oz goat cheese (I usually use Chevre)
- 5 slices bacon
- 1-2 cloves of garlic
- 1 Tbsp fresh herbs (basil, chives, parsley, oregano), optional
- Salt and Pepper
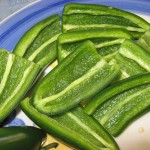
Slice the jalapenos in half lengthwise and use a spoon to scrape out the seeds and ribs. Set these aside and make the filling.
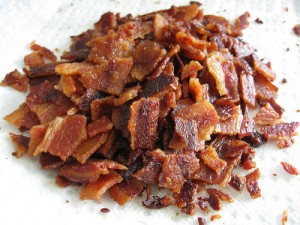
First off, cook those bacon slices on medium heat until they are pretty well done. You want all the fat rendered out, and good amount of browning on the bacon. Remove from the pan, chop them up and then throw that in whatever mixing bowl you are using for the cheesy goodness.
Then mince the garlic cloves. Turn it into garlic paste by adding a pinch of kosher salt to the garlic and then grinding it into the cutting board. Some people use their knife for this; I prefer the back of a spoon. Pasting the garlic will bring out the juices to mix with the cheese, and make it more homogenous so people don’t get chunks of raw garlic in their mouth. Add the garlic to the bowl, along with the minced herbs (if you like), a few grinds of black pepper, and the cheeses. Mix well to combine and – if you have the time- cover it and refrigerate for an hour or two.
Then pile the filling into the jalapeno shells. If you’re looking for an exact amount to put in each jalapeno, you are a deranged and misguided person. Just eye it; it’ll be good for you. Put the poppers on a baking sheet and put them in an oven you’ve preheated to 350. Let them bake for 10 minutes, then transfer the sheet to beneath a broiler and finish them off for 2 or 3 minutes, until they look a little golden. DON’T START DOING SOMETHING ELSE WHILE THESE ARE BROILING!!! These things are small, and you will burn the whole batch before you get half way done with whatever it was you were going to do.
Note: If you have leftover cheesy-goodness, it makes a fantastic spread for a baguette or crackers. Try it sometime, and you just might forget about the jalapenos in the future.
VIKINGS-DOLPHINS PREVIEW:
I’m not entirely sure what to expect for this game, mainly because I think it might take Favre until after the bye week to truly be on the same page with all of his receivers. Here’s what I do know: AP is looking good. Last season we saw way more of those runs for no gun, or +/- 1 yard. Last week it looked like AP in year 1, where you knew every time he touched the ball was good for at least 4-6 yards. Throw in a few busted tackles and he can easily rack up 150+ yards in almost any game. I like what I see from him and this week I expect the Vikings to make a concerted effort to stick with the gameplan of feeding #28 the rock ALL DAY long.
We can’t look past Miami as much as we once could, they are definitely on the rise, but I like how we match up here. Our front seven has gotten, if possible, even better since last year and I cannot see the Fins running their way to victory in this game. I also don’t think Chad Henne has what it takes to win the game through the air when that becomes necessary. Vikes win in a low scoring rushing game, 21-17.
Arthur’s Two Cents: Looking back at last weekend I think that half the problem with Favre’s game was the offensive line. Yes, he isn’t completely in tune with receivers. BUT this man can throw the ball to anyone if he has the time. I think that versus Miami he’ll have at least a few more seconds in the pocket, which will give him time to look down field and come-up with some big plays.
Versus the Saints Favre didn’t seem to go for many long passes (only handful of attempts beyond 5 or maybe 10 yards). I’m not sure if this was his own caution or if it was Brad Childress’ play calling. Either way I think that against a team that is, still a threat, but not the defending Super Bowl champs, we’ll see at least a little of Favre from last year.
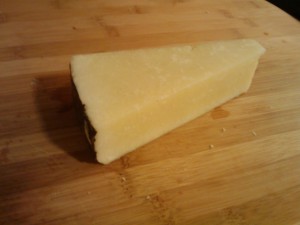 When I started this blog, cheese is one of the things that I had in the forefront of my mind. The problem with me and cheese is that I’ll buy or eat some random interesting cheese and then forget what it was a few days later. The end result is that I’ve had lots of cheese I like, but I’m still always unsure what to go for at the cheese section. Tonight I am changing that. My goal is that whenever I try a new cheese I’m going to do a little post about it.
Tonight’s cheese is Pecorino Romano. It’s described as a hard, salty Italian cheese, suitable primarily for grating, made out of sheep milk. I got it today at Whole Foods while getting some needed ingredients to make pasta. It was right there next to the Parmigiano Reggiano (aka the really good parmesan cheese) but about $6 less per pound.
Trying a slice by itself, it reminded me of Parmigiano, though much more mild in flavor–less bite and edge. It was savory and a little salty. The texture is also much more smooth than Parmigiano, in that it doesn’t have that pleasant crunchy graininess.
 I made a nice simple pasta (really, the days of canned sauce are over!) and grated it on. Once added to the pasta it imparted a nice bit of depth and salt, very similar to Parmigiano. In all, it may be showing up on my plate as a lower price point Parmigiano substitute.
Last month, Arthur started a forum on canning and Meg issued a challenge for all of us to try it out. Despite the upheaval of quitting the job I’ve had for 5 years and starting full-time culinary school a couple of weeks ago, I thought I was up to the challenge. I went to the farmer’s market and purchased about 6 lbs of roma tomatoes, thinking there was no way I could let that much produce go to waste (guilt over waste is a good motivator for me). My mom got down ye olde canning book and turned to the page(s!) on tomato canning. After reading about the threat of botulism and learning I would have to have at least 3 large vessels a-boilin’ on my mom’s stove to get this “simple” operation overwith, well, I chickened out.
But fear not! I just last weekend turned those tomatoes into some pretty delicious soup and pizza sauce, so my conscience is clear. And I came up with a way to say I’ve canned something, even though I’m not really sure putting something in a jar that keeps for a little while in the refrigerator counts as canning. However, it’s as close as I’m going to get this season! I decided to make pickles. Over the last few weeks (because that’s how long it took to wrangle space in the prime real estate that is my mom’s refrigerator), I made 4 versions of quick pickles (quick meaning they’re ready to eat in 24 hours or less), including a couple of old favorites and 2 new additions to my repertoire. I’ve included the specific vegetables I used, but you can certainly try others if you prefer.
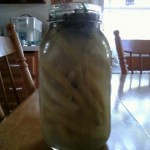
[DDET Spicy Dill Quick Pickles]
This recipe is from Food & Wine Magazine. With cucumbers, it reminds me of my favorite store-bought (no more, ha ha!) Claussen pickles. If you’re doing cucumbers, I recommend using English cucumbers or buying organic/farmer’s market/grow your own to avoid the wax coating of store-bought cucumbers. Spice fiends, before you protest, despite the name the chiles add a delightfully SUBTLE zing to these pickles. I remove the seeds, but if you leave them in I’m sure it’s spicier.
Makes 2 Quarts
cucumbers, cut into spears, stem end removed (you’ll have to eyeball the amount depending on the size)
3 T kosher salt
2 T sugar
1 1/4 C distilled white vinegar
2 T coriander seeds
6 large garlic cloves, halved
4-6 long redor green hot chiles, halved lengthwise
16 dill sprigs
Pack cucumbers into 2 clean 1-quart glass jars. In another jar, combine salt, sugar, vinegar, coriander and garlic. Shake to dissolve salt and sugar. Add 2 cups water; pour brine over cucumbers. Tuck chiles and dill between vegetables (note: if you’re like me and try to cram that last cucumber spear in there, this step will be difficult or impossible. Resist the urge. If there are too many cucumber spears in there, the ones on the bottom won’t get as much flavor until you’ve eaten some of the top spears). Add water if necessary to keep cucumbers submerged. Close jars; refrigerate overnight or up to 1 month.
[/DDET]
[DDET Curry Quick Pickles]
This recipe is also from Food & Wine (the same article, in fact!) and is a favorite of Arthur’s. Here you go, Arthur! Now you can make them too! I think this one is just perfect with carrots, but I’m sure other vegetables would taste good in it too.
Makes 2 Quarts
Carrot sticks, peeled & blanched in boiling water for 2 min, drained & cooled
3 T kosher salt
1 T sugar
1/2 C thin matchsticks fresh ginger
6 garlic cloves
1 tsp Madras curry powder (not wanting to go expensive spice hunting, I used regular curry powder to fine result)
1 1/4 C unseasoned rice vinegar
Pack carrot sticks into 2 clean 1-quart glass jars. In another jar, combine the salt, sugar, ginger, garlic, curry powder and rice vinegar. Shake until the salt and sugar dissolve. Add 2 C water and pour the brine over the carrot sticks (again, just like with the dill pickles, if your carrot sticks are packed too tight, the ginger and garlic won’t infiltrate the bottom sticks until some of the top ones are eaten). Add enough water to cover and keep the carrot sticks submerged. Close the jars and refrigerate overnight or for up to 1 month.
[/DDET]
[DDET Horseradish-Pickled Wax Beans]
This one is also from Food & Wine. I was nervous about not blanching the wax beans and about the horseradish, but these turned out to be really good. I’ve never been able to find wax beans at the grocery store, but they’re available at the farmer’s market (here in Minnesota at least) starting in July. I was still able to get them toward the end of August, but I haven’t found out yet how long they’ll be available.
Makes 4 Pints
1 1/2 lb wax beans, stem ends trimmed to fit in pint jars
8 garlic cloves, halved
8 dill sprigs
4 tarragon sprigs
4 tsp black peppercorns
4 tsp prepared horseradish
1 1/2 C distilled white vinegar
1/4 C kosher salt
3 T sugar
Pack the beans in 4 pint jars, tips down. Tuck 2 halved garlic cloves, 2 dill sprigs and 1 tarragon sprig in each jar. Add 1 tsp each black peppercorns and horseradish to each jar.
In a large jar, combine the vinegar, salt, and sugar and shake until the salt and sugar dissolve. Add 2 1/2 C water and shake again. Pour the brine over the beans and top jars off with water if the beans aren’t completely submerged. Close the jars and refrigerate at least 24 hours and up to 3 months.
[/DDET]
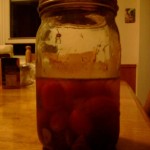
[DDET Quick-Pickled Cherry Tomatoes With Dill]
Lest you think I’m a Food & Wine junkie, I’ve included this recipe from Bon Appetit magazine. The recipe doesn’t say how long these will keep, but I don’t think it’s as long as the other pickles. Because the tomatoes are pierced to let in the brine, they get more and more flavorful as time passes. So maybe a week or two? These would probably be pretty delicious as a cocktail garnish.
Makes 3 Cups
3/4 C apple cider vinegar
3/4 C water
4 tsp coarse kosher salt
2 tsp sugar
1 3 X 1/2-inch strip of lemon peel
12 oz cherry tomatoes, grape tomatoes, and/or pear tomatoes
2 garlic cloves, thinly sliced
1/4 tsp dried crushed red pepper (or to taste)
Bring vinegar, water, salt, sugar, and lemon peel to a boil in a small saucepan, stirring to dissolve sugar and salt. Remove from heat, and let cool 20 min. Pierce each tomato 2 times (on each end) with a slender wooden skewer. Toss tomatoes, dill, garlic & crushed red pepper in a large bowl. Pour mixture into a quart jar. Add cooled vinegar mixture. Let stand at room temperature at least 2 hours and up to 8 hours (or, like I did, cover and stick it in the fridge if you’re keeping the tomatoes longer than 1 day).
[/DDET]
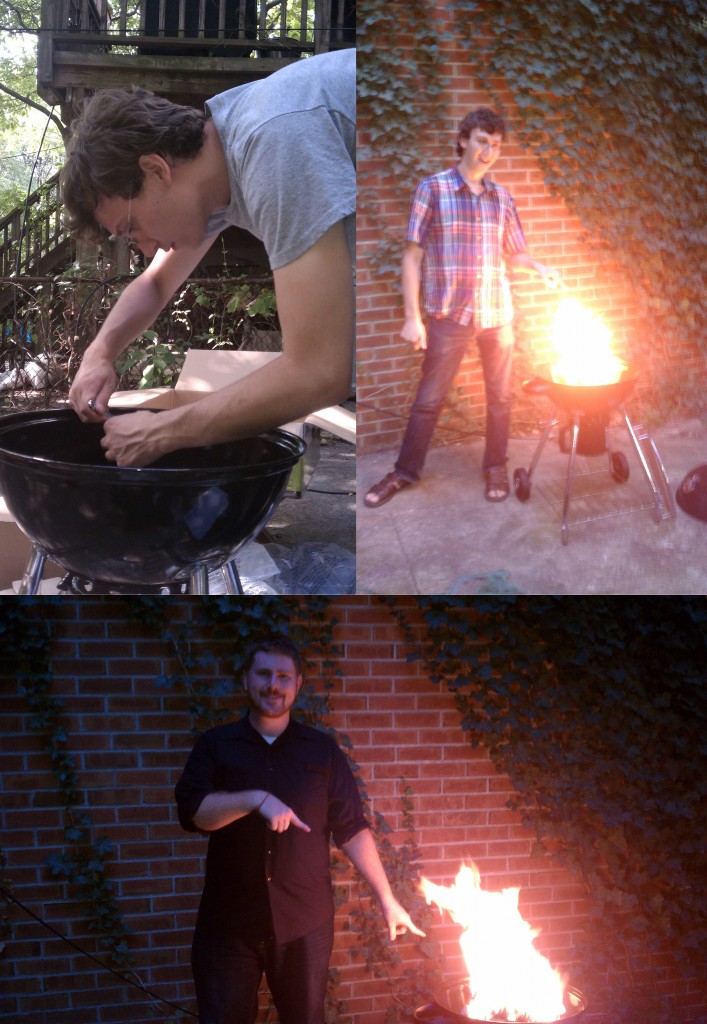 Things have settled down after the move-in and real cooking in the new apartment has begun. Posts are coming on the indoor cooking, but today it’s time to talk about grilling.
The first part of this cooking adventure begins with getting the grill itself. Back in Minnesota this wouldn’t be a problem, but here in Brooklyn, in order to get the grill Nick and I had to walk about a mile to Home Depot. Actually, the walk there wasn’t bad - it was the walk home with a grill and a giant bag of charcoal that was a little more of a struggle. The main problem is that to get to and from Home Depot and the apartment we had to walk on what is basically a highway offramp. Unlike the skilled Mexicans pushing carts up the hilly off ramp in the middle of a lane, we not-so-artfully walked on the curb that was about two feet from a cement wall. But we made it home with body and grill unharmed.
Our next job was to set up the grill. I know, I know, it’s not rocket science, but it’s been about two years since I’ve built anything even as simple as an Ikea bookshelf.
It wasn’t in the instructions, but I’m pretty sure that the first step of building a grill is opening a beer. So with some Brooklyn Lagers in hand we set to work and successfully assembled a fine grill (Yes, the handle somehow ended up on the side instead of the front, but I like to think it adds character).
Finally, it was time to grill. Since it was Labor Day weekend, burgers and brats seemed right. Unfortunately, here in New York, brats are not as ubiquitous as they are in the Midwest and we were forced to settle for some hot Italian sausages.
On our second grilling day, Labor Day proper, Meg was hit with a brilliant idea: cheese inside the burgers! Having experimented with putting various herbs and spices in the burgers we decided to mix some Chipotle Tabasco sauce in with the meat. To get the cheese inside, I basically made a smaller-and flatter-than-normal burger with a dent in the middle which I filled with cheese, and then I put a similarly-sized beef patty on top. Softly pinching and massaging sides of the burger makes the patty whole, with the delicious cheese trapped inside.
With an heirloom tomato, a red onion, and some mizuan (a lettuce with spiky dark green leaves that has surprisingly delicate texture, but a good crunch), it was time for meat to meet fire.
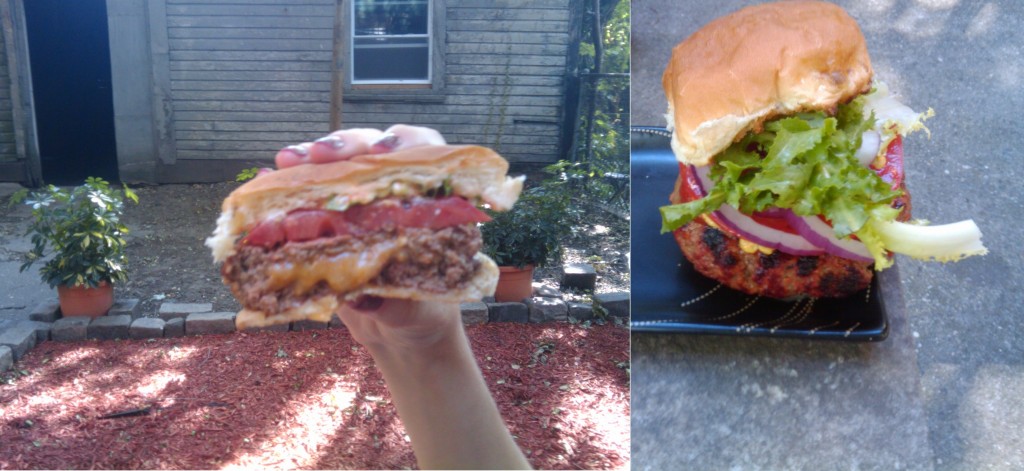 One especially large and juicy burger became what I call an open legs burger (No, it’s not an open legs burger because as we all know great food is the way to a woman’s, um, heart). It’s an open legs burger because it’s so deliciously juicy that the only way to take it on and not ruin your clothing is to sit down, open legs, lean forward, put your elbows on your knees, and eat so any drippings fall cleanly on the ground in front of you.
After the meat was cooked I threw a few ears of corn (husk and all) onto the grill that, after about 20 to 30 minutes, were so sweet and savory, with a hint of smoke, butter was unnecessary.
With the grill now safely broken in, new proteins are on the horizon. My recent trips to the store have me eyeing great looking racks of ribs.
 With the football season approaching (GO VIKES!) I thought it would be fun to start a recurring article here on EatCookLive. Every weekend I’m going to try to post a new recipe for football food. These recipes will generally be fairly easy (no one wants to cook 5 hours before a football game, unless it’s the super bowl), incredibly unhealthy (all that beer should flush the cholesterol and sodium from your system) and will pair well with beer. I’m going to do my best to get them posted on Friday or Saturday so you can buy the necessary groceries before game-day. And, just because I can’t get enough football, I may break down the upcoming Vikings game. Maybe I can even get Arthur to tag-team this section with me.
For this week: Buffalo Chicken Dip!
This one is pretty simple, and very easy to make the day/night before and then throw it in the oven right before the game starts. It also definitely meets the necessary criterion of pairing well with beer! You will need:
- 1 oz block of cream cheese
- ½ cup  of blue cheese or ranch dressing (or ¼ cup of each)
- 2 cups of shredded chicken (I have always used canned chicken for this because the combined buffalo/blue cheese flavor is pretty strong, but I wonder if this would taste even better if you bought a rotisserie chicken and shredded the breast meat.)
- ½ cup of blue cheese crumbles.
- ½ cup of frank’s red hot (you can use whatever hot sauce you like but, for me, Frank’s has that perfect buffalo wing flavor. However, use the regular stuff, not the buffalo sauce variety which has artificial butter flavoring added. Ick.)
Bear with me on this one because the preparation necessary to make this is both extensive and very tedious. Ready? Take a casserole dish; add all the ingredients and mix well to combine. Throw it in the fridge until you are ready to cook it. Then throw it in the oven (preheated to 350) and bake for 20-25 minutes until it looks done in the middle. Hot damn that was hard, but I have faith that most of you can pull this one off.
Serving suggestions: you need something to put this dip on, and most anything will work in that respect. This can go with crackers, potato chips, baguette or other crusty bread, or you can use some crunchy veggies like celery and carrots. Word to the wise: as tasty as this dip is right out of the oven, it’s pretty bad as leftovers out of the fridge. You probably want to make this one when you have a few people coming over to watch the game.
VIKINGS-SAINTS PREVIEW:
I will admit that this game is making me pretty nervous, and it has a lot to do with the depth of cornerback and wide-receiver on the Vikings. Three healthy cornerbacks? Three? Vikings fans take note: when your team’s two best option for a 4th cornerback is to rush a player back from a torn ACL, or start a special-teamer who has never before played CB, things are dire. Add to that a Saints offense which likes to pass even more than Childress likes to toss out random 19th century literary references, and you have the recipe for a defensive melt-down. And as for wide receivers, why the hell did we cut Javon Walker and trade Darius Reynaud??? Granted, neither of them are by any means star wide-receivers, they’re only emergency back-ups, but WE NEED EMERGENCY BACKUPS!!! And why not pick up TJ Houzh? All he was gonna get was 1 year and $850K, and we turned him down! WTF ARE YOU DOING CHILLY!?
Having said all of that, I still think we can pull this one out. Look, we destroyed that New Orleans defense last year, racking up damn near 500 yards and being 15 seconds from the super bowl on unfriendly turf. You just don’t win games with that many turnovers. I’m counting on AP to get his mind right regarding the fumbles and Brett Favre to be steady but not spectacular, at least not in the first game when the decrepit old fart still hasn’t nailed down the timing with his receivers. I’ll take by Vikings by a field goal, 28-31.
Arthur’s Two Cents:
With football season fast approaching, I know there are a few emergency fantasy football drafts in the works. For those of you hosting the midnight hour drafts this recipe might be just the quick snack you need.
On to the football. I think that AP, even with his fumble risk, is enough of a threat to allow the Old Man to make the most of the passing game. Still, I honestly don’t know if we are going to be able to win this one. If we lose, I see the season going one of two ways: (1) responding by pulling together and working out the kinks or (2) staring a patented Brad-Johnson-era style downward spiral.
 We’ve all been there after a move—you’re moved in only in the sense that you’ve gotten boxes through the door of the new place. This last weekend, two days before the start of the school year, my new roommate Nick and I got the boxes in the door (with the help of Eat Cook Live cohorts Meg and Stu).
A few days after unpacking the bottle opener for our Brooklyn Lagers, we turned our attention to some kitchen luxuries: a pot, a skillet, a spatula, some cutlery, and a few plates and bowls. Over this first week of school with evening classes and no time for a real shopping run our cooking has been limited to pasta in some form.
I’m actually embarrassed to put this in the cooking section. In all honesty my efforts to feed myself probably fall short of cooking. The two nights were shameful pasta and jarred sauce meals (the sauce and pasta were all that made it through the move). Finally, a morning Key Foods run and a late night Trader Joe’s run yielded wine, sausage, onion, bell peppers, and canned tomatoes. 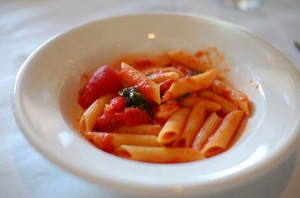 Last night’s dinner was still a meal of simple pasta, but the added 5 minutes of turning the veggies, meat, and tomatoes into a sauce while the pasta water boiled was pleasant change from the jar-o-tomato sauce.
But hope is on the horizon. With a long weekend coming up, priority one is going to be finding a grill for the back yard. Soon after delicious late-night, post-class grilling will ensue!
