Posts Tagged ‘Pork’
This is my shameless attempt to get in a post for the first time in a few weeks. Hilarious. Must Watch.
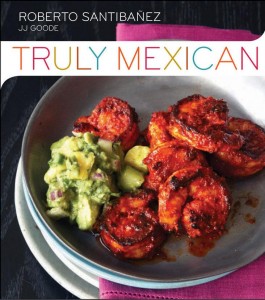 I’m not sure I’d ever made real Mexican food.  Don’t get me wrong.  Box tacos are a guilty pleasure.  But calling box tacos Mexican cooking would be like calling a jar of Ragu and boxed spaghetti Italian cooking.  The closest I’ve probably come is fish tacos with a side of fresh guacamole.  Maybe some of my enchiladas have gotten on the path.  But, with the purchase of a new cook book, it was time to give it a real try.
The new cook book (Truly Mexican) offers up recipes ranging from the simple to the devilishly complex.  I decided to ease in with a basic Adobo sauce (recipe below).  And the basic sauce was even easier than I expected.  Maybe a few extra minutes (at max, 15 minutes of real cooking time) compared to the crappy slightly seasoned tomato sauces I’ve played with in the past.
On my first go, I decided for pork (recipe below).  After making the sauce and cutting the pork, a bit of hands-off cooking yielded delicious fall apart pork.  With a little cilantro, Mexican cheese, and a small bit of sour cream I had some rock’n tacos.  For a full meal, I added some beans and rice.  So freak’n good!
This last weekend I made the same meal with chicken and a few eggs on the side for an at home brunch. Â The chicken recipe tracks the pork with a reduced cook time (for sliced chicken it was about 20 minutes of stove top in sauce cook time).
The cook book tells me the sauce can keep in the fridge for a week and on both cookings it seemed better the next day. Â (I’m eating Sunday brunch leftovers for lunch as I type.) Â I think I might next need to make the sauce a couple days in advance. Â Then I’ll be just 30 minutes away from my next taco night!

Basic Ancho Adobo
Ingredients:
- 2 1/2 onces ancho chiles (5 individual chiles), wiped clean, stemmed, slit open, seeded and deveined
- 1/2 cup water for blending, more if necessary
- 1/4 cup Seville orange juice or distilled white vinegar
- 2 garlic cloves, peeled
- 1/4 teaspoon fine sale or 1 teaspoon if kosher salt
- 1/4 teaspoon sugar
- 1/4 teaspoon dried oregano, preferably
Directions:
Heat a heavy skillet over medium-low heat, and toast the chiles 2 at a time, turning them over frequently until they’re fragrant and they’ve developed light brown blisters, about 1 1/2 minutes per batch. Soak the chiles in enough cold water to cover until they’re soft, about 30 minutes. Drain and discard the soaking water.
Put the 1/2 cup of fresh water in the blender jar with the chiles and the remaining ingredients. Â Blend until smooth, at least 3 minutes, adding a little more water in necessary to puree. Â For a silkier, smooth texture, strain the adobo through a medium-mesh sieve.
Pork in Adobo (Cerdo en Adobo)
Ingredients:
- 2 pounds pork shoulder or other pork stewing meat, cut into 1 1/2-inch cubes.
- 1/4 teaspoon fine salt, or 1 teaspoon kosher salt
- 2 tablespoons
- 1 1/2 cup of Adobo
- 2 cups of water or chicken stock
Directions:
Pat the pork dry and season it with the salt. Â Heat the oil in a 4 to 5 quart heavy pot or skillet over medium-high. Â Brown the pork (us e multiple batches is needed–avoid having the pork pieces sitting on top of each other), turning occasionally, 8 to 10 minutes per batch.
Reduce the heat and return all the pork to the pot. Â Carefully pour the adobo over the pork. Â If the adobo is in the blender, swish a little liquid around in the jar and add it to the pot. Â Simmer, stirring to coat the pork and fry the sauce, until the sauce is slightly thicker, about 5 minutes. Â Add the 2 cups of water.
Cook the pork, covered, in an oven in an ovenproof pot in a 350 degree oven for 1 1/2 to 2 hours. Â Season to taste, vinegar, and additional salt. Â (The recipe also instructs that you can reduce the heat to low, cover the pot, gently simmer the pork, adding a couple table spoons of water from time to time to maintain a silky texture until the pork is tender, 1 1/2 2 hours)

Few things hit the spot on a tipsy Saturday night better than a spicy pork and noodle dish with just the right amount of grease. This recipe doesn’t take a lot of planning either, as its short on unique ingredients and, once your mise en place is done, everything comes together in 15 minutes or so.
Stir together well in a small bowl:
- 1/2 cup chicken stock or broth
- 1 tablespoon soy sauce
- 2 tablespoons black bean garlic sauce
- 2 teaspoons sugar
Heat a wok or large skillet over high heat, when it is hot pour in 2 tablespoons of peanut oil, swirl around the pan until very hot but not smoking. Add and stir fry very briefly until the garlic is slightly brown:
- 2 tablespoons finely minced peeled fresh ginger
- 1 tablespoon finely minced garlic
- 2 tablespoons thinly sliced chile peppers (I used seeded serrano peppers)
- 1/4 cup coarsely chopped canned bamboo shoots
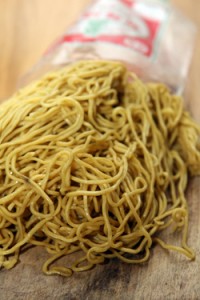
Add 1 lb ground pork and stir fry the meat, breaking it up, until it is no longer pink but not yet browned. Meanwhile, cook in a large pot of boiling unsalted water, 1 pound chinese egg noodles (or spaghetti, if you must).
Add the stock mixture to the pork, stir well and cook for 1 to 2 minutes. Add and stir fry briefly 1/2 cup of 2 inch scallion pieces, cut on the bias. Remove the pan from the heat, drain the noodles (they should only take 2-3 minutes), add to the pan and toss with the pork and sauce. Season with 1/2 teaspoon toasted sesame oil, stir well, and garnish with 1/4 cup finely chopped scallions.
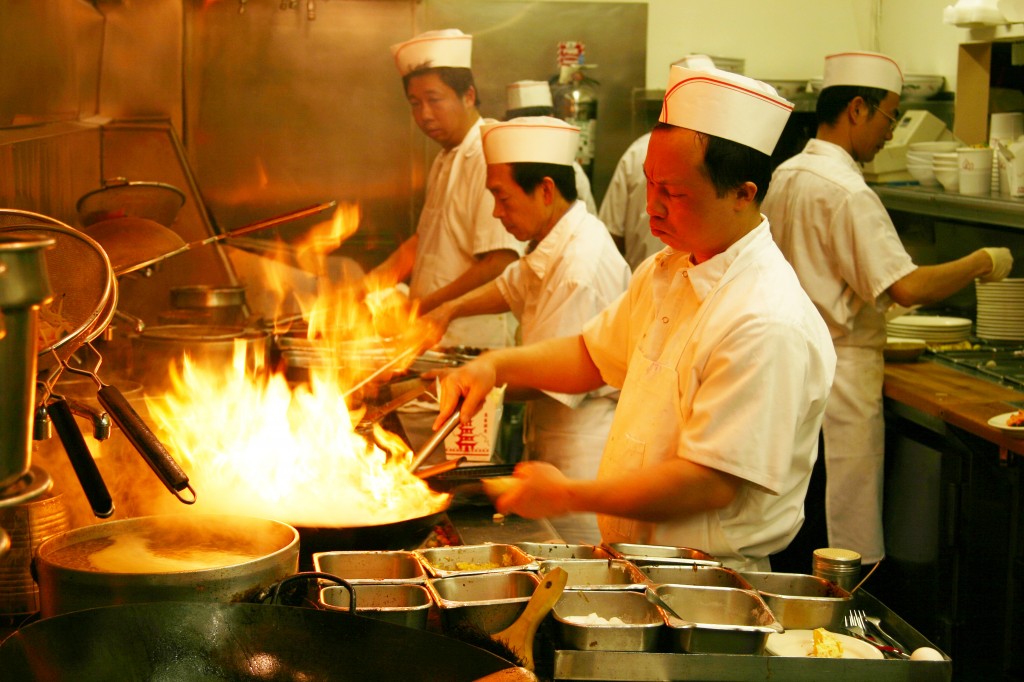
As I was getting into the final stretch of putting this together, I was really wondering if it was going well. As you can see above, the recipe (from Joy of Cooking) makes repeated references to stir frying, even after adding the pork. For me, as soon as I added the pork, there was way too much liquid coming out of the meat to do any stir frying, from there on out everything was being simmered in a sauce, especially once the brother mixture was added. Typically when that happens it means that your pan isn’t big enough to allow the liquid to evaporate as it comes out of the meat, or you don’t have the pan on high enough heat. In this case, I was using my widest pan and had the heat on the highest setting. Absent using a wok and a commercial grade heat source like on the badass mofos below, I’m not sure how I could solve this problem although I will be experimenting with using chicken thigh pieces rather than a ground meat to see if it releases less moisture. Â Either way, by adding the noodles to the pan it helped soak up some of the additional moisture and the end result was fantastic, with a soy-ish sauce, with just the right amount of spice and fresh ginger, and enough fat from the pork to coat the noodles.
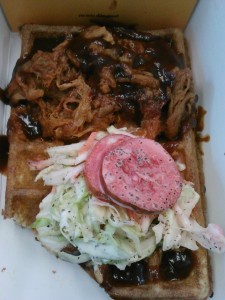 Last year, I discovered the wonder that is the Wafels & Dinges food truck.  Since my first visit, I’ve made several returns and sampled a range sweet delights.  However, I always kept my eye on the BBQ pork waffle.  Until last Friday, my timing never seemed to able to match-up with lunch.
With a pile of pork and a pile coleslaw sitting on the waffle, the move to a savory treat looked great.  But the flavor and texture fell short.  As I ate, I realized there was an underlying candy sugariness.  The sweetness emanated not just from the waffle but from the Kool aid pickles and the sauce on the pork.  The pork itself was lackluster and fairly flavorless.  My usually iron clad stomach was actually unsettled by the end of it all.
Though I may mark Wafels & Dinges’s attempt at savory down in the L column, I have no doubt I will be headed back again, and often, to try their amazing sweet offerings of wafels, dinges, and ice cream.
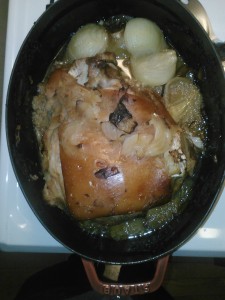 After a late start to Sunday at DUB Pies, Iggy and I made our way down to the super market to pick-up something for dinner.  Right away I headed to the meat section to see if today was a cheap roast day.  I wasn’t disappointed; pork shoulder was only $1.19 a pound.  I’ve seen $0.89 a pound, but $1.19 is still a good deal.  I grabbed a smaller, eight pound, slab of meat.  Right away, I knew what the rest of the simple recipe would be.
I came-up with this a few years ago when I was home visiting Minnesota and at mother’s house without a car.  My mom had left me a pork loin and a recipe.  Though she seemed to over look the fact that the house was missing half the ingredients in that recipe.  Undeterred, I found some apples, onions, a bit of garlic, and a bit of apple cider vinegar.  Put it all together in a ceramic roasting pan covered it and let the flavors come together.  The result was a moist piece of meat, with a sweet apple sauce on the side, that has become my template for many a meal.
What You’ll Need:
- Some pork (shoulder, butt, loin, or whatever cut you’re in the mood for)
- A bunch of apples
- A bunch of onions
- Cider vinegar
- Fish sauce
How to Cook It:
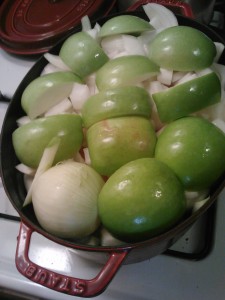
Put the meat in a dutch oven (or some other heavy roasting device with a lid). Â If you have a pork shoulder, or other fatty cut of meat, be sure to put the fatty side-up so that the juices run down over the meat over the hours of cooking.
Cut some big chunks of apple and onions and fill in the sides and the space above the meat.  It’ll be packed in there, but everything is going to cook way down.  Throw in a bit of apple cider vinegar, maybe a quarter to half a cup.  Add a little fish sauce.  This is some what optional, but the umami in the fish sauce will help bring out the flavors.  Tread lightly with this stuff though, while a few tablespoons will bring out the flavors, too much will be a disaster (take a wiff of the bottle and you’ll know what I mean).  Give the garlic a rough chop and mix it in on the sides of the meat.
Now cover this bad boy, put it in the oven, and let it cook for hours. Â For a pork shoulder, target maybe 45 minutes a pound. Â Uncover for the last 30-45 minutes or so to give the meat a nice crisp.
The Result:
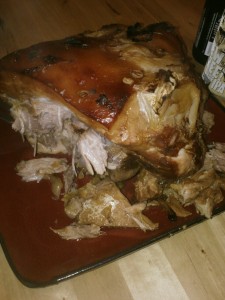
The apple and onion cook way down and fall apart and mix with the pork dripping to form a sweet and savory apple sauce perfect for pork. Â After hours of cooking, the meat falls off the bone and practically shreds itself. Â As an added benefit, your home will be filled with wonderful Sunday cooking smells.
After the Sunday night meal, you’re almost sure to have left overs.  The shredded pork and sauce can then easily become a great pulled pork sandwich (just add some BBQ sauce) or some pulled pork taco.  The Sunday meal that keeps on giving.
Hello food fans,
It’s been about 5-6 weeks since my last post. I would apologize for the delay but at this point it seems to be becoming a pattern that I post in bunches and then dissapear for a while, so maybe you should just expect that at this point. Anyways, I’ve got some great ideas and recipes which are coming your way over the next month or two, including: Oreo cake balls, the best stuffing recipe EVAR, White Chicken Chili, grilled pheasant breasts, and some homemade eggnog when we get close to Christmas!
Today’s recipe comes from… nowheres in particular. I stopped at the grocery store on my way home from work one night and got a hankering for some kind of garlicky-creamy goodness which I could spread on crackers. Since this particular grocery store happened to sell roasted garlic cloves in their olive bar, I went for those. A week later I re-made the recipe with a few tweaks which really brought everything together.
- 1 brick of cream cheese, room temp
- 1 cup roasted garlic cloves
- 1 raw garlic clove, roughly chopped
- 1 package basil leaves (15Â big leaves or so?)
- 4 scallions, roughly chopped
- 1/4 cup shredded/grated Parmesan
- 1 pinch of red pepper flakes
- Salt & pepper
- Sprinkle of red wine vinegar
- a big dollop of  sour cream (optional)
Combine everything but the cream cheese in a food processor and pulse until its a roughly homogeneous mixture, then add the cream cheese and process until everything is mixed together. Â You can do a few different things with this; I imagine it would be great as a sandwich spread, you could make pinwheels, you could probably thin this out with some milk and white wine to make a bitchin’Â pan sauce for something like roasted chicken, or you could just spread it on same fancy crackers and top it with some thinly sliced capocollo. Â I chose the latter route, and it was well received by the Thanksgiving crowd.
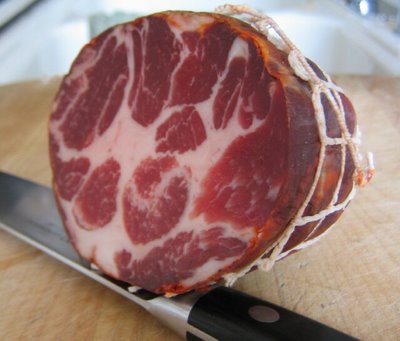
On a side note, please do yourself a favor and go buy a half pound of capocollo. This delicious salumi is dry cured from the meat on the neck and shoulder cuts of the pig. It’s like a cross between canadian bacon, real bacon (take that Canada!), and prosciutto. It’s not usually smoked to the best of my knowledge, but there is sometimes a spicy or savory coating on the outside of the meat. The marbling, which is amply demonstrated below, is incredible and gives it a deep, rich flavor. Get your butcher to slice it thin, and eat a few slices while you walk around the grocery store and decide what you want to do with this manna from heaven.
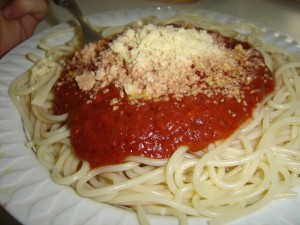
I never liked Italian food growing up, which caused friction with my brother Allen who I think would have been content to eat Spaghetti every single night. As my palate has matured I have realize that I didn’t dislike Italian food, I disliked poor impersonations of Italian food. What I mean by that is mushy spaghetti, topped with canned tomato sauce, and maybe some overcooked and unseasoned ground beef. Yuck
. But properly done Italian food? Fantastic. I especially like the recipes which bubble away for hours, letting the flavors mingle and making your kitchen smell so damn good that you can’t resist stealing some of the food before it’s done.
The basis of this recipe came from my America’s Test Kitchen cookbook. Btw, if you are unaware of the ATK cookbooks/TV show or Cook’s Illustrated magazine, you should really check them out. It’s a wonderful organization. They test endless variations of each recipe they publish to find the very best methods, and they also test kitchen equipment and common ingredients to tell you the best ones to buy. Anyways, in this particular instance I thought their recipe was a bit too simple, so I added a few things to make it more interesting. You will need:
- 1.5-2 lbs of beef short ribs or pork bone-in country ribs
- 1 tbsp light olive oil
- 1 onion, diced
- 1 shallot, thinly sliced
- 1/2 cup dry red wine
- 28 oz. of canned diced tomatoes (look for Muir Glen Organic. They won the ATK taste test of canned diced tomatoes.)
- 1 tbsp fresh oregano, minced
- 3-4 cloves garlic, peeled and lightly crushed (you want these left whole, so you can take them out after stewing)
- 1 bay leaf
- salt and pepper
- 1 lb of pasta (the book recommends tubular pasta like a rigatoni or penne)
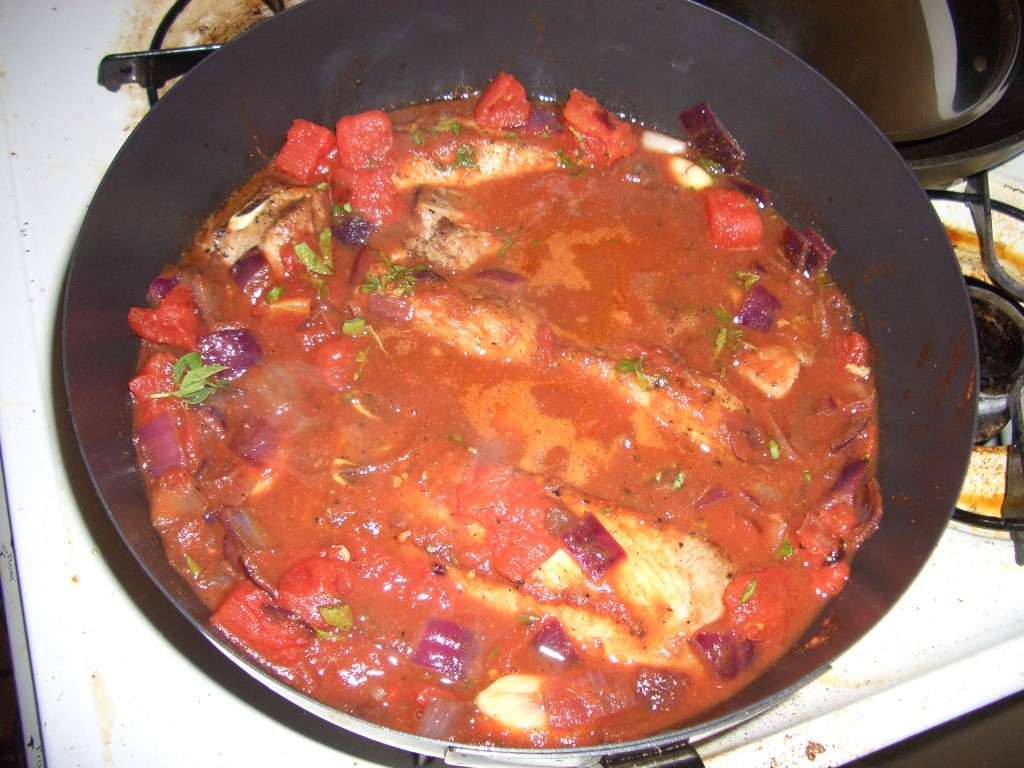
Pat the ribs dry, then season with salt and pepper. Heat the oil in a 12 inch skillet over medium-high heat until just smoking. Brown the ribs, about 10 minutes, then transfer to a plate. Pour off all but 1 teaspoon of the fat in the skillet (I poured it all out and replaced it with some bacon fat from the fridge. I think it added a nice smoky background flavor.) Add the onion and shallot to the skillet and cook over medium heat until softened, about 5 minutes. Stir in the wine and simmer, scraping up any browned bits, until the wine has reduced to a glaze, about 2 minutes.
This is another spot where I differed from the recipe, either because I didn’t have the right size pan or because I leaned more towards the 2lb range in terms of meat. Either way, instead of returning the meat to the skillet, I transferred the meat and wine/aromatics to a large pot, about the size of a dutch oven. Â Don’t forget to add any juices which might have come out from the meat while it was resting; that’s good flavor. Then add in the tomatoes and juice, plus the garlic cloves, bay leaf and oregano. Bring the sauce to a boil, then reduce the heat to low, cover and simmer gently for 1.5 to 2 hours, turning the ribs occasionally until the meat is tender and falling apart. That is the real test of done-ness, when I made this I let it go for 2.5 hours and the meat was shreddable but still just a bit tougher than I would have liked.
Using a slotted spoon, remove the meat from the sauce and let cool. Shred the meat and discard the bones and any chunks of fat you find. You’ll also want to remove the garlic cloves and bay leaf. Return the shredded meat to the sauce and continue to simmer over medium heat for another 5 minutes or so to re-heat the ribs and thicken the sauce a bit. Season with salt and pepper to taste. When tossing with pasta, add some of the pasta water if the sauce needs to be thinned out a bit. For a garnish, I shredded some parmesan and sprinkled some chiffonaded basil leaves, but really this can stand on its own. One last note: to get a gentle simmer (1-2 bubbles per second as the book describes it) I had to turn my stove down as low as it could go, until the flame was almost turned off. So it might take some fiddling to get the heat just right.
