Posts Tagged ‘Chicken’
During my recent weight loss efforts, I’ve found that, for me, it is much easier to make small changes which compound over many days rather than big changes which I won’t be able to stick with. A great example of that is switching to taco salads instead of tacos or burritos. I find that tortillas are one of those foods for which I don’t intuitively account for the calories they contain. It doesn’t seem like food, it seems like what goes around food, but at around 150 calories for a medium tortilla, they can start to add up if you eat more than one taco/burrito per meal. Moreover, they don’t seem to add all that much to the meal in terms of flavor or even texture. Unless, of course, you know a little old Hispanic lady who makes homemade tortillas from scratch. If that’s the case, damn the calories, you can find somewhere else to cut them out.
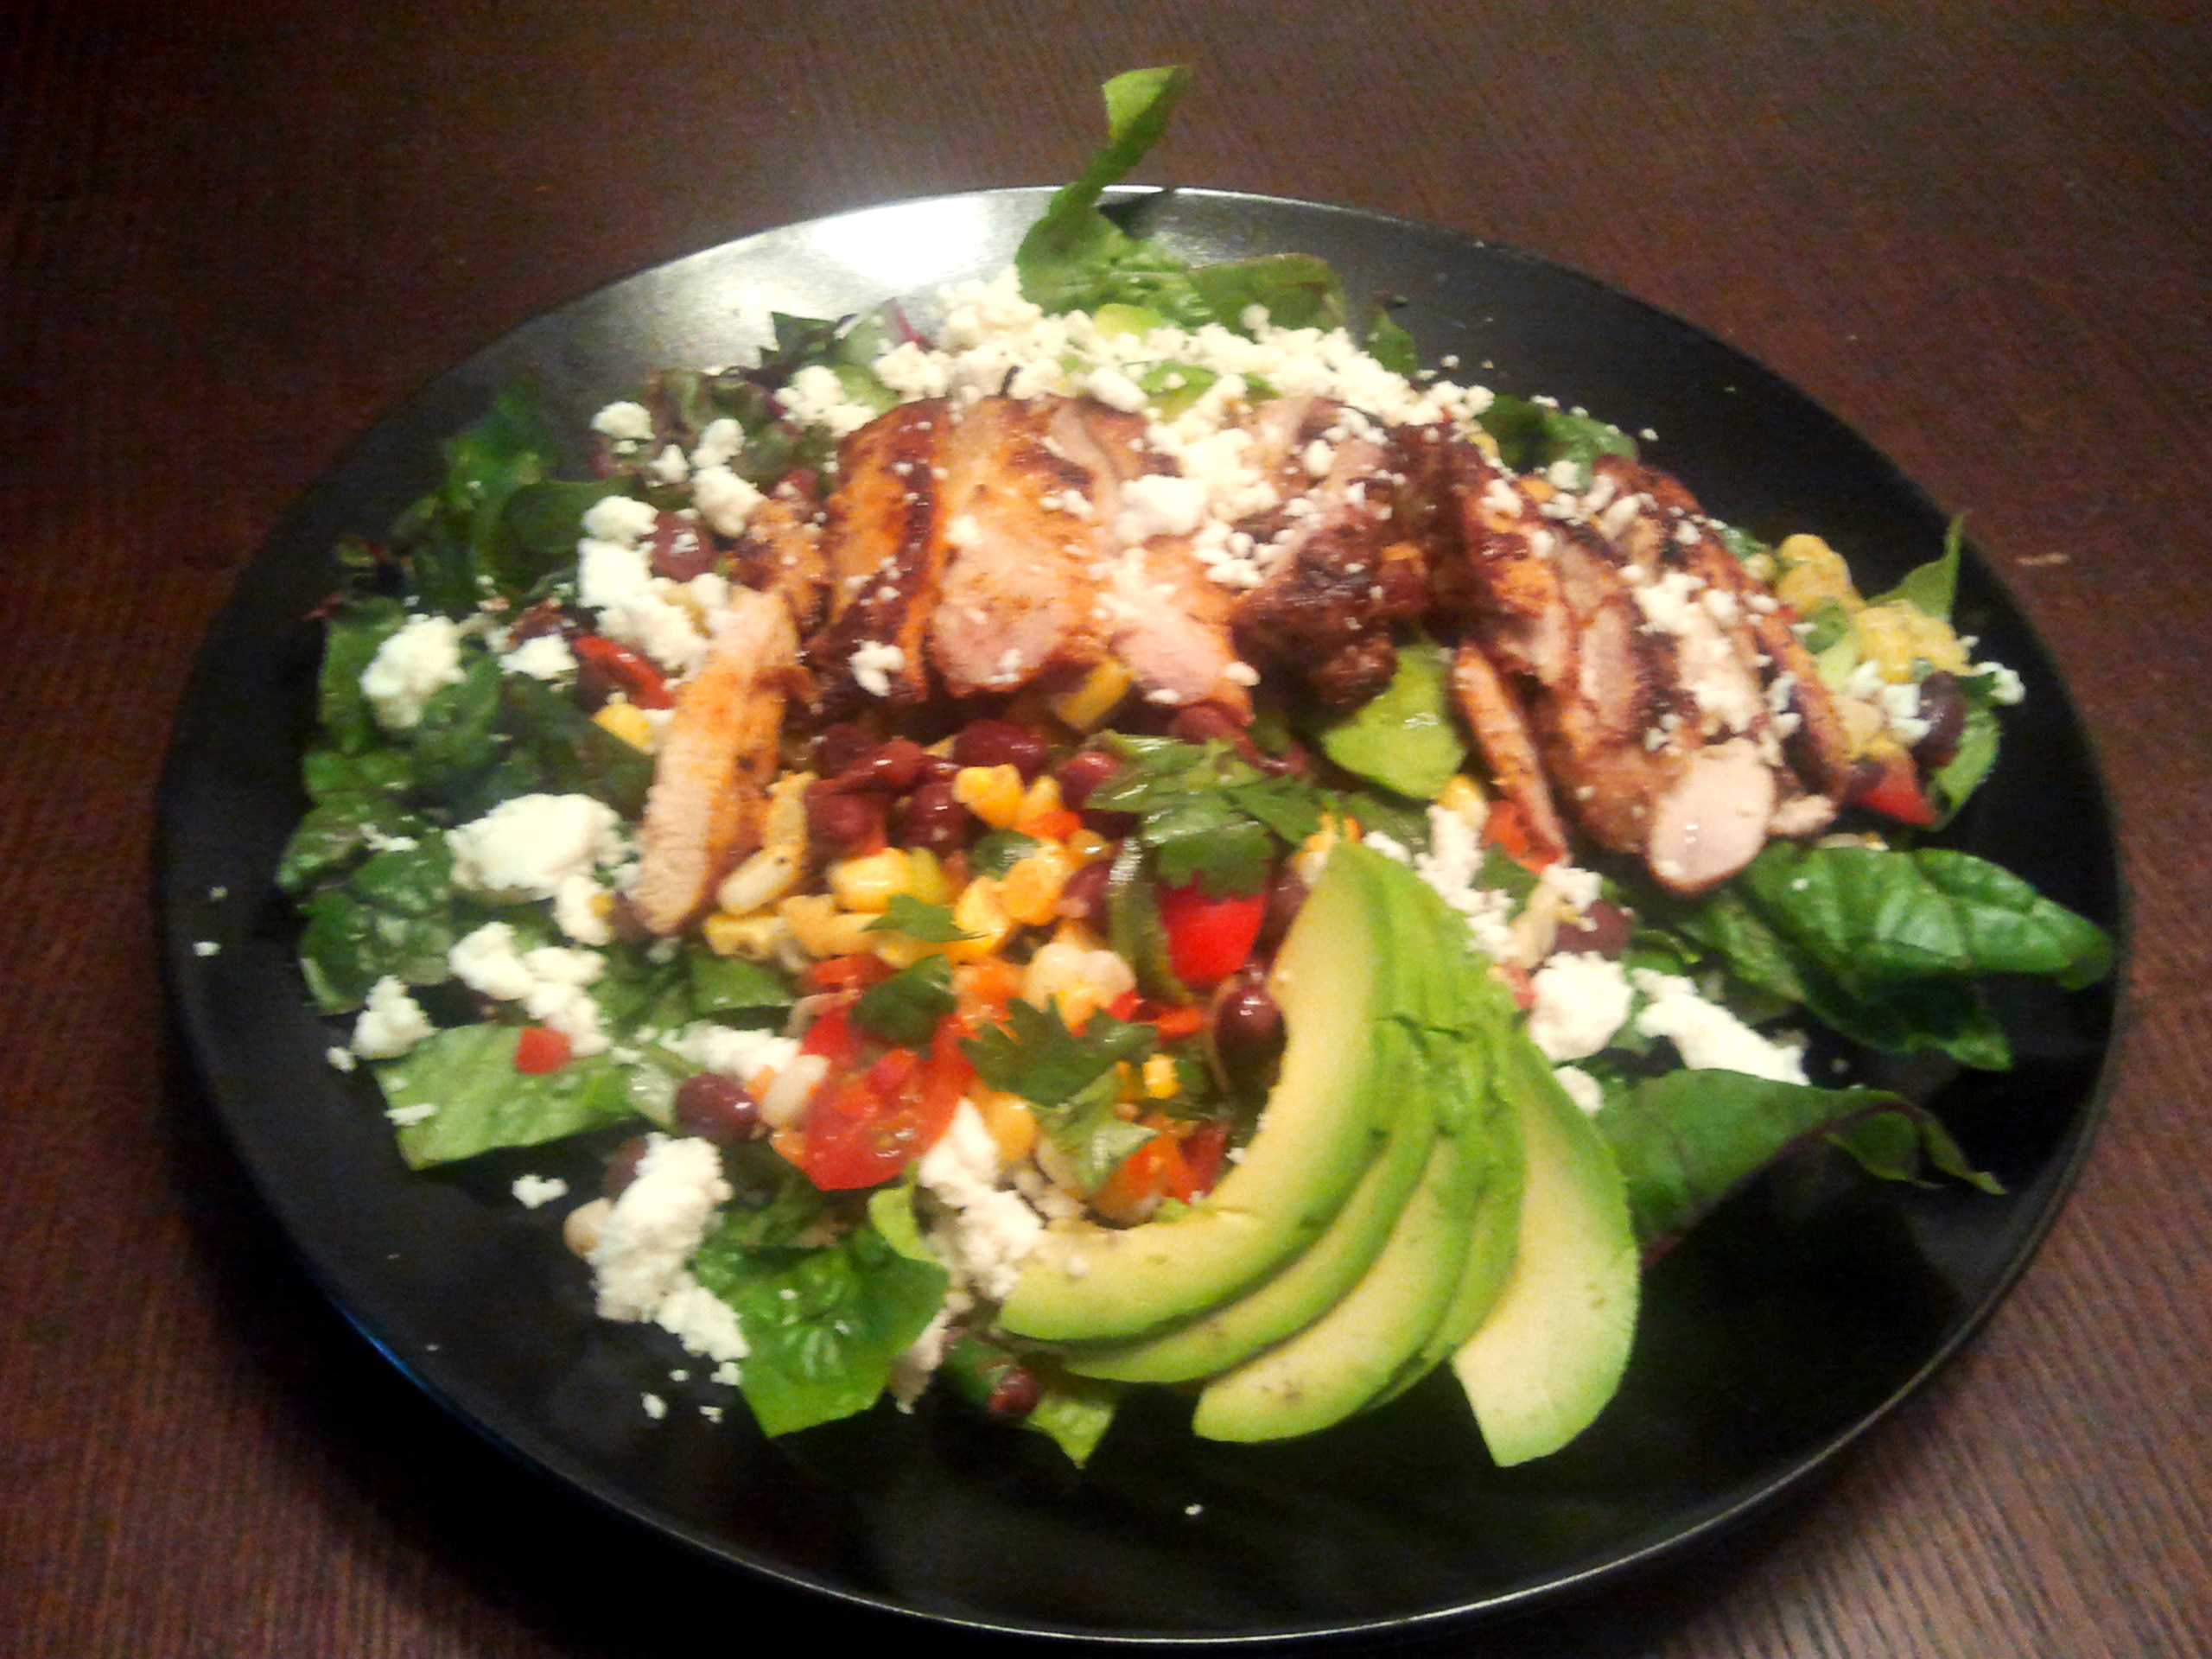
Since I don’t have that homemade tortilla hookup, I made this delicious chicken taco salad the other day, and it came out great. The main flavors here are the chipotle marinated chicken thighs and the really fresh black bean/corn salsa.
To make the marinade: mince 2 canned chipotle peppers and add to a bowl with 2 tablespoons of the adobo paste from the can, 2 tablespoons of oil (olive, peanut, or vegetable), 2 teaspoons of garlic paste, a few dashes of worcestershire sauce, the juice of one lime, and salt and pepper. Mix this up and pour over four boneless, skinless chicken thighs. If I can make a recommendation: buy whole chicken thighs and bone them yourself. You’ll pay about half as much per pound, and you can keep a collection of thigh bones in your freezer until you have enough to make chicken stock (foreshadowing some  soon to come posts? perhaps…). Back to the recipe. Let the chicken marinate for a few hours, then throw it on the grill.
To make the corn & black bean salsa, add the following to a mixing bowl: 1 can of black beans, drained and rinsed; 1.5 cups sweet corn (roasted is better if you can find it or want to make it); 5 green onions, sliced, 1 red bell pepper, Â finely chopped; 1 handful of cilantro, chopped; 1 jalapeno, seeded and minced; 1 cup of cherry tomatoes, quartered; the juice of one lime; 1/2 teaspoon of cumin; and 2 tablespoons of olive oil, plus salt and pepper to taste.
This salsa is spicy, smoky, sour, crunchy and so fresh. For salad greens, I went with swiss chard. For one, I bought some at the farmers market with no real plan for how to use it, so this was a pleasant surprise. Two, I think the assertive flavor and texture of chard, as compared to something like lettuce or spinach, better stands up to a meal with aggressive flavors like chipotle grilled chicken and lots of salsa. So rinse and cut your chard (removing most of the stem), add a nice heap of salsa, top with sliced chicken and half of a sliced avocado, and sprinkle with crumbled queso fresco.
I’m going to start with a warning: this recipe takes more time and effort than it looks. Â That shouldn’t scare you off. Its not hard. But its also not the easy weekday dinner I thought it would be when I open the pages of my cook book one evening on a Tuesday night. Â The recipe involves pounding cardamom pods to get at the seeds and has a minimum four hour date with a marinade. (The recipe warns the marination time is critical and I’m inclined to believe it.) Â It was good reminder to read through a new recipe in detail before making plans!
I pulled this recipe from Good Meat.  Loren’s posts put this cookbook put it on my Christmas list and Santa seemed to think I was nice enough last year to grant my wish.  Paging through the cookbook is to anyone who loves meat as pornography is to a 15 year old boy.  The book is packed full of awesome information about meats and the processes for cooking them.  And the photos are amazing. I was excited to finally break into a cook of my first recipe from this tome.
Unfortunately, the results were less than stellar.  I would classify the chicken as edible.  Much of the error may be on my end.  Instead of bone-in skin-on thighs I accidentally grabed the boneless skinless variety.  The cardamon flavor was just overwhelming.  The fat of skin-on thighs would help cut this down.  Cardamon is also not flavor I’m very accustomed too.  Though, when I ate the leftovers the second day, the cardamon flavors had mellowed to an enjoyable level.
On the next go I may try reducing the amount of marinated or marinating for only four hours rather than overnight. Â There is something good here and I’ll definitely be giving this recipe another go.
——————————————————————————–
Ingredients:
- 1/4 cup whole green cardamon pods or 1 to 2 tablespoons whole black cardamom seeds out of the pod.
- 2 cloves of garlic, diced
- 1 tablespoon of kosher salt
- 1/4 cup fresh or dry oregano
- 1/4 cup plus 2 tablespoons olive oil
- 4 to 6 large skin-on bone-in chicken thighs
- Freshly ground pepper
Directions:
Select a shallow pan that will hold the thighs closely in one layer, such as a quarter sheet pan, cast-iron lasagna pan or frying pan, or gratin dish.
Using a mortar and pestle, or a heavy resealable plastic bag on the back of a cast-iron frying pan, pound the cardamom pod until they split. Discard the husks, and bruise the tiny black seed by pounding them a little to release their oils. Â Add the garlic, salt, and oregano and bash away to release their oils. Â Transfer the mixture to a bowl, then stir in the olive oil to a thin the paste.
Arrange the thighs, flesh side up, in the pan and massage half the paste onto the flesh; turn them over and do the same on the skin side with the remaining paste. Â Allow the meat to marinate, covered and refrigerated, for at least 4 hours or overnight before bring back to room temperature. Â Grind black pepper over the thighs.
Heat the oven to 450 degree, and set a rack along the top of the oven, just under the heating element (although you are not broiling, this exposes the skin to more heat for crispness). Â When the oven is good and hot, roast the chicken for 45 minutes, turning the meat over half way through cooking.
When done, the skin should be beautifully crisp and the flesh completely cooked through. Â Serve warm or at room temperature with rice.
 I’m not sure I’d ever made real Mexican food.  Don’t get me wrong.  Box tacos are a guilty pleasure.  But calling box tacos Mexican cooking would be like calling a jar of Ragu and boxed spaghetti Italian cooking.  The closest I’ve probably come is fish tacos with a side of fresh guacamole.  Maybe some of my enchiladas have gotten on the path.  But, with the purchase of a new cook book, it was time to give it a real try.
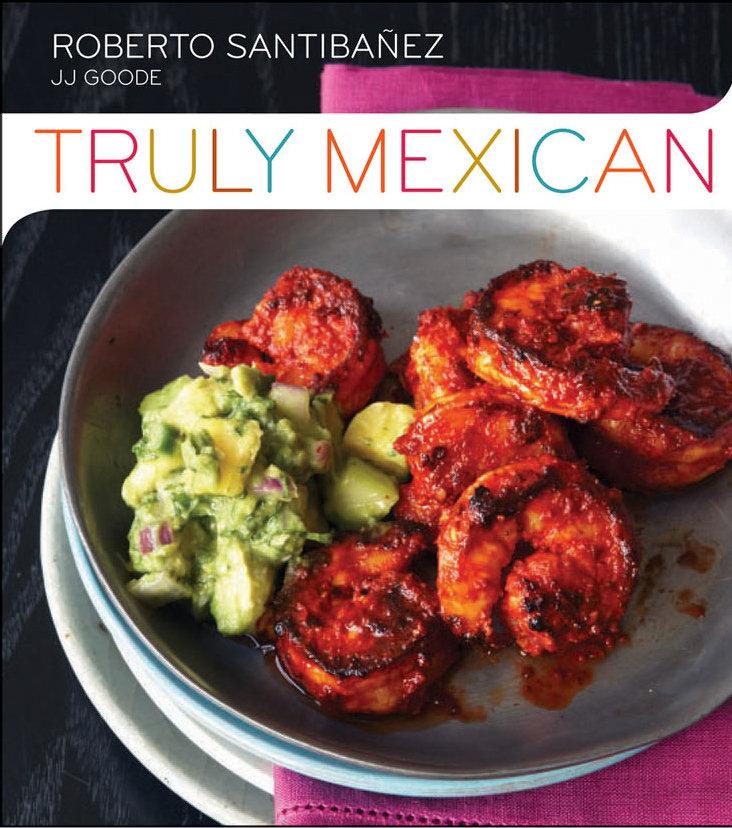
The new cook book (Truly Mexican) offers up recipes ranging from the simple to the devilishly complex.  I decided to ease in with a basic Adobo sauce (recipe below).  And the basic sauce was even easier than I expected.  Maybe a few extra minutes (at max, 15 minutes of real cooking time) compared to the crappy slightly seasoned tomato sauces I’ve played with in the past.
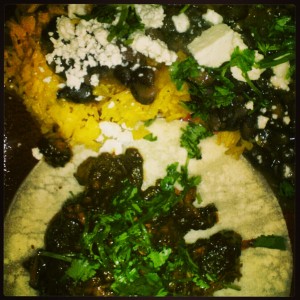
On my first go, I decided for pork (recipe below).  After making the sauce and cutting the pork, a bit of hands-off cooking yielded delicious fall apart pork.  With a little cilantro, Mexican cheese, and a small bit of sour cream I had some rock’n tacos.  For a full meal, I added some beans and rice.  So freak’n good!
This last weekend I made the same meal with chicken and a few eggs on the side for an at home brunch. Â The chicken recipe tracks the pork with a reduced cook time (for sliced chicken it was about 20 minutes of stove top in sauce cook time).
The cook book tells me the sauce can keep in the fridge for a week and on both cookings it seemed better the next day. Â (I’m eating Sunday brunch leftovers for lunch as I type.) Â I think I might next need to make the sauce a couple days in advance. Â Then I’ll be just 30 minutes away from my next taco night!
Basic Ancho Adobo
Ingredients:
- 2 1/2 onces ancho chiles (5 individual chiles), wiped clean, stemmed, slit open, seeded and deveined
- 1/2 cup water for blending, more if necessary
- 1/4 cup Seville orange juice or distilled white vinegar
- 2 garlic cloves, peeled
- 1/4 teaspoon fine sale or 1 teaspoon if kosher salt
- 1/4 teaspoon sugar
- 1/4 teaspoon dried oregano, preferably
Directions:
Heat a heavy skillet over medium-low heat, and toast the chiles 2 at a time, turning them over frequently until they’re fragrant and they’ve developed light brown blisters, about 1 1/2 minutes per batch. Soak the chiles in enough cold water to cover until they’re soft, about 30 minutes. Drain and discard the soaking water.
Put the 1/2 cup of fresh water in the blender jar with the chiles and the remaining ingredients. Â Blend until smooth, at least 3 minutes, adding a little more water in necessary to puree. Â For a silkier, smooth texture, strain the adobo through a medium-mesh sieve.
Pork in Adobo (Cerdo en Adobo)
Ingredients:
- 2 pounds pork shoulder or other pork stewing meat, cut into 1 1/2-inch cubes.
- 1/4 teaspoon fine salt, or 1 teaspoon kosher salt
- 2 tablespoons
- 1 1/2 cup of Adobo
- 2 cups of water or chicken stock
Directions:
Pat the pork dry and season it with the salt. Â Heat the oil in a 4 to 5 quart heavy pot or skillet over medium-high. Â Brown the pork (us e multiple batches is needed–avoid having the pork pieces sitting on top of each other), turning occasionally, 8 to 10 minutes per batch.
Reduce the heat and return all the pork to the pot. Â Carefully pour the adobo over the pork. Â If the adobo is in the blender, swish a little liquid around in the jar and add it to the pot. Â Simmer, stirring to coat the pork and fry the sauce, until the sauce is slightly thicker, about 5 minutes. Â Add the 2 cups of water.
Cook the pork, covered, in an oven in an ovenproof pot in a 350 degree oven for 1 1/2 to 2 hours. Â Season to taste, vinegar, and additional salt. Â (The recipe also instructs that you can reduce the heat to low, cover the pot, gently simmer the pork, adding a couple table spoons of water from time to time to maintain a silky texture until the pork is tender, 1 1/2 2 hours)
A few weeks back, my friend Erin sent out an email with the brilliant idea of a supper club.  In a twist on the classic supper club, the guests are in charge of the food while the host takes on the booze.  Each dinner is to be organized around a theme and this last Saturday things kicked-off with Peruvian night.
Ceviche
On reading the theme, I was taken back in time to a cliff top restaurant in Lima where I savored ceviche while watching the large dark blue waves of the Pacific ocean roll, crash, and foam below.  I knew I had to make this citrused Peruvian classic.
In fairness, this dish likely originated in a few place across the globe.  But around 500 years ago the Moche, a coastal civilization in current-day northern Peru, came up with the stuff.  Modern Peru adopted it and it hit the United States in force in 80s. It’s easy to make and prefect for these warm summer months.
For the uninitiated, cechive is fish or seafood “cooked” in citrus.  Cooking fish, meat, poultry, etc. is all about changing the structure of the proteins or breaking them.  In science/Alton Brown talk, the citrus does its cooking by denaturing the proteins in the fish.  And, since the cooking comes from the fish’s time in the citrus bath, unless you’re using sushi grade fish, be sure to use small pieces and marinate for approximately three hours; raw fish can carry some nasty stuff.
[DDET The Ceviche Recipe]
Ingredients
- 1 pound white saltwater fish: albacore, sole, snapper, halibut, etc. Â (I used halibut)
- 1 cup lime juice
- 1/2 cup lemon juice
- 1/2 cup orange juice
- 1 T. salt
- 1 rocoto chile (chile manzano in Mexican markets) or 2 aji limon (substitute a habanero) – I used the habanero, the only pepper I could find.
- 1 medium onion, sliced very thinly into half-moons
- 4 T. chopped cilantro
Directions
For the citrus, you’re going to want to buy the fruits and juice them yourself.  The stuff you buy in a bottle is going to disappoint every time.
Cut the fish into pieces no bigger than one inch cubes; remember the bigger the pieces the longer it takes for the citrus to do its work. Salt the fish, then cover with the citrus juice in a non-reactive (glass or plastic, metal might yield an unpleasing metallic taste). Add the sliced onions and the chiles.  Put the covered mixture in the fridge for two to three hours–if you have true sushi grade fish, its okay to shorten so the fish is still raw in the middle.  When you serve, garnish with the cilantro.
[/DDET]
Overall, ceviche is a very forgiving dish as long as you start with good fish. Â It’s a great food to play with: ratchet up the heat (the habeneros were a little intense), pull it back, add the cilantro before marination, change-up the citrus juice, etc.
Peruvian Stewed Chicken
Because ceviche is, in all honestly, a bit of a cooking cop out, I helped Nick and Becca in their preparation of Peruvian Stewed Chicken.
[DDET The Peru Peruvian Stewed Chicken Recipe]
Ingredients
- 1 (16 ounce) can chopped tomatoes
- 1 tablespoon olive oil
- 1 medium onion, finely chopped
- 3 cloves garlic, minced
- 1 teaspoon cumin
- 1 teaspoon dried oregano
- 1 bay leaf
- 10 to 12 small chicken pieces
- 1 teaspoon coarse salt
- 1/2 teaspoon freshly ground black pepper
- 1 green bell pepper, sliced
- 1 cup green peas
Place tomatoes in a blender or a food processor fitted with the metal blade and process until liquefied. Set aside.
Heat oil in a large saucepan or stockpot over moderate heat. Add onion and saute until soft, about 10 minutes. Add garlic and saute for another two minutes. Add cumin, oregano and bay leaf and stir to combine. Sprinkle chicken pieces with salt and pepper and add to pan. Brown the chicken lightly. Add the tomatoes and enough water to cover 3/4 of chicken. Bring to a boil, cover, reduce the heat, and simmer for 45 minutes to an hour, until chicken is cooked through. About 10 minutes before the chicken is done, add the green pepper and peas. Serve warm.
[/DDET]
True to form, we managed to pull off the dish and (a big pot) of rice and arrive fashionably late, along with most of the supper club crew. Â At the dinner itself, the stewed chicken was a bit bland. Â Though the the next day, the flavors had come together and were more bold. Â I would recommend making this dish a day in advance and reheating, for maximum flavor.
Transporting our creations was a bit tricky and I was thrilled, for probably the 100th time, that Becca actually has a car in New York.
The Supper
The actual meal was a lot of fun.  Erin pulled together a good group of people who pulled off some great dishes (including a salad, a cheesy potato dish, and a beef dish that seemed to be the bovine cousin of the stewed chicken) .  I’m very much looking forward to the next one.
 Yesterday evening, with my TPS reports completed (correct covers and all), I left the office at a reasonable hour with embryonic cooking ideas in my head.  As I got to the store, I still had no solid idea of the menu.  But I had time to wander the aisles and ponder fish vs poultry, grilling vs the oven, salad vs pasta… In the end I decide to make-up a new chicken recipe.
Union Market has a hot pepper jelly that has been taunting me for months. Â As my mind settled on roasting a chicken, I knew I had to make use of this jelly. Â But what else… Â then the universal truth came to me: bacon makes everything better (and perhaps thinking back to Meg’s butterfly chicken). Â And Union Market just happens to have some pretty fine looking bacon. Â Some carrots, celery, onions, and potatoes fell into my basket for side dishes. Â Finally, I grabbed a thing of cilantro to top everything off.
Now this dish takes a bit of time, but almost all of that is passively letting everything cook. Â You need about 20 minutes of prep. Â I put the chicken in a dutch over, peeled and chopped the veggies and put them in along with the potatoes. Â Next I took my pound of bacon, gave it a fine chop, and mixed it in a bowl with maybe a half cup of the hot pepper jam. Â About a third of the bacon pepper jam went into the bird’s cavity, about third under the skin, and about a third on the top-side skin. Â For good measure, any extra little bacon pieces on the cutting board were put on the potatoes.
With the lid on, and the oven at 375, I just let everything cook for maybe a bit more than 90 minutes–after about 30 the smells of onions, chicken, and bacon were wafting through the apartment.  I took the lid of for the last 15 or so minutes, as I made some quinoa, just to help the onions brown a bit; because of the sugars in the jelly, the chicken was already there.
And how did this improvised concoction turn out?  Well, between Nick, Fayaz, and I, we took down almost the whole bird and all the veggies.  There was a little sweet and heat from pepper jelly and bacon added all the savory you could hope for.  I realized, after it was in the oven, that I had forgotten to add garlic.  But, I think this error might have been for the best.  [You can pick your jaw up off the floor.]  There was plenty of flavor that worked well together.  I feel that the garlic might have just gotten in the way.  If I were going to add something else, it would be more heat, probably by adding diced hot pepper to the bacon jelly mix.
More than just the food, it was nice to sit down  at a table mid-week with my roommates and chat–much better than the usual take-out in front of the TV with the work laptop going.
I’d like to introduce you to a friend named Tyler. I met Tyler roundabout 6 or 7 years ago through a friend of a friend, and we ended up living in a house together while I was in college. Tyler and I are the ultimate example of diametrically opposed forces in the

My favorite pic of Tyler. He doesn't always look quite so deranged.
kitchen. Whereas I ususally know what I want a dish to look and taste like before I start cooking it, Tyler is very much a person who is enthralled with the process of cooking itself. He will start out with the ingredients at hand, but usuaully does not know what the food will look or taste like until its done. To the best of my knowledge, this only lead to inedible food on one occasion, when he added a tablespoon or two of cumin to a noodly-cream sauce dish… we shall not speak of that horror.
Since we were the biggest cooks in house, we invariably ended up collaborating on meals on some nights and our contrasting cooking styles always made for interesting meals. The entire process was a struggle between us; Tyler would make a suggestion and I would resist because I already knew what I wanted. I would make a suggestion and Tyler would resist because he wanted to see the outcome of what he was doing. We didn’t always listen to each other, but there was usually a shared commitment to accept some input, and typically the meals we created ended up better than either of us could have produced on our own. This night was no different. Tyler sent me a text saying he had spent all day roasting red peppers and was planning on making lasagna that night. How could I resist?
Unfortunately, I don’t have an exact ingredient list for you because Tyler bought most of the groceries and (of course) did not have a recipe while doing it. Here’s what I think we had though:
- 2 boxes of lasagna noodles (one was regular pasta, the other was whole wheat. We preferred the latter.)
- 2 jars of Bertolli alfredo sauce

Tasty, tasty venison.
- 2 frozen chicken breasts
- 1lb of venison steak/cutlets
- 1-2 lbs of mushrooms
- 2 cups of roasted red peppers, cut into strips (if you have homemade, god bless you)
- 20 oz. frozen spinach, thawed (I normally dont like frozen spinach, this turned out quite well.)
- 2 logs of fresh mozzarella
- 1 tub of ricotta cheese
- Wedge of parmasean and/or asiago
- Fresh basil
- Red pepper flakes

We pre-prepared everything so we could just bake the lasagnas long enough to melt everything together and not have to worry about uncooked meat. The chicken breasts were boiled in a heavily seasoned (salt, pepper, garlic powder, sage, rosemary and thyme) pot of water, then diced into small peices. After that, we tossed them with the liquid left in the jar from the roasted peppers to add another layer of flavor. Note: while the boiling liquid smelled fantastic, I don’t think enough of the flavor trasnferred. You might be better off brining and roasting them. Alternately, you could use chicken thighs which usually have more flavor. The venison was already sliced into medallions, about 1/4 to 3/8 inch thick. We patted them dry, seasoned with salt, pepper, garlic & herb, and chili powder, then seared them in a very hot pan with a teaspoon or two of canola oil. By the time they are well browned on both sides, they should be done. Then cut them into matchstick peices so they can be sprinkled throughout the layers. Lastly, the mushrooms were cooked with some butter, garlic and seasonings. Just make sure you get a good amount of the moisture out so it doesn’t come out in the lasagna itself. One thing we forgot to do: the recipe we were loosely consulting suggested mixing the ricotta with an egg, then mixing the spinach into that. I think that process would have helped hold the lasagna together a bit better when it came time to serve.
Put all the various ingredients into some bowls so you can put together the lasagna via assembly line. First layer was alfredo sauce and a small amount of spinach. Then noodles. The next layer was meat(one lasagna was chicken and the other was venison), spinach, mozz, roasted peppers, shrooms. Then noodles. Then sauce, ricotta, and spinach. Then noodles. Then meat, spinach, mozz, roasted peppers, shrooms. Maybe a littlle sauce too (this was hardly a scientific process). Then noodles. Then sauce, ricotta, spinach, red pepper flakes, and some chiffonaded basil, then some shredded parm/asiago. Then the last layer of noodles. Top layer is some sauce, spinach, peppers, and a larger amount of mozz than you had been using. I really tried to cover the top layer in mozz so it would broil up well, then topped with some more shredded parm. Spray some aluminum foil with cooking oil, then cover the lasagna with it. Throw the lasagna in an oven preheated to 350 degrees. After 15 minutes, remove the aluminum foil and let it go for another 25 minutes in the oven. Depending on how crusty and brown you like the cheese, you may have to finish it under the broiler, which is what we did. Let it sit for 10 minutes, then furiously devour it.


YummmmTasty potato and green bean closeup!
OK, so this dish is not officially named “Butterfly Chicken” but that’s what Arthur and I call it because that is the verb for when you cut out the chicken’s backbone, break the breastbone, and lay it flat, “to butterfly a chicken” – it looks sort of like a butterfly. I think the official name is “Balsamico Roast Chicken” (it comes from The Italian Country Table, by Lynne Rossetto Kasper).
I have been talking about purchasing a dining table since at least August and with my 30th birthday fast approaching, I decided to finally go for it – let’s face it, who wants to be 30 and admit that they eat all of their meals on the sofa? (Although, now that we have the table, Arthur still seems to prefer the sofa…)
To break in the new table we decided to call upon our good friend Debbie, some excellent board games, and this classic recipe – who doesn’t love a whole chicken with potatoes roasted in the bottom of the pan? We started out the evening with a bottle of white wine while Debbie prepped a delicious salad (arugula, walnuts, cranberries, goat cheese, prosciutto, with balsamic fig dressing) and I got the chicken going. Dinner guests always seem impressed by a whole roasted bird (even though it’s not much work!) and this recipe smells great cooking, cooks more quickly because of the butterfly technique and has never come out dry because of all of the delicious extra fat from the pancetta. If anything, Arthur, if asked, will warn you not to get over-zealous with the pancetta. We tried bumping up the pancetta amount one time (’cause we love it so much) and it just turned out waaaay too greasy – and you know it was reeeeeally greasy if we’re saying that…
[DDET Click Here for the Balsamico Roast Chicken and Potatoes Recipe]
from The Italian Country Table by Lynne Rossetto Kasper
Ingredients:
¼ medium onion                                                        4 slices (1 ½ to 2 ounces) pancetta, chopped
3 large garlic cloves                                                    5 Tablespoons balsamic vinegar
¼ tightly packed cup fresh basil leaves                     1 Tablespoon extra-virgin olive oil
½ teaspoon dried basil                                                           Salt and freshly ground pepper
¼ teaspoon each dried oregano and marjoram          ½ to 1 cup dry white wine
1 3 ½- to 4-pound chicken                                        Parsley or fresh thyme for garnish
6 medium Yellow Finn, Yukon Gold, or
red-skinned potatoes, scrubbed and cut
into 2-inch chunks
- If time allows, season the chicken ahead and refrigerate it several hours or overnight. Preheat the oven to 400˚ F when ready to cook the chicken. Mince together, by hand or in a food processor, the onion, garlic, herbs (dried ones could be in here too), and pancetta. Then blend in 2 teaspoons of the balsamico, the oil, and salt and pepper to taste.
- Cut out the chicken’s backbone and open the chicken out flat, skin side up. With your palm, firmly press down the breast area to flatten. Stuff most of the herb mixture under the skin of the thigh, leg and breast areas. Rub the rest all over the chicken. Place the bird skin side up on a large shallow pan (a broiler pan or jelly-roll or half0sheet pan). Scatter the potatoes around it and sprinkle everything with salt and pepper.
- Roast 20 minutes, then pour in ½ cup wine. Roast another 70 minutes, or until the thigh reaches about 175˚ F on an instant-read thermometer. Baste the potatoes and chicken frequently with the pan juices, turning the potatoes often to brown evenly and prevent them from sticking. Add more wine if the pan is dry. Turn over the chicken two thirds of the way through cooking for even browning.  If after an hour of roasting, the chicken isn’t browning, raise the heat to 500˚ F to finishing cooking. (Or wait until it is done and run it under the broiler 5 minutes to crisp the skin.)
- Let the chicken rest 5 to 10 minutes at room temperature, then present on a warmed platter along with the potatoes, sprinkling everything with the rest of the balsamic. Garnish with bouquets of parsley or fresh thyme.
[/DDET]
Once you have started pre-heating the oven to 400, I recommend starting by rinsing and chopping the red potatoes into roughly 1 inch cubes (the recipe says 2 inches, but if you want to make sure they’re fully cooked and get nice and crispy on the outside, 1 inch is best in my experience). Toss your potato cubes in a large bowl with some olive oil, salt, pepper, dried basil, marjoram, and oregano. Then use olive oil to grease the bottom of your roasting pan and throw those spuds in there. Next, prepare the “stuffing” according to the recipe- it’s not technically stuffing, because it’s going to go under and over the skin, not actually inside the bird, but that’s what I call it.
When your pan and your stuffing are ready, grab your whole “roaster” chicken and a sharp knife… and cut out the back bone! Yep, cut the whole. thing. out. If you are squeemish, you can have the butcher do it for you at the grocery store, but it’s really not that hard. (Plus, think how proud of yourself you’ll be if you do it yourself! It’s a task that always makes me feel like a real chef). Just set that c
hicken up so it’s sitting on the counter facing away from you and make 2 cuts, one down each side of the backbone from neck to tail.  Then, throw out the backbone (unless you want to save it for making stock). Lay the chicken down flat on the counter, breasts up, and press your thumbs down on the breastbone until you hear a snap – now the chicken will lie flat in a “butterfly” position. It cooks quicker this way and still looks really cool.

Ready for the oven...
Putting the stuff under the skin is fun, but be sure not to get carried away: you’ll want to save some to pat onto the outside of the skin (Arthur likes to be sure to pat it on, trying to rub it in does not seem to be as effective). Finally, put your chicken in the roasting pan (on the rack, above the potatoes). Roast in the oven for 20 minutes, then pour 1/2 coup of white wine over the chicken and potatoes. After, roast for another 70 minutes (or however long it takes for the chicken to finish roasting), basting every 20 minutes, or so.
Check to see that the chicken is fully cooked by slicing the thickest part of the thigh or breast with a knife and making sure the juices are running clear. Then lift the chicken on its rack off of the pan, and let it “sit” for another 20 minutes or so while you jack the oven up to 50o degrees and finish giving those potatoes a nice crisp finish. (This dish tastes great with green beans, too. Just add them to the bottom of the pan with the potatoes for the last 40 minutes to an hour of cooking time).

Thanks, Debbie!
My new table is now officially broken in.
Easy! Delicious! Impressive!
(If you’re lucky enough to have Debbie joining you for dinner, she might just bring some homemade chocolate madelines with ice cream to finish off the meal…)

The Holy Grail of Cookbooks
Friends, if you have ever listened to anything I said, listen closely to these words: go buy Good Meat. Do it right now, and buy me an appropriately priced gift of thanks at a later date. I bought this book for my brother and his wife for Christmas, and was pretty excited about giving it to them. Then I saw his facebook status later that week and it was something to the effect of “Spent my entire day drinking tea and reading my new cookbook”. Now, I’m a fan of cookbooks, but I have never been so grossly enthralled in one so as to give up a whole day in my weekend in order to read through it. But that is partly because this is not just a bunch of recipes sent to a bindery. It’s a holy tome of carnivorous cuisine! Each section (beef, pork, poultry, lamb, rabbit, etc.) contains a sub-section about the meat itself. You’ll find information such as discussions of the difference between grass and corn fed beef, sustainable models of protein farming, breaking down a side of beef into primal, sub-primal and butcher cuts, and suggested vendors you can order from. It’s truly, truly amazing stuff.
The following recipe is the best one I’ve had from the book so far, but that isn’t saying much since we only tried 3 recipes while down in Kansas (where my brother Allen, recipient of the book, lives) and I haven’t yet bought my own copy of Good Meat. I will say up-front, I am not a mustard guy. Especially the bolder, spicier mustards; I hate them in the same way I hate horseradish. This recipe opened my eyes. You will need
- 2 1/2 lb new potatoes, cut into 2 inch chunks (any small potatoes will work)
- 1 chicken, 5 lb
- 1 head garlic, seperated into cloves and skinned
- 1 bunch/package  rosemary
- 1 cup coarse/stone ground mustard
- 1/4 cup EVOO
- 2 tbsp soy sauce
- 1/2 cup white wine
- 2 tbsp heavy cream (pretty sure we left this part out, and it was still friggin awesome)
Heat the oven to 450. Choose a roasting pan that will hold the potatoes tightly together. The idea is to keep them from burning here. Remove excess fat from the chicken and place chunks among potatoes.
Strip the rosemary leaves from the stems, and rough chop them. Take 1/4 cup of the rosemary and set it aside. Now take half of the remaining rosemary and sprinkle it inside the bird cavity, along with some salt and pepper. The rest of the rosemary should be scattered among the tatoes in the pan.
In a bowl or blender, mix together the 1/4 cup of rosemary you reserved, the mustard, olive oil and soy sauce until its a homogenous paste. Spread that over the bird. It’s supposed to be a nice, thick crust so don’t be shy with the mustard paste. GET IT ON THERE! Place the bird on top of the potatoes, and put the roasting pan in the oven. Bake for 30 minutes, then reduce the heat to 350. You need that initial high temperature period to really set the crust and get some browning action on the outside. Let it go at 350 degrees for another 60-75 minutes until a thermometer reads 165 in the thickest part of the thigh. When its done, let it rest 15 minutes before carving the bird.
Last step: drain the juices from the roasting pan and add to a saute pan along with the wine, place over medium heat. Allow that to reduce to about 1/2 volume. Remove from the heat and stir in the cream (again, we left that part out) then you can either serve in a gravy boat or just pour it over the potatoes as a dressing.

Doesn't it look fantastic?
Apologies to Meg, who apparently wants my mustard-crusted chicken recipe, but you’ll have to wait a few days. The other night, I made an interpretation of chicken stir-fried with Chinese long beans. It was probably my best re-creation of Asian cuisine so far. My favorite part of this recipe is the incorporation of dark soy sauce to raise the sugar content of the chicken marinade. When the chicken hits the pan the extra sugar will help the caramelization and develop a deep, rich flavor.
For any chicken stir frying, I prefer using thighs. There’s a little more fat in them, so there’s more flavor to stand up to spicy Asian sauces, and they’re definitely more forgiving of being slightly overcooked. So buy some boneless, skinless chicken thighs or, if you have a nice boning/fillet knife, save yourself a few bucks per  pound and buy the normal chicken thighs and bone them yourself. Cut 4 chicken thighs into roughly 1-2 inch chunks and add to a dish or plastic bag to marinate them.
For the marinade, mix together:
- 4 tbsp soy sauce
- 2 tbsp dark soy sauce (you can substitute some sugar or honey, but really, go buy a bottle of dark soy sauce. You will find yourself putting it in everything)
- ¼ tsp sesame oil
- 1 tsp  EVOO
- 1 tsp rice wine vinegar
- 1/2 tsp sriracha hot sauce
- 2 cloves minced garlic

You just can't fail with these ingredients.
- a few dashes of white pepper

Mix it up, add it to the chicken, toss to combine and let it marinate for 1-2 hours.
Next, get a large pot of salted water to a boil. Then par-boil about 3 cups of green beans for just a few minutes, until they are bright green. Â Then take them out and shock them either in ice water or under a cold tap. Set aside.
Mix 2 tablespoons of oyster sauce with 2 tablespoons of water, set that aside as well.
Pre-heat 1 tbsp of light oil in a skillet over medium high heat. While that is warming up, take the chicken out of the marinade and (important) pat the chicken dry with paper towels. This will help the chicken get some browning in the pan, and will also remove most of the garlic which might burn in the pan. When the oil is shimmering, add the chicken and cook for 3-5 minutes per side or until there is some serious browning on each side. Don’t overcrowd the pan; you will probably have to separate the chicken into two batches unless you have a pretty decent size pan. When the chicken is almost done, add 3 cloves of minced garlic and a minced serrano pepper and stir it around. Let the garlic cook for 30-40 second, then add in the green beans and the oyster sauce mixture.  Cover the pan and let it cook for 3-4 minutes. If the sauce is not thick enough, you can either take the top off and let it reduce or mix up a little water/soy sauce/cornstarch slurry and mix it in. Serve over rice or rice noodles or whatever floats your boat.
Later this week: the last football post of the year. We’re breaking out the best of the best for the SUPERBOWL! It’s times like these I really wish Arty was back in the tundra, but Rick and I will have to step up and perform in his absence. Â I’m hoping to have about 3 appetizer recipes and maybe a review of my favorite football beers or someother such nonsense.

ABOUT
Good Food, Good Drink, Great Living
RECENT POSTS
| M | T | W | T | F | S | S |
|---|---|---|---|---|---|---|
| 1 | 2 | 3 | 4 | 5 | ||
| 6 | 7 | 8 | 9 | 10 | 11 | 12 |
| 13 | 14 | 15 | 16 | 17 | 18 | 19 |
| 20 | 21 | 22 | 23 | 24 | 25 | 26 |
| 27 | 28 | 29 | 30 | |||
Tags
Archives
- November 2014 (1)
- October 2014 (2)
- September 2014 (1)
- April 2014 (1)
- March 2014 (1)
- February 2014 (1)
- January 2014 (1)
- December 2013 (4)
- November 2013 (2)
- October 2013 (1)
- September 2013 (1)
- August 2013 (4)
- July 2013 (4)
- June 2013 (6)
- April 2013 (5)
- March 2013 (5)
- February 2013 (1)
- January 2013 (3)
- December 2012 (2)
- November 2012 (13)
- October 2012 (4)
- September 2012 (6)
- August 2012 (3)
- July 2012 (4)
- June 2012 (6)
- May 2012 (10)
- April 2012 (13)
- March 2012 (5)
- February 2012 (5)
- January 2012 (2)
- December 2011 (16)
- November 2011 (8)
- October 2011 (10)
- September 2011 (10)
- August 2011 (12)
- April 2011 (2)
- March 2011 (8)
- February 2011 (7)
- January 2011 (7)
- October 2010 (5)
- September 2010 (8)
- August 2010 (12)
- July 2010 (5)