Posts Tagged ‘Italian’
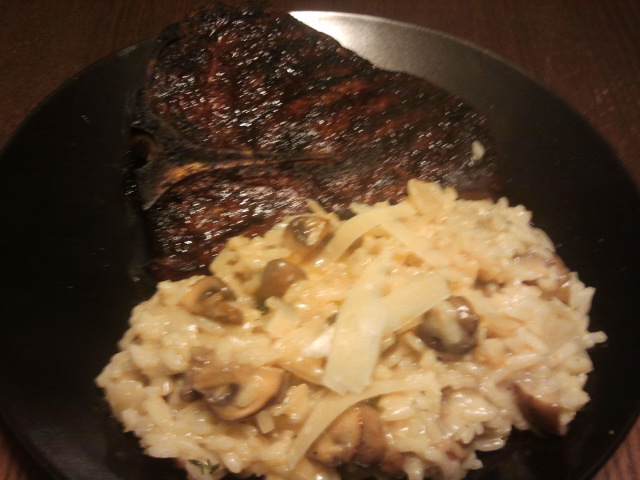
This was the first time I ever tried to make risotto, probably because I have always heard that it was a pain to constantly have to stir it for a ~30 minute cook time. That level of attention is usually not conducive to making other courses to go along with dinner. Silly me, I should have known that America’s Test Kitchen would have figured out a more user friendly version of the recipe. To make this gooey, cheesy, white winey goodness, you will need:
- 3.5 cups of low-sodium chicken broth
- 3 cups water
- 6 tablespoons butter
- 1 onion, minced
- Salt & pepper
- 2 cups Arborio Rice
- 1 cup dry white wine
- 2 oz Parmesan cheese, grated (1 cup)
- 2 cloves garlic, minced
- fresh thyme
- 1 lb cremini mushrooms, trimmed & cut into small wedges
- 1/3 oz of dried porcini mushrooms (optional)
Bring the broth and water to a boil over medium-high heat. Cover and keep warm on the lowest possible stove setting. Â Melt 4 tablespoons of the butter in a large saucepan over medium heat, add the onion and 1/2 teaspoon salt and cook until lightly browned, about 9 minutes. The original recipe also calls for you to stir in 1/3 oz of dried porcini mushrooms, “thoroughly rinsed and minced”, to the onion mixture in this step. I forgot this step, despite scouring the grocery store for dried porcini mushrooms that day, and really didn’t think the recipe was lacking in any way. I would try the dried mushrooms if you want, but don’t stress yourself out looking for this ingredient. I kind of like the way it turned out where the mushroom flavor was in the mushrooms themselves and sort of contrasted with the brothy-wine flavor in the rice.
At roughly the same time that you start cooking the onion, melt the other 2 tablespoons of butter in a large skillet over medium high heat and add the mushrooms and 1/2 teaspoon salt. Cook until the mushrooms are browned, about 10 minutes. Stir in the minced garlic and about 1/2 teaspoon of minced fresh thyme. The garlic and herbs really only need to cook until they are fragrant, about 15 seconds or so. Finally, transfer the mushrooms to an oven safe container, cover them, and keep them warm in a 200 degree oven until the risotto is basically done. One final note about the mushroom cookery: you want these to brown, not steam. If too much liquid comes out of the mushrooms while cooking, enough liquid to cover the bottom of the pan, drain that off into the broth/water mixture you have going on the stove. It will add some good mushroom flavor to the final product.
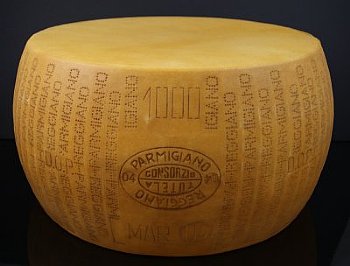
Stir the rice into the onions and cook until the edges of the grains turn translucent which takes about 3 minutes. Add the wine and cook, stirring frequently, until the wine is completely absorbed. Then add 3 cups of the warm broth mixture and bring to a simmer. Cook, stirring occasionally, until all the liquid has been absorbed. It will be very helpful for this recipe to have a ladle on hand so you don’t have to pour hot liquid from the pot into a measuring cup and then from the measuring cup into the rice. Continue to cook the rice, stirring in 1/2 cup of the broth every few minutes, allowing each addition of broth to be absorbed completely before adding more. Continue this process until the rice is cooked through but still somewhat firm in the center, about 11 minutes. Stir in the mushrooms and the parmesan, season with salt and pepper to taste. As always, buy real parmesan wedges and grate it yourself for the best result. Luckily, my brother Danny gave me a two pound wedge of parmesan for Christmas, so this recipe was a perfect way to use part of it.Serve the risotto next to a beautiful peice of grilled meat, and garnish with some parmesan shavings and maybe some minced flat leaf parsley or chives.
The final dish was everything I hoped it would be. The rice was soft but firm, the broth and wine combined to make some great layers of flavor, and the parmesan made everything that much more creamy and salty. By adding half of the liquid immediately and allowing it to cook down for a while, you really cut down on the amount of time during which you have to devote lots of effort and attention to the risotto to keep it from burning. What I really love about this recipe is that it’s fairly easy to keep all the ingredients in your head, and the steps are not exact science. Once you have added and reduced the 3 cups of water/broth, you pretty much just keeping adding liquid and stirring and reducing and adding liquid and stirring until the risotto tastes and feels just right in your mouth. After making this recipe just one time, I’m pretty confident I could recreate the final product without having the recipe around to follow.
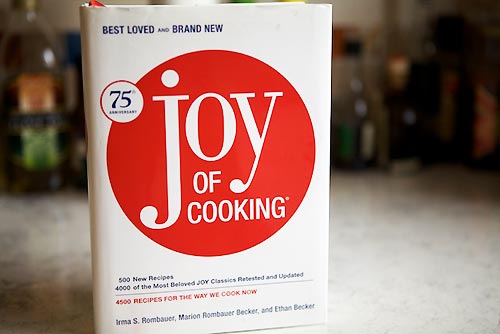
In terms of classic tried and true cookbooks, the Joy of Cooking is right up there with the best. It’s the size of an unabridged encyclopedia and carries about the same amount of information. Recipe’s from scallop ceviche to saltwater taffy and everything in between, culinary techniques, chemistry lessons, cocktail notes, conversion tables, and cooking temperatures are just a small sampling of what you can find in this 1130 page tome. Whenever I have a particular idea in mind of something I want to try making, I can rely on two things: 1) The Joy of Cooking will have some version of that recipe I’m looking for and 2) That recipe will be a solid interpretation of the dish at hand, with good reasoning as to why certain steps are taken or ingredients used. The JOC recipe might not always be identical to the final version I decide that I like, but it’s always a good start.
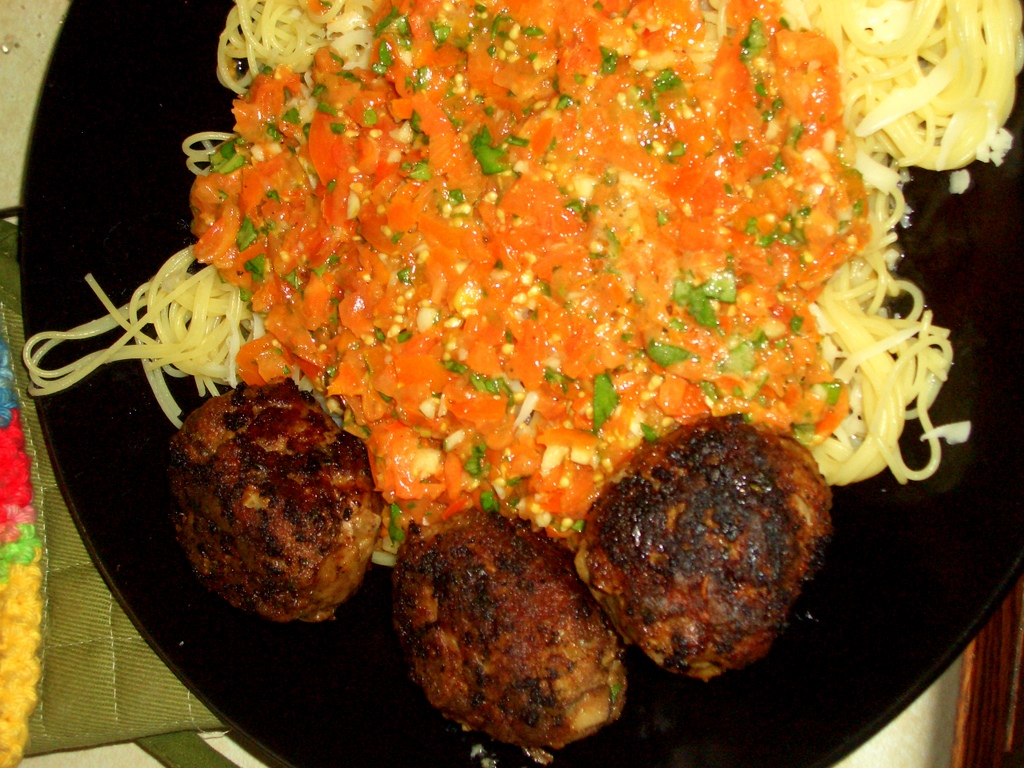
To start what I hope becomes another recurring series on this foodiest of blogs, I’m sharing the Italian Meatball recipe from the Joy of Cooking. Ingredients are as follows:
- 1lb ground beef
- 2-3 cloves of garlic, minced
- ½ cup chopped parsley
- ½ cup grated Parmesan
- 1 medium onion, finely chopped
- ½ cup fresh breadcrumbs
- 1 large egg, beaten
- 3 tablespoons dry red wine (optional)
- 2 tablespoons tomato paste
- 1 teaspoon salt
- ½ teaspoon black pepper
- ½ teaspoon dried oregano (I substituted 1/2 tsp of minced fresh oregano and 1/2 tsp of minced fresh sage. In hindsight, I probably should have doubled those amounts)
I’d like to introduce you to a friend named Tyler. I met Tyler roundabout 6 or 7 years ago through a friend of a friend, and we ended up living in a house together while I was in college. Tyler and I are the ultimate example of diametrically opposed forces in the
kitchen. Whereas I ususally know what I want a dish to look and taste like before I start cooking it, Tyler is very much a person who is enthralled with the process of cooking itself. He will start out with the ingredients at hand, but usuaully does not know what the food will look or taste like until its done. To the best of my knowledge, this only lead to inedible food on one occasion, when he added a tablespoon or two of cumin to a noodly-cream sauce dish… we shall not speak of that horror.
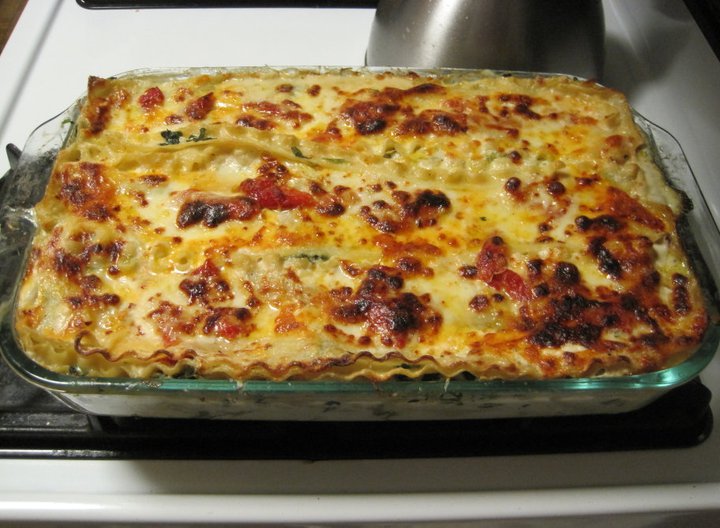
Since we were the biggest cooks in house, we invariably ended up collaborating on meals on some nights and our contrasting cooking styles always made for interesting meals. The entire process was a struggle between us; Tyler would make a suggestion and I would resist because I already knew what I wanted. I would make a suggestion and Tyler would resist because he wanted to see the outcome of what he was doing. We didn’t always listen to each other, but there was usually a shared commitment to accept some input, and typically the meals we created ended up better than either of us could have produced on our own. This night was no different. Tyler sent me a text saying he had spent all day roasting red peppers and was planning on making lasagna that night. How could I resist?
Unfortunately, I don’t have an exact ingredient list for you because Tyler bought most of the groceries and (of course) did not have a recipe while doing it. Here’s what I think we had though:
- 2 boxes of lasagna noodles (one was regular pasta, the other was whole wheat. We preferred the latter.)
- 2 jars of Bertolli alfredo sauce
- 2 frozen chicken breasts
- 1lb of venison steak/cutlets
- 1-2 lbs of mushrooms
- 2 cups of roasted red peppers, cut into strips (if you have homemade, god bless you)
- 20 oz. frozen spinach, thawed (I normally dont like frozen spinach, this turned out quite well.)
- 2 logs of fresh mozzarella
- 1 tub of ricotta cheese
- Wedge of parmasean and/or asiago
- Fresh basil
- Red pepper flakes
We pre-prepared everything so we could just bake the lasagnas long enough to melt everything together and not have to worry about uncooked meat. The chicken breasts were boiled in a heavily seasoned (salt, pepper, garlic powder, sage, rosemary and thyme) pot of water, then diced into small peices. After that, we tossed them with the liquid left in the jar from the roasted peppers to add another layer of flavor. Note: while the boiling liquid smelled fantastic, I don’t think enough of the flavor trasnferred. You might be better off brining and roasting them. Alternately, you could use chicken thighs which usually have more flavor. The venison was already sliced into medallions, about 1/4 to 3/8 inch thick. We patted them dry, seasoned with salt, pepper, garlic & herb, and chili powder, then seared them in a very hot pan with a teaspoon or two of canola oil. By the time they are well browned on both sides, they should be done. Then cut them into matchstick peices so they can be sprinkled throughout the layers. Lastly, the mushrooms were cooked with some butter, garlic and seasonings. Just make sure you get a good amount of the moisture out so it doesn’t come out in the lasagna itself. One thing we forgot to do: the recipe we were loosely consulting suggested mixing the ricotta with an egg, then mixing the spinach into that. I think that process would have helped hold the lasagna together a bit better when it came time to serve.
Put all the various ingredients into some bowls so you can put together the lasagna via assembly line. First layer was alfredo sauce and a small amount of spinach. Then noodles. The next layer was meat(one lasagna was chicken and the other was venison), spinach, mozz, roasted peppers, shrooms. Then noodles. Then sauce, ricotta, and spinach. Then noodles. Then meat, spinach, mozz, roasted peppers, shrooms. Maybe a littlle sauce too (this was hardly a scientific process). Then noodles. Then sauce, ricotta, spinach, red pepper flakes, and some chiffonaded basil, then some shredded parm/asiago. Then the last layer of noodles. Top layer is some sauce, spinach, peppers, and a larger amount of mozz than you had been using. I really tried to cover the top layer in mozz so it would broil up well, then topped with some more shredded parm. Spray some aluminum foil with cooking oil, then cover the lasagna with it. Throw the lasagna in an oven preheated to 350 degrees. After 15 minutes, remove the aluminum foil and let it go for another 25 minutes in the oven. Depending on how crusty and brown you like the cheese, you may have to finish it under the broiler, which is what we did. Let it sit for 10 minutes, then furiously devour it.
I never liked Italian food growing up, which caused friction with my brother Allen who I think would have been content to eat Spaghetti every single night. As my palate has matured I have realize that I didn’t dislike Italian food, I disliked poor impersonations of Italian food. What I mean by that is mushy spaghetti, topped with canned tomato sauce, and maybe some overcooked and unseasoned ground beef. Yuck
. But properly done Italian food? Fantastic. I especially like the recipes which bubble away for hours, letting the flavors mingle and making your kitchen smell so damn good that you can’t resist stealing some of the food before it’s done.
The basis of this recipe came from my America’s Test Kitchen cookbook. Btw, if you are unaware of the ATK cookbooks/TV show or Cook’s Illustrated magazine, you should really check them out. It’s a wonderful organization. They test endless variations of each recipe they publish to find the very best methods, and they also test kitchen equipment and common ingredients to tell you the best ones to buy. Anyways, in this particular instance I thought their recipe was a bit too simple, so I added a few things to make it more interesting. You will need:
- 1.5-2 lbs of beef short ribs or pork bone-in country ribs
- 1 tbsp light olive oil
- 1 onion, diced
- 1 shallot, thinly sliced
- 1/2 cup dry red wine
- 28 oz. of canned diced tomatoes (look for Muir Glen Organic. They won the ATK taste test of canned diced tomatoes.)
- 1 tbsp fresh oregano, minced
- 3-4 cloves garlic, peeled and lightly crushed (you want these left whole, so you can take them out after stewing)
- 1 bay leaf
- salt and pepper
- 1 lb of pasta (the book recommends tubular pasta like a rigatoni or penne)
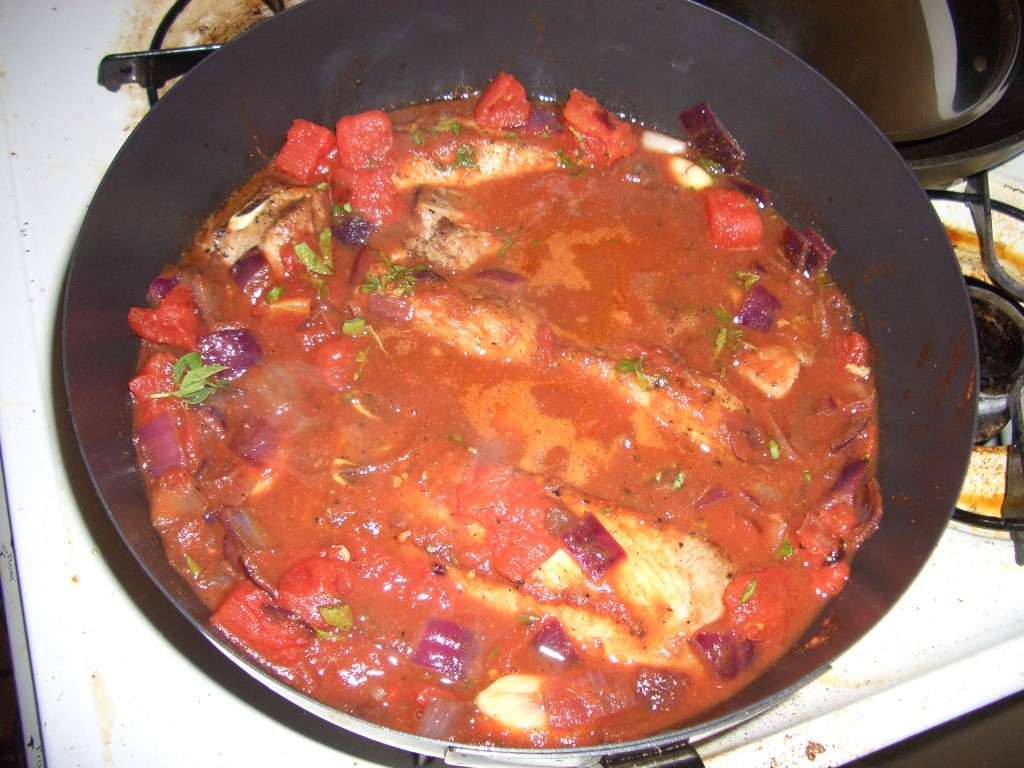
Pat the ribs dry, then season with salt and pepper. Heat the oil in a 12 inch skillet over medium-high heat until just smoking. Brown the ribs, about 10 minutes, then transfer to a plate. Pour off all but 1 teaspoon of the fat in the skillet (I poured it all out and replaced it with some bacon fat from the fridge. I think it added a nice smoky background flavor.) Add the onion and shallot to the skillet and cook over medium heat until softened, about 5 minutes. Stir in the wine and simmer, scraping up any browned bits, until the wine has reduced to a glaze, about 2 minutes.
This is another spot where I differed from the recipe, either because I didn’t have the right size pan or because I leaned more towards the 2lb range in terms of meat. Either way, instead of returning the meat to the skillet, I transferred the meat and wine/aromatics to a large pot, about the size of a dutch oven. Â Don’t forget to add any juices which might have come out from the meat while it was resting; that’s good flavor. Then add in the tomatoes and juice, plus the garlic cloves, bay leaf and oregano. Bring the sauce to a boil, then reduce the heat to low, cover and simmer gently for 1.5 to 2 hours, turning the ribs occasionally until the meat is tender and falling apart. That is the real test of done-ness, when I made this I let it go for 2.5 hours and the meat was shreddable but still just a bit tougher than I would have liked.
Using a slotted spoon, remove the meat from the sauce and let cool. Shred the meat and discard the bones and any chunks of fat you find. You’ll also want to remove the garlic cloves and bay leaf. Return the shredded meat to the sauce and continue to simmer over medium heat for another 5 minutes or so to re-heat the ribs and thicken the sauce a bit. Season with salt and pepper to taste. When tossing with pasta, add some of the pasta water if the sauce needs to be thinned out a bit. For a garnish, I shredded some parmesan and sprinkled some chiffonaded basil leaves, but really this can stand on its own. One last note: to get a gentle simmer (1-2 bubbles per second as the book describes it) I had to turn my stove down as low as it could go, until the flame was almost turned off. So it might take some fiddling to get the heat just right.
Some of you Manhattanites are believers. Others have heard the stories and aren’t sure what to think. Well I’m here to tell you the rumors are true: amazing food can be found just a subway ride outside of the island of Manhattan.
Down in South Park Slope, just off the N train, is a gem of pizza places. Toby’s Public House manages to fit the best of a pub, a sports bar, and small Italian restaurant all into one place. When I first moved to the Slope at the beginning of the school year, a neighbor told me I had to go for the great beer selection. Upon arrival, I found a beer list that, while not vast, is varied and regularly updated and includes some uncommon brews.
 Toby’s is in three story brick building with tall narrow windows and heavy wooden shudders. The “faded†painted name on the brick exterior above the door suggests a timeless establishment, despite its 2008 opening. The old style character continues as you walk through the door with dark woods, exposed brick, and a hammered tin ceiling. Once inside, you find yourself looking down the length of the one room bar at the large bell-shaped wood fired brick oven that is truly at the heart of Toby’s.
Out of the wood burning oven come some of the best pizza I’ve found in New York.  I know that’s a huge statement, but Toby’s backs me up. (And for the Minnesotans out there: this pie beats Punch Pizza.) The pizzas are seemingly Naples-styled (or at least influenced, given it’s a little larger than a true Neapolitan pizza), in that the high temperature of the wood burning oven yields a wonderful crispy thin crust. My biggest disappointment with this style of pizza at too many New York restaurants is a soggy middle. A good Neapolitan pizza should have a crispy under crust from the edge to the center—end of story—and Toby’s delivers, without fear of piling on amazing topping combinations.
The only drawback to Toby’s is that, despite its Brooklyn location, it has Manhattan prices. Pizza prices range from $13 for the classic margherita to $18 for the tartufata (complete with black truffle cream sauce, mozzarella, crimini mushrooms, prosciutto cotto, truffle oil). One of Toby’s pizzas can satisfy a single ravenous person or be split between two less eager diners. The real danger comes off the pizza menu. Though tempting and, yes, delicious, the antipasti can quickly make your bill spiral out of control. If you venture off the pizza menu, mussels in a spicy marinara sauce (on the list to be made cheaply at home), served with focaccia to soak up the extra sauce, is sure to be a hit.
A favorable departure from the ol’time feel of Toby’s are the three flat screen TVs playing everything from soccer to college football. I can’t think of a more tempting bar at which to watch “the game.â€Â And though the football season may be over, with its outdoor patio seating, Toby’s is sure to be a favorite summertime destination.
Toby’s Public House
686 6th Avenue
Brooklyn, NY 11215
www.TobysPublicHouse.com
On what may well be my last first day of class for the rest of my life (lets not think about that LLM right now) it was time to grab lunch with the A Team, aka the old crew from Section A in first semester of law.   After an extensive group gchat the place was picked: Piola.
I’ve walked by Piola hundreds of times–it’s near school and on the way to the gym and what used to be one of my favorite bars (the Reservoir dropped like a stone in my rankings when they got rid of their Big Buck machine). Piola always looked good from the outside, signs luring me with descriptions of tasty pizza, pasta and wine. I was excited to finally make it through the door.
As the five of us sat at the table we found a tasty looking list of lunch specials, including pizza, pastas, and salads. A quick scan of the regular menu revealed even more interesting dishes, but also told me that we were getting a good deal (probably $3-$5 off each entree).
I ordered the “Born in USA” pizza (which featured chicken, spicy salami, mushrooms and onions), Meg ordered gnocchi in a bolognese sauce, Nick ordered the “Pisa pizza” (ham), Debbie ordered a cheese pizza with diced tomatoes, and Rebbecca ordered a cheese pizza with tomato slices and dried oregano.
From where we were sitting we could see a beautiful wood burning oven.  I know I saw them put the pizzas in the oven.  But Piola made a mistake that all to many places make–they either have the temperature too low in the oven or don’t keep the pizzas in for long enough.  If there is a wood burning oven, the bottom of the pizza should be nice and crispy, NOT SOGGY, when it lands in front of me. The toppings on my Born in USA were fine, though the chicken was dry and nearly flavorless.
I tried a slice of Nick’s pizza.  It had the same soggy crust problem, but the ham on the pizza was a good combination.
Rebbecca’s pizza, which I didn’t try, looked like it had been bombed with oregano–far more than a dusting. She found it to be way too much and had to pull off the sliced tomatoes in order to make the pizza edible.
Debbie was very satisfied with her pizza, but then again, if Piola couldn’t handle making a cheese pizza they probably would be out of business by now.
Meg’s pasta was okay.  Though the sauce was entirely uninspired, just meat and some tomato. No real flavoring, not even any onion. The gnocchi itself was good, a nice texture in that it wasn’t too hard or too soft. But, all in all, a very bland plate.
I wouldn’t avoid this place like the plague, maybe it was just a bad day, but I’m also not in a rush to check it out again.
Piola
48 E. 12th St.
New York, NY 10003
The following is adapted from a restaurant review first publish in the Cardozo Jurist.
Let me start by saying that I don’t like writing negative reviews. They seem kind of boring. I would much rather write article about places that are great to eat at. But these were some new places I had high hopes for and well I felt the need to talk about them falling shorty.
Over the last summer two new restaurants have sprung up near Cardozo, my fine law school, on the corner of University and 13th Street: Vapiano, a stylish pizza and pasta bar and its next door neighbor Nanoosh, a sleek Mediterranean hummus bar. After eating at each a few times, my mind settled on a number of words that describe the food at each restaurant: adequate, all right, fine, and OK. My issue is that both restaurants are chains that put fashion above substance and quality.
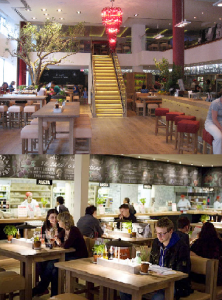 Vapiano occupies a large space and sports a modern design and lounge-like feel. It has a novel payment system where you are given a card when you walk in. You swipe the card when you get food at cafeteria-style stations, and the card records your purchases. Upon leaving, you give your card back to the hostess or cashier at the door, and you’re given the total bill to pay.
Ordering my first pizza at Vapiano, I had high hopes. The pizzaiolo (Italian for the guy that cooks the pizza) makes the pizza in front of you and puts it in the oven. The pizza even looked great once it was on my plate. But the problem was in the crust; it just didn’t have the crispy, almost burnt crust an Italian style pizza should have. It made a fine flatbread, but an uninspired pizza. The other pizzas I tried during that visit and subsequent visits shared the same crust failures.
After trying the pizza, I turned my attention to the pasta bar. I ordered the Pesto e Spinaci pasta. Given the name, I was expecting a fresh pesto dish with spinach. What I got, however, was an overly creamy, heavy dish that had a hint of pesto. Not a bad dish, but not up to the potential of the fresh ingredients the server at the pasta bar had at his disposal.
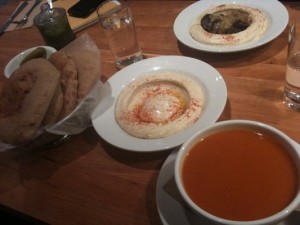 Nanoosh is a smaller space that has a chic atmosphere and décor that reminds me of a spa. The menu is, not surprisingly, heavy on the hummus but also has Mediterranean influenced salads and wraps. The hummus comes in either plain or tahini (sesame seed paste) and can be ordered with a few toppings. The hummus’ flavor was par for the course, but the texture was too smooth—overly creamy. The Lebane wrap was a solid combination of Mediterranean salad with a bit of cheese.
In all, I may have gone into both restaurants with excessive expectations. Both offer fine food at a decent value. I won’t avoid going back to these places, but I won’t go out of my way to return to them, either.
————————————————
Vapiano
113 University Place (at 13th Street)
New York, NY, 10003
Nanoosh
111 University Place (between 12th & 13th Streets)
New York, NY 10003
Well, summers almost here so it seems like a good time to start gathering your recipes for the fresh veggies of summer. Wait… what’s that you say? Summer’s almost GONE?! Damn it, this happens every year. So what are you waiting for? Grab your shoes, keys and a $20 bill and get yourself to the nearest farmers market! There happens to be one in downtown Minneapolis about a block away from where I work, so every Thursday is a new culinary adventure.
I absolutely love the farmer’s market; it reminds me of my Dad’s garden when I was growing up. Just a huge bounty of everything I could ever want: squash, cucumbers, green and red peppers, jalapenos, cilantro, sweet corn, asparagus, heirloom tomatoes, the list goes on and on. And then there are the fake vendors who, should be banned outright from ever stepping foot in a farmer’s market. You can identify them by the fact that their fruit comes in the same packaging you see in the super-markets, and they have produce which is ridiculously out of place for the season and geographic location (note to self: pineapples are not grown in Minnesota). I see no reason why my money should go to some schmuck who got a sweetheart deal from a produce distributor rather than the local farmers who have put in countless hours of backbreaking labor in order to bring their food to the market.
Anyways, this week’s haul included a few bunches of basil, some garlic, yellow squash and bag of Wisconsin cheese curds which didn’t even make it back to the office with me, they were so squeaky fresh and delicious. But for this post we’re going to focus on the basil and garlic because with those, and just 3 more ingredients, you can make a world class pesto.
You will need:
- 2 packed cups of basil leaves
- 1/2  cup grated/shredded parmesan cheese (buy a wedge of the good stuff, it’s worth it)
- ½ cup extra virgin olive oil
- 1/3 cup pine nuts
- 3-5 cloves of garlic depending on your taste for it.
- Salt and pepper to taste.
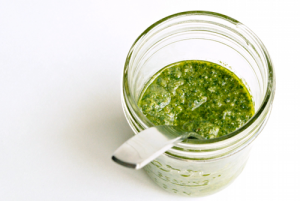
Pack the basil into a food processor, along with the cheese, pine nuts and the garlic which you have peeled and quartered. Add good drizzle of the olive oil, and pulse it about 5 times with the processor. You could probably do this by hand, but who the hell has time for something like that? After pulsing, gradually add the remainder of the olive oil while keeping the processor running.  Don’t puree the hell out of it though; it shouldn’t be a homogenous paste. Add a pinch of salt and a few grinds of pepper, and you’re done! I guarantee that after one taste of this, you will never again buy store bought pesto.
Transfer the pesto to a jar and pour a thin layer of olive oil over the top to prevent oxidation.
Just a few suggestions for enjoying your pesto, because you will have a fair amount of it: mix it with fresh cooked pasta and any grilled meat or fish you like, spread it on slices of artisan bread and top with mozzarella before broiling, make a pan sauce with pesto, creams and white wine before adding sautéed mushrooms to go with chicken or pork chops, throw together some halved cherry tomatoes and small fresh mozzarella balls with farfalle pasta for a caprese pasta salad. Be creative with it!
