Posts Tagged ‘Rice’
This was the first time I ever tried to make risotto, probably because I have always heard that it was a pain to constantly have to stir it for a ~30 minute cook time. That level of attention is usually not conducive to making other courses to go along with dinner. Silly me, I should have known that America’s Test Kitchen would have figured out a more user friendly version of the recipe. To make this gooey, cheesy, white winey goodness, you will need:
- 3.5 cups of low-sodium chicken broth
- 3 cups water
- 6 tablespoons butter
- 1 onion, minced
- Salt & pepper
- 2 cups Arborio Rice
- 1 cup dry white wine
- 2 oz Parmesan cheese, grated (1 cup)
- 2 cloves garlic, minced
- fresh thyme
- 1 lb cremini mushrooms, trimmed & cut into small wedges
- 1/3 oz of dried porcini mushrooms (optional)
Bring the broth and water to a boil over medium-high heat. Cover and keep warm on the lowest possible stove setting. Â Melt 4 tablespoons of the butter in a large saucepan over medium heat, add the onion and 1/2 teaspoon salt and cook until lightly browned, about 9 minutes. The original recipe also calls for you to stir in 1/3 oz of dried porcini mushrooms, “thoroughly rinsed and minced”, to the onion mixture in this step. I forgot this step, despite scouring the grocery store for dried porcini mushrooms that day, and really didn’t think the recipe was lacking in any way. I would try the dried mushrooms if you want, but don’t stress yourself out looking for this ingredient. I kind of like the way it turned out where the mushroom flavor was in the mushrooms themselves and sort of contrasted with the brothy-wine flavor in the rice.
At roughly the same time that you start cooking the onion, melt the other 2 tablespoons of butter in a large skillet over medium high heat and add the mushrooms and 1/2 teaspoon salt. Cook until the mushrooms are browned, about 10 minutes. Stir in the minced garlic and about 1/2 teaspoon of minced fresh thyme. The garlic and herbs really only need to cook until they are fragrant, about 15 seconds or so. Finally, transfer the mushrooms to an oven safe container, cover them, and keep them warm in a 200 degree oven until the risotto is basically done. One final note about the mushroom cookery: you want these to brown, not steam. If too much liquid comes out of the mushrooms while cooking, enough liquid to cover the bottom of the pan, drain that off into the broth/water mixture you have going on the stove. It will add some good mushroom flavor to the final product.
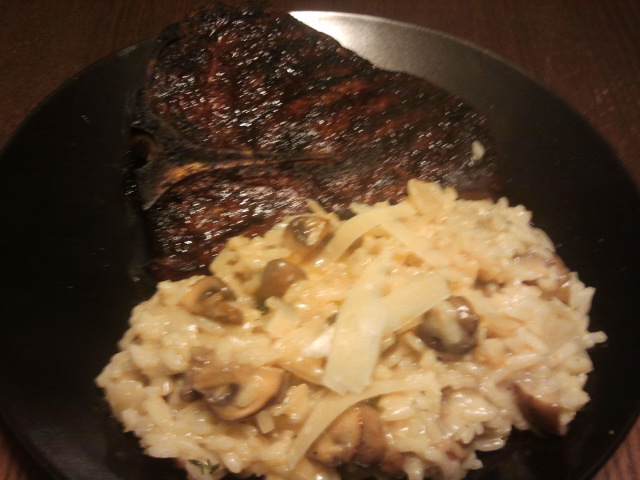
Stir the rice into the onions and cook until the edges of the grains turn translucent which takes about 3 minutes. Add the wine and cook, stirring frequently, until the wine is completely absorbed. Then add 3 cups of the warm broth mixture and bring to a simmer. Cook, stirring occasionally, until all the liquid has been absorbed. It will be very helpful for this recipe to have a ladle on hand so you don’t have to pour hot liquid from the pot into a measuring cup and then from the measuring cup into the rice. Continue to cook the rice, stirring in 1/2 cup of the broth every few minutes, allowing each addition of broth to be absorbed completely before adding more. Continue this process until the rice is cooked through but still somewhat firm in the center, about 11 minutes. Stir in the mushrooms and the parmesan, season with salt and pepper to taste. As always, buy real parmesan wedges and grate it yourself for the best result. Luckily, my brother Danny gave me a two pound wedge of parmesan for Christmas, so this recipe was a perfect way to use part of it.Serve the risotto next to a beautiful peice of grilled meat, and garnish with some parmesan shavings and maybe some minced flat leaf parsley or chives.
The final dish was everything I hoped it would be. The rice was soft but firm, the broth and wine combined to make some great layers of flavor, and the parmesan made everything that much more creamy and salty. By adding half of the liquid immediately and allowing it to cook down for a while, you really cut down on the amount of time during which you have to devote lots of effort and attention to the risotto to keep it from burning. What I really love about this recipe is that it’s fairly easy to keep all the ingredients in your head, and the steps are not exact science. Once you have added and reduced the 3 cups of water/broth, you pretty much just keeping adding liquid and stirring and reducing and adding liquid and stirring until the risotto tastes and feels just right in your mouth. After making this recipe just one time, I’m pretty confident I could recreate the final product without having the recipe around to follow.


