Posts Tagged ‘Pasta’
 I seem to only write about cooking successes here, filing the failures away as improvement projects to be blogged about when I figure out how to do things right.  In my defense I don’t have many out right failures.  That is to say it’s rare that I’ll cook something my roomies are unwilling to eat or that I’m unwilling to eat for lunch in the following days.  My Sunday pasta making endeavor falls into this minor failure category.
Now, when I say pasta making, I don’t mean making a pasta sauce and boiling some boxed pasta. Â I mean making the pasta myself from flour, eggs, and salt. Â All without the benefit of a pasta maker.
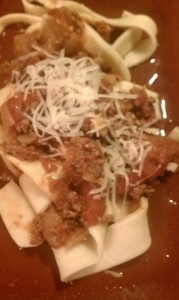
All around this project was a bit of a disaster.  The first step involves making a mound of flour, with a hole in the middle that you fill with eggs into which you slowly incorporate the flour.  In theory.  My eggs overflowed their flour bowl; making the mixing process messy and awkward.  Next, I learned the value of a pasta maker.  Or, more accurately, I learned the pain of not having a pasta maker.  The pasta dough was elastic and fought against my efforts with the rolling pin.  I rolled the dough to what seemed like an adequate thinness and then cut the dough (using a pizza cutter) to what seemed like an adequate width. After dropping the raw pasta in its pot of boiling water and watching it expand, I realized I had made the pasta broth overly thick and wide.
Served with a Bolognese sauce, the flavor of the pasta seemed right.  But there was just too much of it. This stuff is dense.  Eating it required cutting a small piece and dredging it through the sauce.  Not a complete failure, but the stuff from the box would have been better.
Rather than sweeping this minor disappointment under the rug, I’m throwing it out as my first step in pasta making.  A pasta machine isn’t in my budget at the moment, so it will be more adventures in rolling pins for the foreseeable future.
Update: I re-heated this pasta for dinner 24 hours after storing it in the fridge covered in the Bolognese sauce.  The pasta seemed less dense and more approachable.  Actually pretty awesome.  I think I’m track here.  Once I figure out how to make a thinner noodle, I see some good eating in my future.
As I mentioned earlier, my roomie Tyler is something of a gardener. This year he grew two kinds of tomatoes, several kinds of cucumbers, pumpkins, butternut squash, cabbage, broccoli, kale, chard, lettuce, eggplant, 4 kinds of peppers, brussel sprouts, and watermelon, plus the herb garden. Well, seeing as how we live in the tundra, we had to pick pretty much everything we could last Wednesday because it was forecasted to freeze overnight. Lemme
just run that one by you one more time. Last Wednesday was September 14. The last day of summer is September 22nd. And it was supposed to freeze. [Editors note: Please ignore the dating issue above resulting from the delay in posting this.]
Anyways, we suddenly had a massive amount of veggies to do something with. Tyler will be stewing the heirloom tomatoes, and he made some pickled pumpkin which I think will turn out to be pretty good. I took all the cherry tomatoes to make this quick and easy tomato sauce. My favorite part about this recipe is how fast you get a rich, full flavored sauce compared to the normal methods which require an hour or more of stewing.
Combine 4 cups of halved cherry tomatoes with 2 tbsp of extra virgin olive oil, 1 tsp of balsamic vinegar, 5 cloves of minced garlic, 1 pinch of red pepper flakes, 1 tbsp of minced fresh oregano and a sprinkling of salt and pepper. Mix that all together and then spread it out on a sheet pan lined with tin foil, bake at 350 for 20-30 minutes, until the tomatoes start to get a bit of browning. Once the tomatoes are done, throw them in a food processor along with some fresh basil leaves, 1/4-1/2 cup of shredded parmesean, 2 tbsp of EVOO, and 1/2 tsp of red wine vinegar. Process that all together until it’s smooth, and you’re done. Although you don’t have to be done, you could add the sauce back to a pan full of spicy italian sausage. Nothing wrong with that.
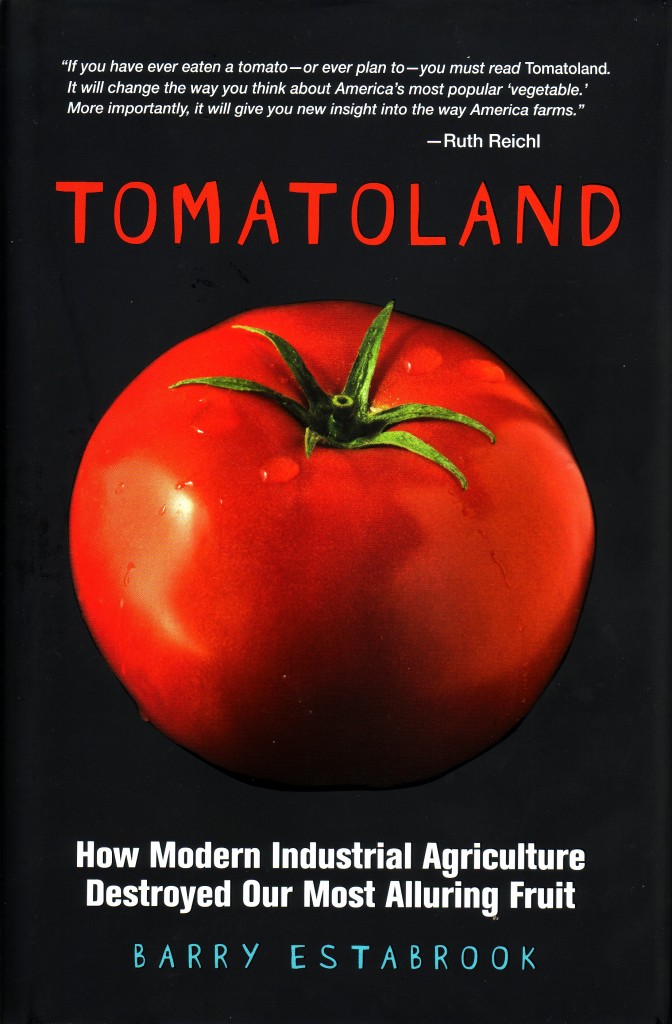
Now a word about the tomatoes you use: I don’t think you would need to use cherry tomatoes for this recipe to be good, we just happened to have a bucket of cherry tomatoes which needed to be used up. But I do think that, in general, the cherry tomatoes you find in grocery stores tend to be more flavorful than the full size tomatoes, unless your grocery store is selling heirloom tomatoes. In a perfect world, you would grow your own tomatoes. I was listening to The Splendid Table the other week and the guest of the week spent about 10 minutes convincing me that Florida tomatoes (aka the vast majority of tomatoes you find in North America all winter long) are just about the most evil fruit to ever exist. Because of the humid environment and soil which is almost solely composed of sand, it takes 7-8 times the amount of fertilizer, fungicide, herbicide and pesticide to grow tomatoes in Florida as compared to someplace like California. There is also a long history of using slave labor to harvest tomatoes in Florida. If you want more information (and really, you should check out this stuff) you can download that episode of The Splendid Table (August 20th episode), or go check out the writings of Barry Estabrook in his book Tomatoland.
It’s been a while, a long while, since I last posted. A difficult break-up, followed by finals, followed by studying for the bar kept me out of the kitchen and off the blog. The last few months have been arduous.
I sat for the last day of the bar exam on July 27 and on the 28th began my return to the real world.  But, when I tried to get back on ECL on the 29th I found an unfortunate “Fatal Error†message. After only a few hours of work behind the scenes I was able to break the blog even more—no contact with the server. But today, I final got everything back up and running.  I had no idea when I started this thing that I would learn so much about computers.
Last Saturday, for the first Saturday in recent memory, I woke-up and didn’t open a bar study book. Instead I grabbed an ice coffee and made the mile and a half walk to the farmers market for the first time this summer. I went from stand to stand looking at all the green, red, yellow, and orange delights. But I had a mission: caprese and pesto.
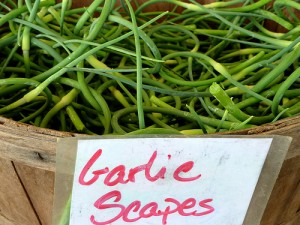
I found a huge plant of basil for only $3. I say plant because it really was still a plant with roots and all. It kills me to think about how much I’ve paid in winter for a handful of sorry looking basil from the supermarket. For the tomatoes in the caprese I got some bright red cherry tomatoes.  Other random finds included some garlic scapes (long shoots that grow out of the head of the garlic) and a head of broccoli. [My apologies for the details on the mundane. What can I say? I’m excited.]
On the way home I picked-up pine nuts from Russo’s Mozzarella and Pasta up the street from me. On the walk home from Russo’s I realized I had forgotten the cheese! So I stopped in a Union Market and picked-up some Parmigiano Reggiano and some amazing mozzarella.
Now when I say this was amazing mozzarella I’m not doing it justice. I didn’t realize when I bought it, but I had gotten Burrata. Burrata is basically cream filled mozzarella. It’s rich, silky, and decadent—like no other cheese I’ve had in my life. Outside is a layer of the familiar fresh mozzarella, inside is a semi-solid pudding like structure. I started cutting the fist size balls to make caprese but quickly turned to tearing with my hands. I then cut the cherry tomatoes in half and cut about a half dozen basil leaves into strips. After mixing it all together with some good olive oil and some coarse sea salt I enjoyed an incredible afternoon snack.
But I can’t forget the pesto. I used the following recipe as a template (it’s almost identical to the one in Loren’s pesto post), but improved it with two more cloves of garlic and about another cup of basil.  Also, make sure you buy actual Parmesan Reggiano and some decent olive oil–the extra few bucks are worth it and can be spread over several batches.
Ingredients:
 2 3 cups fresh basil leaves, packed  [going from 2 to 3 cups made it less runny, which I personally like]- 1/2 cup freshly grated Parmesan Reggiano
- 1/2 cup extra virgin olive oil
- 1/3 cup pine nuts
 3 6-7 medium sized garlic cloves, minced [I needed more garlic, all the vampires in pop-culture today have me worried]- Salt to taste
Instructions:  First, combine the basil with the pine nuts, pulse a few times in a food processor.  Then, add the garlic, pulse a few times more. Next you’re supposed to slowly add the olive oil in a constant stream while the food processor is on.  I only have a miniature Cuisinart Chopper and Grinder. The lid doesn’t have an opening so I had to pulse, add oil, pulse, and oil…. you get the idea. It was a little slower going, but worked great.  Scrape down the sides of the food processor with a rubber spatula and add the grated cheese and pulse again until blended.  Finally, hit it with a pinch of salt to taste and give it one last pulse. When you’re done the whole room will have a wonderful pesto smell and you’ll have enough pesto for a few people.
Oh, and the pesto keeps in the fridge for a few days or the freezer forever—so you don’t need to eat it all right away. This is a good thing, because I made a return to the farmers market yesterday and just made a giant batch.
It’s feels good to be cooking and typing some non-law study words again. There isn’t a lot of summer left, but I plan to make the most of it!  Sometime soon I’m coming back from the farmers market with squash blossoms.
I’d like to introduce you to a friend named Tyler. I met Tyler roundabout 6 or 7 years ago through a friend of a friend, and we ended up living in a house together while I was in college. Tyler and I are the ultimate example of diametrically opposed forces in the
kitchen. Whereas I ususally know what I want a dish to look and taste like before I start cooking it, Tyler is very much a person who is enthralled with the process of cooking itself. He will start out with the ingredients at hand, but usuaully does not know what the food will look or taste like until its done. To the best of my knowledge, this only lead to inedible food on one occasion, when he added a tablespoon or two of cumin to a noodly-cream sauce dish… we shall not speak of that horror.
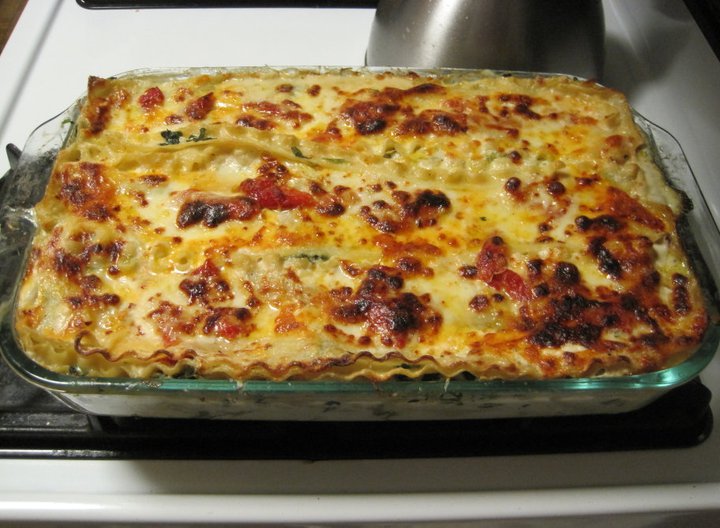
Since we were the biggest cooks in house, we invariably ended up collaborating on meals on some nights and our contrasting cooking styles always made for interesting meals. The entire process was a struggle between us; Tyler would make a suggestion and I would resist because I already knew what I wanted. I would make a suggestion and Tyler would resist because he wanted to see the outcome of what he was doing. We didn’t always listen to each other, but there was usually a shared commitment to accept some input, and typically the meals we created ended up better than either of us could have produced on our own. This night was no different. Tyler sent me a text saying he had spent all day roasting red peppers and was planning on making lasagna that night. How could I resist?
Unfortunately, I don’t have an exact ingredient list for you because Tyler bought most of the groceries and (of course) did not have a recipe while doing it. Here’s what I think we had though:
- 2 boxes of lasagna noodles (one was regular pasta, the other was whole wheat. We preferred the latter.)
- 2 jars of Bertolli alfredo sauce
- 2 frozen chicken breasts
- 1lb of venison steak/cutlets
- 1-2 lbs of mushrooms
- 2 cups of roasted red peppers, cut into strips (if you have homemade, god bless you)
- 20 oz. frozen spinach, thawed (I normally dont like frozen spinach, this turned out quite well.)
- 2 logs of fresh mozzarella
- 1 tub of ricotta cheese
- Wedge of parmasean and/or asiago
- Fresh basil
- Red pepper flakes
We pre-prepared everything so we could just bake the lasagnas long enough to melt everything together and not have to worry about uncooked meat. The chicken breasts were boiled in a heavily seasoned (salt, pepper, garlic powder, sage, rosemary and thyme) pot of water, then diced into small peices. After that, we tossed them with the liquid left in the jar from the roasted peppers to add another layer of flavor. Note: while the boiling liquid smelled fantastic, I don’t think enough of the flavor trasnferred. You might be better off brining and roasting them. Alternately, you could use chicken thighs which usually have more flavor. The venison was already sliced into medallions, about 1/4 to 3/8 inch thick. We patted them dry, seasoned with salt, pepper, garlic & herb, and chili powder, then seared them in a very hot pan with a teaspoon or two of canola oil. By the time they are well browned on both sides, they should be done. Then cut them into matchstick peices so they can be sprinkled throughout the layers. Lastly, the mushrooms were cooked with some butter, garlic and seasonings. Just make sure you get a good amount of the moisture out so it doesn’t come out in the lasagna itself. One thing we forgot to do: the recipe we were loosely consulting suggested mixing the ricotta with an egg, then mixing the spinach into that. I think that process would have helped hold the lasagna together a bit better when it came time to serve.
Put all the various ingredients into some bowls so you can put together the lasagna via assembly line. First layer was alfredo sauce and a small amount of spinach. Then noodles. The next layer was meat(one lasagna was chicken and the other was venison), spinach, mozz, roasted peppers, shrooms. Then noodles. Then sauce, ricotta, and spinach. Then noodles. Then meat, spinach, mozz, roasted peppers, shrooms. Maybe a littlle sauce too (this was hardly a scientific process). Then noodles. Then sauce, ricotta, spinach, red pepper flakes, and some chiffonaded basil, then some shredded parm/asiago. Then the last layer of noodles. Top layer is some sauce, spinach, peppers, and a larger amount of mozz than you had been using. I really tried to cover the top layer in mozz so it would broil up well, then topped with some more shredded parm. Spray some aluminum foil with cooking oil, then cover the lasagna with it. Throw the lasagna in an oven preheated to 350 degrees. After 15 minutes, remove the aluminum foil and let it go for another 25 minutes in the oven. Depending on how crusty and brown you like the cheese, you may have to finish it under the broiler, which is what we did. Let it sit for 10 minutes, then furiously devour it.
I never liked Italian food growing up, which caused friction with my brother Allen who I think would have been content to eat Spaghetti every single night. As my palate has matured I have realize that I didn’t dislike Italian food, I disliked poor impersonations of Italian food. What I mean by that is mushy spaghetti, topped with canned tomato sauce, and maybe some overcooked and unseasoned ground beef. Yuck
. But properly done Italian food? Fantastic. I especially like the recipes which bubble away for hours, letting the flavors mingle and making your kitchen smell so damn good that you can’t resist stealing some of the food before it’s done.
The basis of this recipe came from my America’s Test Kitchen cookbook. Btw, if you are unaware of the ATK cookbooks/TV show or Cook’s Illustrated magazine, you should really check them out. It’s a wonderful organization. They test endless variations of each recipe they publish to find the very best methods, and they also test kitchen equipment and common ingredients to tell you the best ones to buy. Anyways, in this particular instance I thought their recipe was a bit too simple, so I added a few things to make it more interesting. You will need:
- 1.5-2 lbs of beef short ribs or pork bone-in country ribs
- 1 tbsp light olive oil
- 1 onion, diced
- 1 shallot, thinly sliced
- 1/2 cup dry red wine
- 28 oz. of canned diced tomatoes (look for Muir Glen Organic. They won the ATK taste test of canned diced tomatoes.)
- 1 tbsp fresh oregano, minced
- 3-4 cloves garlic, peeled and lightly crushed (you want these left whole, so you can take them out after stewing)
- 1 bay leaf
- salt and pepper
- 1 lb of pasta (the book recommends tubular pasta like a rigatoni or penne)
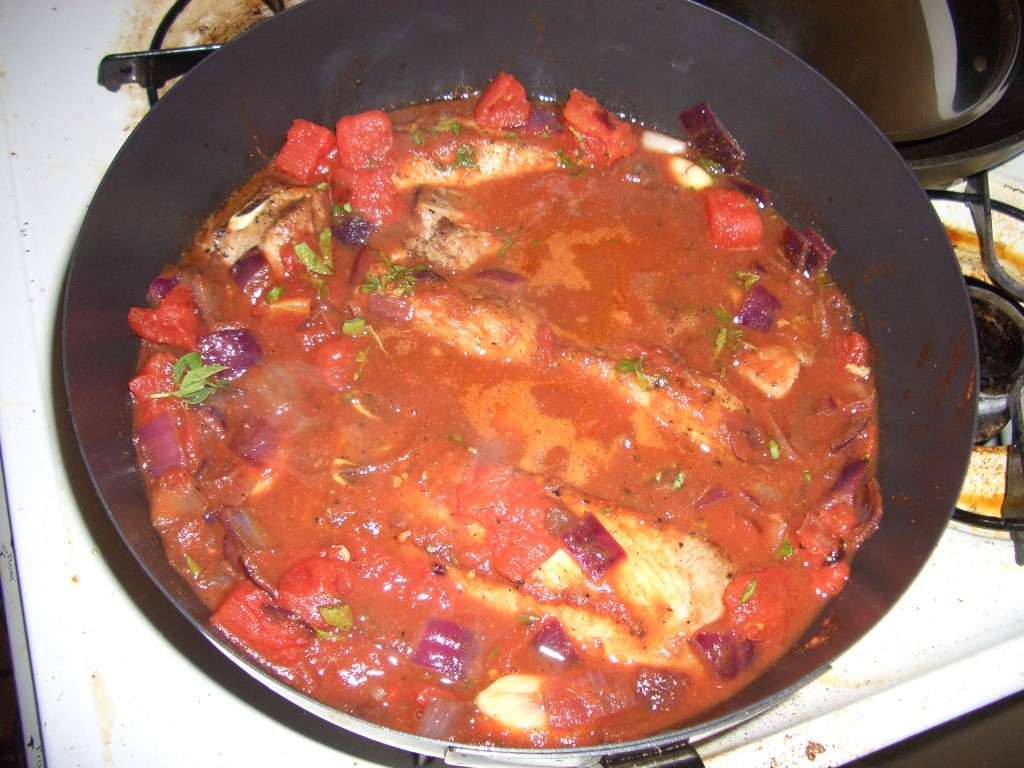
Pat the ribs dry, then season with salt and pepper. Heat the oil in a 12 inch skillet over medium-high heat until just smoking. Brown the ribs, about 10 minutes, then transfer to a plate. Pour off all but 1 teaspoon of the fat in the skillet (I poured it all out and replaced it with some bacon fat from the fridge. I think it added a nice smoky background flavor.) Add the onion and shallot to the skillet and cook over medium heat until softened, about 5 minutes. Stir in the wine and simmer, scraping up any browned bits, until the wine has reduced to a glaze, about 2 minutes.
This is another spot where I differed from the recipe, either because I didn’t have the right size pan or because I leaned more towards the 2lb range in terms of meat. Either way, instead of returning the meat to the skillet, I transferred the meat and wine/aromatics to a large pot, about the size of a dutch oven. Â Don’t forget to add any juices which might have come out from the meat while it was resting; that’s good flavor. Then add in the tomatoes and juice, plus the garlic cloves, bay leaf and oregano. Bring the sauce to a boil, then reduce the heat to low, cover and simmer gently for 1.5 to 2 hours, turning the ribs occasionally until the meat is tender and falling apart. That is the real test of done-ness, when I made this I let it go for 2.5 hours and the meat was shreddable but still just a bit tougher than I would have liked.
Using a slotted spoon, remove the meat from the sauce and let cool. Shred the meat and discard the bones and any chunks of fat you find. You’ll also want to remove the garlic cloves and bay leaf. Return the shredded meat to the sauce and continue to simmer over medium heat for another 5 minutes or so to re-heat the ribs and thicken the sauce a bit. Season with salt and pepper to taste. When tossing with pasta, add some of the pasta water if the sauce needs to be thinned out a bit. For a garnish, I shredded some parmesan and sprinkled some chiffonaded basil leaves, but really this can stand on its own. One last note: to get a gentle simmer (1-2 bubbles per second as the book describes it) I had to turn my stove down as low as it could go, until the flame was almost turned off. So it might take some fiddling to get the heat just right.
 We’ve all been there after a move—you’re moved in only in the sense that you’ve gotten boxes through the door of the new place. This last weekend, two days before the start of the school year, my new roommate Nick and I got the boxes in the door (with the help of Eat Cook Live cohorts Meg and Stu).
A few days after unpacking the bottle opener for our Brooklyn Lagers, we turned our attention to some kitchen luxuries: a pot, a skillet, a spatula, some cutlery, and a few plates and bowls. Over this first week of school with evening classes and no time for a real shopping run our cooking has been limited to pasta in some form.
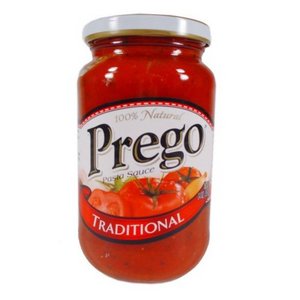
I’m actually embarrassed to put this in the cooking section. In all honesty my efforts to feed myself probably fall short of cooking. The two nights were shameful pasta and jarred sauce meals (the sauce and pasta were all that made it through the move). Finally, a morning Key Foods run and a late night Trader Joe’s run yielded wine, sausage, onion, bell peppers, and canned tomatoes. 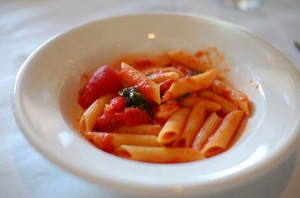 Last night’s dinner was still a meal of simple pasta, but the added 5 minutes of turning the veggies, meat, and tomatoes into a sauce while the pasta water boiled was pleasant change from the jar-o-tomato sauce.
But hope is on the horizon. With a long weekend coming up, priority one is going to be finding a grill for the back yard. Soon after delicious late-night, post-class grilling will ensue!
Well, summers almost here so it seems like a good time to start gathering your recipes for the fresh veggies of summer. Wait… what’s that you say? Summer’s almost GONE?! Damn it, this happens every year. So what are you waiting for? Grab your shoes, keys and a $20 bill and get yourself to the nearest farmers market! There happens to be one in downtown Minneapolis about a block away from where I work, so every Thursday is a new culinary adventure.
I absolutely love the farmer’s market; it reminds me of my Dad’s garden when I was growing up. Just a huge bounty of everything I could ever want: squash, cucumbers, green and red peppers, jalapenos, cilantro, sweet corn, asparagus, heirloom tomatoes, the list goes on and on. And then there are the fake vendors who, should be banned outright from ever stepping foot in a farmer’s market. You can identify them by the fact that their fruit comes in the same packaging you see in the super-markets, and they have produce which is ridiculously out of place for the season and geographic location (note to self: pineapples are not grown in Minnesota). I see no reason why my money should go to some schmuck who got a sweetheart deal from a produce distributor rather than the local farmers who have put in countless hours of backbreaking labor in order to bring their food to the market.
Anyways, this week’s haul included a few bunches of basil, some garlic, yellow squash and bag of Wisconsin cheese curds which didn’t even make it back to the office with me, they were so squeaky fresh and delicious. But for this post we’re going to focus on the basil and garlic because with those, and just 3 more ingredients, you can make a world class pesto.
You will need:
- 2 packed cups of basil leaves
- 1/2  cup grated/shredded parmesan cheese (buy a wedge of the good stuff, it’s worth it)
- ½ cup extra virgin olive oil
- 1/3 cup pine nuts
- 3-5 cloves of garlic depending on your taste for it.
- Salt and pepper to taste.
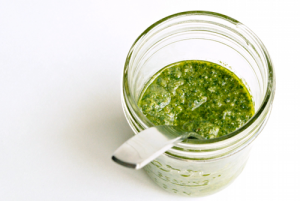
Pack the basil into a food processor, along with the cheese, pine nuts and the garlic which you have peeled and quartered. Add good drizzle of the olive oil, and pulse it about 5 times with the processor. You could probably do this by hand, but who the hell has time for something like that? After pulsing, gradually add the remainder of the olive oil while keeping the processor running.  Don’t puree the hell out of it though; it shouldn’t be a homogenous paste. Add a pinch of salt and a few grinds of pepper, and you’re done! I guarantee that after one taste of this, you will never again buy store bought pesto.
Transfer the pesto to a jar and pour a thin layer of olive oil over the top to prevent oxidation.
Just a few suggestions for enjoying your pesto, because you will have a fair amount of it: mix it with fresh cooked pasta and any grilled meat or fish you like, spread it on slices of artisan bread and top with mozzarella before broiling, make a pan sauce with pesto, creams and white wine before adding sautéed mushrooms to go with chicken or pork chops, throw together some halved cherry tomatoes and small fresh mozzarella balls with farfalle pasta for a caprese pasta salad. Be creative with it!

