Archive for February, 2011
Some of you Manhattanites are believers. Others have heard the stories and aren’t sure what to think. Well I’m here to tell you the rumors are true: amazing food can be found just a subway ride outside of the island of Manhattan.
Down in South Park Slope, just off the N train, is a gem of pizza places. Toby’s Public House manages to fit the best of a pub, a sports bar, and small Italian restaurant all into one place. When I first moved to the Slope at the beginning of the school year, a neighbor told me I had to go for the great beer selection. Upon arrival, I found a beer list that, while not vast, is varied and regularly updated and includes some uncommon brews.
 Toby’s is in three story brick building with tall narrow windows and heavy wooden shudders. The “faded†painted name on the brick exterior above the door suggests a timeless establishment, despite its 2008 opening. The old style character continues as you walk through the door with dark woods, exposed brick, and a hammered tin ceiling. Once inside, you find yourself looking down the length of the one room bar at the large bell-shaped wood fired brick oven that is truly at the heart of Toby’s.
Out of the wood burning oven come some of the best pizza I’ve found in New York.  I know that’s a huge statement, but Toby’s backs me up. (And for the Minnesotans out there: this pie beats Punch Pizza.) The pizzas are seemingly Naples-styled (or at least influenced, given it’s a little larger than a true Neapolitan pizza), in that the high temperature of the wood burning oven yields a wonderful crispy thin crust. My biggest disappointment with this style of pizza at too many New York restaurants is a soggy middle. A good Neapolitan pizza should have a crispy under crust from the edge to the center—end of story—and Toby’s delivers, without fear of piling on amazing topping combinations.
The only drawback to Toby’s is that, despite its Brooklyn location, it has Manhattan prices. Pizza prices range from $13 for the classic margherita to $18 for the tartufata (complete with black truffle cream sauce, mozzarella, crimini mushrooms, prosciutto cotto, truffle oil). One of Toby’s pizzas can satisfy a single ravenous person or be split between two less eager diners. The real danger comes off the pizza menu. Though tempting and, yes, delicious, the antipasti can quickly make your bill spiral out of control. If you venture off the pizza menu, mussels in a spicy marinara sauce (on the list to be made cheaply at home), served with focaccia to soak up the extra sauce, is sure to be a hit.
A favorable departure from the ol’time feel of Toby’s are the three flat screen TVs playing everything from soccer to college football. I can’t think of a more tempting bar at which to watch “the game.â€Â And though the football season may be over, with its outdoor patio seating, Toby’s is sure to be a favorite summertime destination.
Toby’s Public House
686 6th Avenue
Brooklyn, NY 11215
www.TobysPublicHouse.com
This post is a throw back to Valentine’s Day. Yes, it’s been almost two weeks, but the cooking Meg and I got up to was so good I have to recall to this ancient history and write about it.
 A few weeks before V-day, after grabbing brunch with friends at the Essex Cafe in the Lower East Side, we swung into the Essex Market. The Essex Market is a combination of a super market, a farmers market, and random food boutiques (including cheese!). Actually, the market probably deserves a return trip and a post of it’s own. But I digress. As we were walking around the market, passing a 1pm beer party at the butcher station, we ran across the seafood area and saw them: bags of mussels for $2.50 a pound. I think that it must be the landlocked Midwesterner in me but I just always assume that any protein coming out of the ocean is going to be expensive.  Whenever I realized how wrong I am my head starts racing with culinary schemes. But since mussels don’t live long and we already had dinner planned we decided to wait on tasty denizens of the sea.
But then, the Friday before Valentine’s, Meg went out to lunch with an old boss and saw Angry Mussels on the app menu. She didn’t try them there, but was inspired for an at-home go.
As it seems with many things, I’m wasn’t happy with name other people gave this dish and decided that I was going to start calling them the Devil’s Mussels or Devil Mussels instead of Angry Mussels. I mean mussels aren’t like bears, they can’t look angry! And, with the spicy ingredients, the Devil’s Mussels is a fitting name.
The first thing we had to do was get mussels, and finding them at Whole Foods for $5 for a 2 pound bag we just had to get two of the 2 pound bags. That’s right, 4 pounds of mussels for two people. Bring it on!
The next step is cooking the mussels. We decided to go with steaming, which is super easy! First you make a tasty liquid mixture in a big pot. (You don’t need much liquid – only an inch or two.)  In the case of the Devils Mussels, we put together
- 1 cup white wine
- 5 teaspoons chili pepper oil
- 3 teaspoons chili pepper powder
- 2 teaspoons minced garlic
- Half of an onion, chopped
- Juice of one lemon
Ideally you want something to keep the mussels out of this liquid a steaming basket or even some tin foil rolled up an place in the bottom of the pot will do. Still, for some reason, we diced to skip this step and our mussels turned out just fine (just a few had a slightly overly rubbery texture). All you need to do is get the flavor packed liquid up to a boil, rinse the mussels and set them in the pot to steam for five minutes: until the little guys open up. In our case, because of the heroic 4 pounds of mussels and a not-so-heroically-sized pot, after 5 minutes a lot of the mussels weren’t open. But after some careful stirring and another 5 minutes, all of them gave in to the steam and opened up their shells. After they’re done cooking you’ll need a big bowl to put them and a another big bowl (or a smaller bowl for each person) to put the shells in.
These mussels have a great spicy kick that live up to whatever name you call them by. Once you start eating them you just can’t stop. Between Meg and I, we managed to put down all 4 pounds (not as crazy as it sounds given the shells, but still a lot of eating).  One final thing you’ll need is a good baguette.  If you cook mussels right, you’ll have a bunch of tasty liquid you’ll want to sop-up!
Yesterday, taking advantage of an extended restaurant week menu, Meg and couple fellow Cardozo students headed to Fishtail–the restaurant where Meg first saw the Angry Mussels on the menu. I was lured in by oysters, but Meg got the mussels and let me try some. Interestingly, these mussels were dry roasted, not steamed. They didn’t pack the level of spice we had enjoyed in our home made version, but they had a great delicate lemon flavor that let the briny mussel tasty shine through. This has given us a some more great mussel ideas: somehow we are going to get some of these bad boys on the grill this summer and next time we steam, the amount of lemon juice is going get kicked up.
All in all, mussels are an incredibly easy do-it-at-home seafood meal where you can eat yourself silly for the price you would pay for a small mussel appetizer at a restaurant.
This will be more of a rant than a coherent post, but I have reason to be frustrated. Again I’ve been tricked into trying a Cream Cheese Puff here in New York in hopes of re-connecting with my cheesy Minnesota roots. As I talked about in my Delights Missing From New York I can’t seem to find a pure cream cheese wonton. Today, I thought my luck had finally changed. Walking home through Park Slope I saw a hand written sign outside a Chinese restaurant advertising cream cheese puffs. No mention of crab or ragu polluting the glorious cream cheese. But when I got home and opened the bag and took my first bite… wait for it…. FAKE FREAK”N CRAB! And the hunt continues.
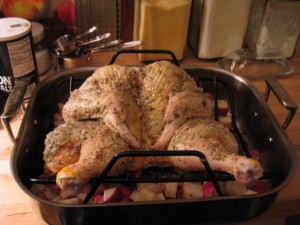
OK, so this dish is not officially named “Butterfly Chicken” but that’s what Arthur and I call it because that is the verb for when you cut out the chicken’s backbone, break the breastbone, and lay it flat, “to butterfly a chicken” – it looks sort of like a butterfly. I think the official name is “Balsamico Roast Chicken” (it comes from The Italian Country Table, by Lynne Rossetto Kasper).
I have been talking about purchasing a dining table since at least August and with my 30th birthday fast approaching, I decided to finally go for it – let’s face it, who wants to be 30 and admit that they eat all of their meals on the sofa? (Although, now that we have the table, Arthur still seems to prefer the sofa…)
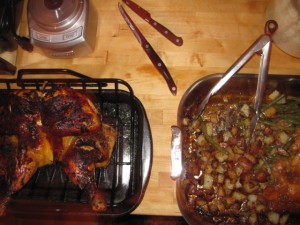
To break in the new table we decided to call upon our good friend Debbie, some excellent board games, and this classic recipe – who doesn’t love a whole chicken with potatoes roasted in the bottom of the pan? We started out the evening with a bottle of white wine while Debbie prepped a delicious salad (arugula, walnuts, cranberries, goat cheese, prosciutto, with balsamic fig dressing) and I got the chicken going. Dinner guests always seem impressed by a whole roasted bird (even though it’s not much work!) and this recipe smells great cooking, cooks more quickly because of the butterfly technique and has never come out dry because of all of the delicious extra fat from the pancetta. If anything, Arthur, if asked, will warn you not to get over-zealous with the pancetta. We tried bumping up the pancetta amount one time (’cause we love it so much) and it just turned out waaaay too greasy – and you know it was reeeeeally greasy if we’re saying that…
[DDET Click Here for the Balsamico Roast Chicken and Potatoes Recipe]
from The Italian Country Table by Lynne Rossetto Kasper
Ingredients:
¼ medium onion                                                        4 slices (1 ½ to 2 ounces) pancetta, chopped
3 large garlic cloves                                                    5 Tablespoons balsamic vinegar
¼ tightly packed cup fresh basil leaves                     1 Tablespoon extra-virgin olive oil
½ teaspoon dried basil                                                           Salt and freshly ground pepper
¼ teaspoon each dried oregano and marjoram          ½ to 1 cup dry white wine
1 3 ½- to 4-pound chicken                                        Parsley or fresh thyme for garnish
6 medium Yellow Finn, Yukon Gold, or
red-skinned potatoes, scrubbed and cut
into 2-inch chunks
- If time allows, season the chicken ahead and refrigerate it several hours or overnight. Preheat the oven to 400˚ F when ready to cook the chicken. Mince together, by hand or in a food processor, the onion, garlic, herbs (dried ones could be in here too), and pancetta. Then blend in 2 teaspoons of the balsamico, the oil, and salt and pepper to taste.
- Cut out the chicken’s backbone and open the chicken out flat, skin side up. With your palm, firmly press down the breast area to flatten. Stuff most of the herb mixture under the skin of the thigh, leg and breast areas. Rub the rest all over the chicken. Place the bird skin side up on a large shallow pan (a broiler pan or jelly-roll or half0sheet pan). Scatter the potatoes around it and sprinkle everything with salt and pepper.
- Roast 20 minutes, then pour in ½ cup wine. Roast another 70 minutes, or until the thigh reaches about 175˚ F on an instant-read thermometer. Baste the potatoes and chicken frequently with the pan juices, turning the potatoes often to brown evenly and prevent them from sticking. Add more wine if the pan is dry. Turn over the chicken two thirds of the way through cooking for even browning.  If after an hour of roasting, the chicken isn’t browning, raise the heat to 500˚ F to finishing cooking. (Or wait until it is done and run it under the broiler 5 minutes to crisp the skin.)
- Let the chicken rest 5 to 10 minutes at room temperature, then present on a warmed platter along with the potatoes, sprinkling everything with the rest of the balsamic. Garnish with bouquets of parsley or fresh thyme.
[/DDET]
Once you have started pre-heating the oven to 400, I recommend starting by rinsing and chopping the red potatoes into roughly 1 inch cubes (the recipe says 2 inches, but if you want to make sure they’re fully cooked and get nice and crispy on the outside, 1 inch is best in my experience). Toss your potato cubes in a large bowl with some olive oil, salt, pepper, dried basil, marjoram, and oregano. Then use olive oil to grease the bottom of your roasting pan and throw those spuds in there. Next, prepare the “stuffing” according to the recipe- it’s not technically stuffing, because it’s going to go under and over the skin, not actually inside the bird, but that’s what I call it.
When your pan and your stuffing are ready, grab your whole “roaster” chicken and a sharp knife… and cut out the back bone! Yep, cut the whole. thing. out. If you are squeemish, you can have the butcher do it for you at the grocery store, but it’s really not that hard. (Plus, think how proud of yourself you’ll be if you do it yourself! It’s a task that always makes me feel like a real chef). Just set that c
hicken up so it’s sitting on the counter facing away from you and make 2 cuts, one down each side of the backbone from neck to tail.  Then, throw out the backbone (unless you want to save it for making stock). Lay the chicken down flat on the counter, breasts up, and press your thumbs down on the breastbone until you hear a snap – now the chicken will lie flat in a “butterfly” position. It cooks quicker this way and still looks really cool.
Putting the stuff under the skin is fun, but be sure not to get carried away: you’ll want to save some to pat onto the outside of the skin (Arthur likes to be sure to pat it on, trying to rub it in does not seem to be as effective). Finally, put your chicken in the roasting pan (on the rack, above the potatoes). Roast in the oven for 20 minutes, then pour 1/2 coup of white wine over the chicken and potatoes. After, roast for another 70 minutes (or however long it takes for the chicken to finish roasting), basting every 20 minutes, or so.
Check to see that the chicken is fully cooked by slicing the thickest part of the thigh or breast with a knife and making sure the juices are running clear. Then lift the chicken on its rack off of the pan, and let it “sit” for another 20 minutes or so while you jack the oven up to 50o degrees and finish giving those potatoes a nice crisp finish. (This dish tastes great with green beans, too. Just add them to the bottom of the pan with the potatoes for the last 40 minutes to an hour of cooking time).
My new table is now officially broken in.
Easy! Delicious! Impressive!
(If you’re lucky enough to have Debbie joining you for dinner, she might just bring some homemade chocolate madelines with ice cream to finish off the meal…)
Friends, if you have ever listened to anything I said, listen closely to these words: go buy Good Meat. Do it right now, and buy me an appropriately priced gift of thanks at a later date. I bought this book for my brother and his wife for Christmas, and was pretty excited about giving it to them. Then I saw his facebook status later that week and it was something to the effect of “Spent my entire day drinking tea and reading my new cookbook”. Now, I’m a fan of cookbooks, but I have never been so grossly enthralled in one so as to give up a whole day in my weekend in order to read through it. But that is partly because this is not just a bunch of recipes sent to a bindery. It’s a holy tome of carnivorous cuisine! Each section (beef, pork, poultry, lamb, rabbit, etc.) contains a sub-section about the meat itself. You’ll find information such as discussions of the difference between grass and corn fed beef, sustainable models of protein farming, breaking down a side of beef into primal, sub-primal and butcher cuts, and suggested vendors you can order from. It’s truly, truly amazing stuff.
The following recipe is the best one I’ve had from the book so far, but that isn’t saying much since we only tried 3 recipes while down in Kansas (where my brother Allen, recipient of the book, lives) and I haven’t yet bought my own copy of Good Meat. I will say up-front, I am not a mustard guy. Especially the bolder, spicier mustards; I hate them in the same way I hate horseradish. This recipe opened my eyes. You will need
- 2 1/2 lb new potatoes, cut into 2 inch chunks (any small potatoes will work)
- 1 chicken, 5 lb
- 1 head garlic, seperated into cloves and skinned
- 1 bunch/package  rosemary
- 1 cup coarse/stone ground mustard
- 1/4 cup EVOO
- 2 tbsp soy sauce
- 1/2 cup white wine
- 2 tbsp heavy cream (pretty sure we left this part out, and it was still friggin awesome)
Heat the oven to 450. Choose a roasting pan that will hold the potatoes tightly together. The idea is to keep them from burning here. Remove excess fat from the chicken and place chunks among potatoes.
Strip the rosemary leaves from the stems, and rough chop them. Take 1/4 cup of the rosemary and set it aside. Now take half of the remaining rosemary and sprinkle it inside the bird cavity, along with some salt and pepper. The rest of the rosemary should be scattered among the tatoes in the pan.
In a bowl or blender, mix together the 1/4 cup of rosemary you reserved, the mustard, olive oil and soy sauce until its a homogenous paste. Spread that over the bird. It’s supposed to be a nice, thick crust so don’t be shy with the mustard paste. GET IT ON THERE! Place the bird on top of the potatoes, and put the roasting pan in the oven. Bake for 30 minutes, then reduce the heat to 350. You need that initial high temperature period to really set the crust and get some browning action on the outside. Let it go at 350 degrees for another 60-75 minutes until a thermometer reads 165 in the thickest part of the thigh. When its done, let it rest 15 minutes before carving the bird.
Last step: drain the juices from the roasting pan and add to a saute pan along with the wine, place over medium heat. Allow that to reduce to about 1/2 volume. Remove from the heat and stir in the cream (again, we left that part out) then you can either serve in a gravy boat or just pour it over the potatoes as a dressing.
Every now and then, I stumble across something here in New York that just can’t be found in the Twin Cities. This time it was a dimly lit bar with a brightly lit stage with a full band pumping out swing and jazz music to the bar and the dance floor. For those from Minnesota, I know that the Twin Cities has places that sound similar to this, but not ones that are really on the same level in terms of size and energy. I think the closest was Sophia’s in down on St. Anthony Main, which unfortunately closed around 2005.
Meg had been to Swing 46 before, but I was a virgin. We didn’t start the night with plans to hit up Swing 46. One of Meg’s friends, Rakesh, was doing a little Valentine’s show down the street (46th Street–aka Restaurant Row) at a piano bar: Don’t Tell Mama. On our way to the show, Meg convinced me to stop outside and take a look at the televised live feed Swing 46 has of their dance floor. While watching a pre-show dance lesson we got to chatting with the promoter who was working to pull people in from the street. We told him our plans for the show and dinner reservation down the street and he offered to waive the $12 cover if we wanted to come back for a drink later.
After the Valentine’s show (good, but too heavy on the serious songs and too light on the funny and fast-paced fare) and an fairly average dinner at Don’t Tell Mama’s restaurant, we headed back to Swing 46.  As we walked in and the music from the stage in the main room rolled over us, the first thing that struck me was the size of the place–a large bar area and huge main room. After checking our coats, as asked by the hostess, we found ourselves in the bar area, a large room with table seating opposite the bar. The room with the bar opens into the larger main room, featuring a stage and a dance floor lined with larger tables for dinner seating. We were able to grab a seat at the very end of the bar which provided a great view into the main room at the stage. After seeing the stage and the white table cloth tables I couldn’t help but feel like I was waiting for Indian Jones in the opening scenes of The Temple of Doom.
 Okay, so this place has great music and atmosphere, but why am I writing about it here on Eat Cook Live? In a word: cocktails. The bartender Jake was a man who knew his booze. For our first round, which at the time we thought would be our only round, Meg ordered a cocktail off the menu, the “Swing 46,” and I ordered a negroni. About 20 seconds after we put in our order, the bartender swung back. Usually this means I need to walk the bartender through how to make a negroni: equal parts gin, campari, and sweet vermouth, topped with soda water and severed with an orange peel. But, as it turned out, the opposite was true.  Jake said something along the lines of “since you ordered an negroni I’m going to assume that you know something about cocktails and steer you away from the ‘Swing 46.'”  After quick exchange with Meg about what she likes, a gin based drink was decided on. Jake muddled two cucumber slices and a little lime into some Hendriks gin. With the addition of a little simple syrup (sugar water), a shake, a pour, and a cucumber garnish and the drink was ready. The cucumber was refreshing and the simple syrup added just enough sweetness. A few minutes later my negroni arrived. Jake used a lemon instead of the usual orange, which was fine, given that this was also Hendriks based. With a little extra attention, Jake was sure to carefully squeeze some of the oil from the lemon peel into the drink.
Realizing we had found a good thing with the drinks, and loving the George Gee Band on stage, we decided to have one more drink. This time I ordered us each a champagne cocktail and again entrusted the details to Jake. A combination of vodka, muddled lime, simple syrup, and honey was mixed and topped with champagne. Again, the drink was light, flavorful, and not overly sweet.  As we sipped we watched the stage and dance floor. The leader of the band is a short stocky Asian man, whose voice is nothing like you’d expect. With seemingly endless energy he kept the room and the band rolling. The male vocalist, John Dokes, had voice that I can only describe as golden butter. The dance floor would fill and wain depending on the song being played. The mix of the people dancing was broad, from the young and fit to the heavy and middle aged. The dancing highlight was a woman who I am guessing was somewhere in her mid 80’s. Dancing with vocalist Dokes, she tore up the floor.
While watching and listening to the show, we enjoyed random small bits of conversations with Jake–mostly about cocktails. Somewhere during the night I learned how to make lime infused simple syrup. A potential gem for summer cocktails.
For the atmosphere and for the great drinks I will definitely be making a return to Swing 46. On the next trip, Meg and I plan to take advantage of the free early-evening swing lessons to prepare for a night of more than just great booze.
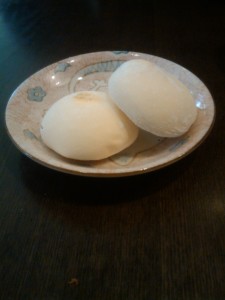
Yes, even food bloggers can live under a proverbial rock. This week when I went out to lunch with Stu to a ramen place near school. No, this isn’t the stuff I’ve live on off and on my whole life–a more detailed post of the ramen is coming when I get in a few more visits.  On the latest trip, after slurping down our bowls of deliciousness, Stu suggested something that I haven’t had before: mochi ice cream.
Now I would say that over the last 28 years I’ve developed some familiarity with ice cream, but I had no idea about this Mochi thing. I love Japanese food and I’m not sure how I missed this one. Well, it turns out that Mochi is, basically, rice ground into a paste that can be formed into shapes.
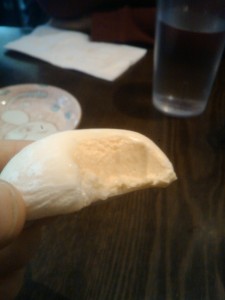
When it comes to mochi ice cream, the mochi is wrapped around an ice cream flavor of your choosing and put into a deep freeze. As you hold it the outer layer of mochi softens, and by the third or fourth (and final) bite the ice cream itself starts to melt. The mochi adds a little texture and lets you pick-up the ice cream like an awesome Asian ice cream sandwich. If I liked it this much now, I can’t wait to take some more of these down when summer finally comes around.

