Cooking
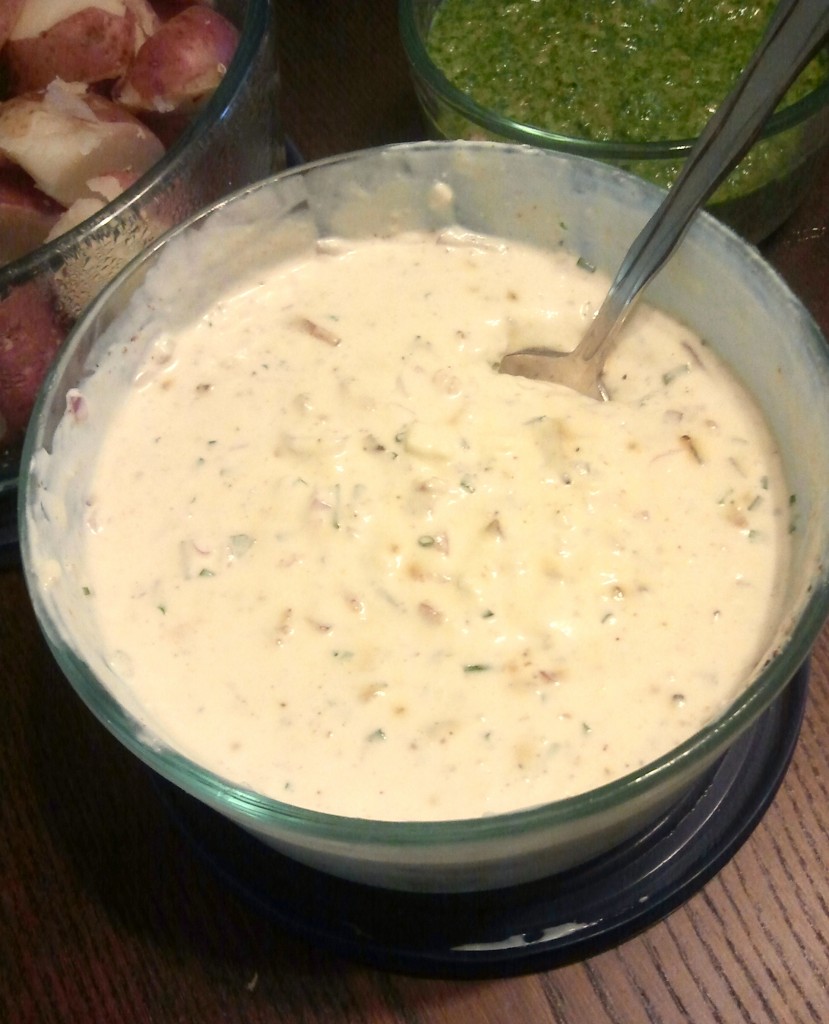
It’s been at least two months since I posted a recipe featuring bacon prominently, right? Good, because this one is pretty good, AND you can put it on vegetables and salad, so it’s totally healthy. Just pay no attention to the Paula Deen-esque ingredients, and keep telling yourself that.
- 3/4 cup mayonnaise
- 3/4 cup sour cream
- 3-6 tablespoons 2% milk
- 1 tbsp white wine vinegar
- 1/2 tsp sugar
- 1/4 tsp salt
- 1/4 tsp garlic powder
- 1/4 tsp white pepper
- Black pepper to taste
- 1 cup (4 ounces) crumbled blue cheese
- 1/3 cup crumbled/chopped, cooked bacon
- 1/4 cup minced chives
- 1 medium shallot, minced
Combine everything but the cheese, bacon, chives and shallots in a mixing bowl and whisk together. Start out by adding 2-3 tablespoons of milk and reserve the rest. Once this mixture is well combined, fold in the remaining ingredients. Now check the consistency and add the remaining amount of milk bit by bit until the dressing has the consistency that you like (keep in mind that if you are going to refrigerate this before serving, it will thicken up a bit). You can also adjust the amount of blue cheese you add, based on your taste for it. I like the taste of the blue cheese in the dressing, but less so the chunks of blue cheese you bite into. I think the next time I make this I’m going to try putting the blue cheese, milk, mayo and sour cream in a food processor to homogenize the mixture.
I’ve found this to be a very versatile dip/dressing. It goes well with salad, although its pretty thick and flavorful so it’s easy to overpower the lettuce; maybe add some arugala to balance it out. It’s a great dip for crudites or potato chips, you could put it on top of a burger, and the first time I made it I used it as a dressing on some boiled, cooled red potatoes for a kind of potato salad. Â Give it a try and let me know what other applications you find for it!
A good while back, I saw a link on a friends gchat status for www.skillshare.com.  It’s a great site that has a ton of local classes on everything from entrepreneurship to art to cooking.  After putting up gmail filters so Groupon, Living Social, and their brethren no longer dominate my in box, I started noticing the Skill Share emails again and decided it was time to sign-up for a cooking class.
I picked the dumpling making class in part because it fit well in my weekly schedule and in part because I’ve never made dumplings.The instructor Cathy Erway, a food blogger and author of The Art of Eating In (a chronicle of her two years of not dining out in NYC), taught the class from her Brooklyn apartment.  She was a great instructor and the class was a great break from the usual week night activities.
How to Make Dumpling Skin
Cathy first showed the eight or so of us how to make the the wrapper dough from scratch: Start with two cups of stifted flour and one cup of warm water and about a 3/4 teaspoon of salt.  Put it all together in a big bowl and  mix with a wooden spoon or your hands until you get a ball.  Transfer to lightly floured surface and knead until smooth and shiny.  Knead the ball.  Break off pieces and roll them out into about four inch diameter circles, nice and thin.  (Making them as thin as possible to handle is an art that makes magic dumplings.)
How to Buy Dumpling Skin
Though, as Cathy told us, unless you’re making only a handful of dumplings, you might go insane making them from scratch. Â Making the wrappers seems to be a simple, Â but time consuming process that can be replaced with store bough dumpling wrapper with minimal harm. Â When you buy the wrappers, be sure to get the white, round dumpling wrappers. Â The yellow ones are usually wonton wrapers and square shapes will just be trouble when you get to the filling stage.
How to Make the Stuff that Goes in Dumplings
The biggest lesson from this class was don’t be afraid to go a little crazy with your fillings.  You can keep it simple and traditional or create concoctions that will have deceased Chinese grandmothers spinning in their graves.
[DDET Classic Pork, Shrimp & Chive Dumpling Filling]
Makes 38.
- 1 lb ground pork
- ¼ lb shrimp, shelled, de-veined and finely chopped (optional)
- 1 bunch chives or scallions, chopped
- 1 cup finely shredded napa cabbage, packed
- 1 ½ tablespoons corn starch
- 1 tablespoon soy sauce
1 teaspoon sesame oil
- 1 tablespoon freshly grated ginger
- ¼ teaspoon white pepper
[/DDET]
[DDET Asparagus, Mint and Feta Dumplings with Balsamic Vinegar]
- 15 round dumpling wrappers
- 1 bunch asparagus, tough ends trimmed, finely chopped
- 1-2 tablespoons chopped mint
- ½ cup crumbled feta cheese
- pinch of salt
- black pepper to taste
Combine all ingredients. Swap in other raw seasonal veggies such as zucchini or summer squash shredded with a box grater.
[/DDET]
[DDET Cheeseburger/White Castle Dumplings ]
- 1 lb ground beef
- 1 teaspoon salt
- 1/2 teaspoon black pepper
- 2-3 teaspoons Worcestershire sauce
- 2 teaspoons mustard
- 1/4 cup finely chopped onion
- 3 oz. grated sharp cheddar (or any cheese you prefer)
Mix everything but the cheese together, then fold the cheese in.
[/DDET]
We made the above in class and all were really tasty. Â My favorite was the classic. Though the cheeseburger dumplings were really fun and made me want to experiment.
How to Fold Dumplings
So you have your dumpling skin and a great filling how do make a dumpling?  Lay the dumpling skin in your hand and put a spoonful of your filing in the middle.  If you’re using the purchased skins, you’ll need to dip your finger in water and trace a wet ring on the outside of the skin–this what will make it stick together in the next steps.   Fold the wrapper in half and pinch (so the two sides stick together) at the top.  Then pull a piece of the edge about half an inch to the right of the pinch over to the pinch, repeat down the side of the dumpling and do the same for the other side.  It’s a little hard to visualize, but the result should look like crescent moon.  Place the dumpling seal side-up while you make some more.
How to Cook the Dumplings
Cathy explained that the cooking process is really a combo of steaming/boiling and frying the dumplings. Â The frying is what gives dumplings that crispiness we all know and love from our favorite takeout. Â The steam is what gets the dumplings cooked through and through.
Heat oil in a large pan. Â Once the oil is hot, place the dumplings, unsealed side down, into the pan. Â Cooking unsealed side down, rather than on their side, will help get the awesome crisp you want. Â Cook the little guys in the oil for two minutes or so. Â Add enough water to the pan to cover about one quarter of the height of the dumplings, reduce heat to medium, and cover for four minutes. (It’s time to give ’em a steam bath!) When the water is gone, crackling sounds are a clue, the dumplings should be ready to scrape out onto a plate.
Serve with some soy sauce, maybe mixed with a bit of rice vinegar, and enjoy!
A few weeks back, my friend Erin sent out an email with the brilliant idea of a supper club.  In a twist on the classic supper club, the guests are in charge of the food while the host takes on the booze.  Each dinner is to be organized around a theme and this last Saturday things kicked-off with Peruvian night.
Ceviche
On reading the theme, I was taken back in time to a cliff top restaurant in Lima where I savored ceviche while watching the large dark blue waves of the Pacific ocean roll, crash, and foam below.  I knew I had to make this citrused Peruvian classic.
In fairness, this dish likely originated in a few place across the globe.  But around 500 years ago the Moche, a coastal civilization in current-day northern Peru, came up with the stuff.  Modern Peru adopted it and it hit the United States in force in 80s. It’s easy to make and prefect for these warm summer months.
For the uninitiated, cechive is fish or seafood “cooked” in citrus.  Cooking fish, meat, poultry, etc. is all about changing the structure of the proteins or breaking them.  In science/Alton Brown talk, the citrus does its cooking by denaturing the proteins in the fish.  And, since the cooking comes from the fish’s time in the citrus bath, unless you’re using sushi grade fish, be sure to use small pieces and marinate for approximately three hours; raw fish can carry some nasty stuff.
[DDET The Ceviche Recipe]
Ingredients
- 1 pound white saltwater fish: albacore, sole, snapper, halibut, etc. Â (I used halibut)
- 1 cup lime juice
- 1/2 cup lemon juice
- 1/2 cup orange juice
- 1 T. salt
- 1 rocoto chile (chile manzano in Mexican markets) or 2 aji limon (substitute a habanero) – I used the habanero, the only pepper I could find.
- 1 medium onion, sliced very thinly into half-moons
- 4 T. chopped cilantro
Directions
For the citrus, you’re going to want to buy the fruits and juice them yourself.  The stuff you buy in a bottle is going to disappoint every time.
Cut the fish into pieces no bigger than one inch cubes; remember the bigger the pieces the longer it takes for the citrus to do its work. Salt the fish, then cover with the citrus juice in a non-reactive (glass or plastic, metal might yield an unpleasing metallic taste). Add the sliced onions and the chiles.  Put the covered mixture in the fridge for two to three hours–if you have true sushi grade fish, its okay to shorten so the fish is still raw in the middle.  When you serve, garnish with the cilantro.
[/DDET]
Overall, ceviche is a very forgiving dish as long as you start with good fish. Â It’s a great food to play with: ratchet up the heat (the habeneros were a little intense), pull it back, add the cilantro before marination, change-up the citrus juice, etc.
Peruvian Stewed Chicken
Because ceviche is, in all honestly, a bit of a cooking cop out, I helped Nick and Becca in their preparation of Peruvian Stewed Chicken.
[DDET The Peru Peruvian Stewed Chicken Recipe]
Ingredients
- 1 (16 ounce) can chopped tomatoes
- 1 tablespoon olive oil
- 1 medium onion, finely chopped
- 3 cloves garlic, minced
- 1 teaspoon cumin
- 1 teaspoon dried oregano
- 1 bay leaf
- 10 to 12 small chicken pieces
- 1 teaspoon coarse salt
- 1/2 teaspoon freshly ground black pepper
- 1 green bell pepper, sliced
- 1 cup green peas
Place tomatoes in a blender or a food processor fitted with the metal blade and process until liquefied. Set aside.
Heat oil in a large saucepan or stockpot over moderate heat. Add onion and saute until soft, about 10 minutes. Add garlic and saute for another two minutes. Add cumin, oregano and bay leaf and stir to combine. Sprinkle chicken pieces with salt and pepper and add to pan. Brown the chicken lightly. Add the tomatoes and enough water to cover 3/4 of chicken. Bring to a boil, cover, reduce the heat, and simmer for 45 minutes to an hour, until chicken is cooked through. About 10 minutes before the chicken is done, add the green pepper and peas. Serve warm.
[/DDET]
True to form, we managed to pull off the dish and (a big pot) of rice and arrive fashionably late, along with most of the supper club crew. Â At the dinner itself, the stewed chicken was a bit bland. Â Though the the next day, the flavors had come together and were more bold. Â I would recommend making this dish a day in advance and reheating, for maximum flavor.
Transporting our creations was a bit tricky and I was thrilled, for probably the 100th time, that Becca actually has a car in New York.
The Supper
The actual meal was a lot of fun.  Erin pulled together a good group of people who pulled off some great dishes (including a salad, a cheesy potato dish, and a beef dish that seemed to be the bovine cousin of the stewed chicken) .  I’m very much looking forward to the next one.
I found these little beauties in the olive bar at the local Bylery’s. For the non-Minnesotans out there, Byerly’s is an upscale grocery store, kind of like a whole foods but without the  commitment to natural/organic food. The kind of place your grandmother shops at, as long as her IRA is well funded. Anyways, I was looking for some olives and the helpful lady behind the counter suggested I try these flaming red beasties from South Africa. I popped one in my mouth and knew pretty much instantly that they were going to become a recurring item in my cooking. The taste starts out sweet and a little fruity, sort of like a red bell pepper. The next thing you taste is the vinegar from the pickling brine, and finally that heat from the chili pepper. The peppadew variety of chili peppers weigh in around 1,200 scoville units, so they have some heat to them but are not as hot as something like a jalapeno. I would definitely serve them confidently to my mother, but maybe not my grandmother, if that’s a useful guide.
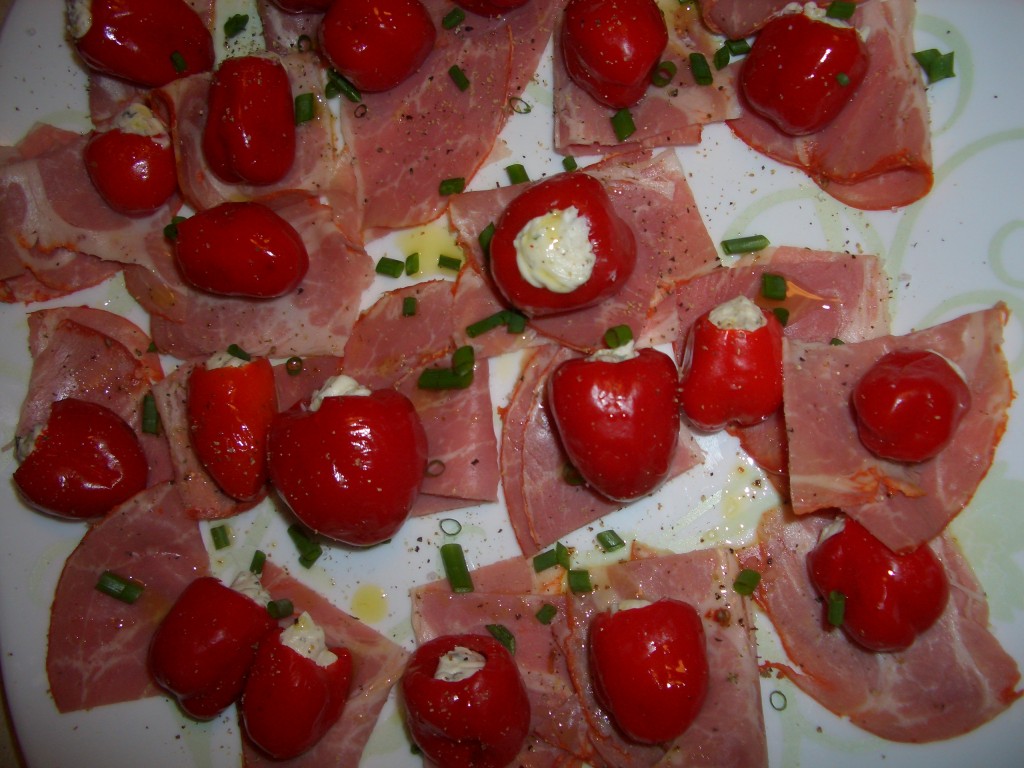
While I will definitely be thinking up more uses for the peppadews, the first thing I went for is stuffing them. Really, I think that is a natural first thought when you look at the peppers. They’re about the size of a cherry tomato, but completely hollow, with a little hole in the top. Tell me that’s not made to stuff with garlicky cheesy goodness? *Editors note:Upon further review, this is definitely everyone’s first idea of what to do with peppadews. Seriously, do a google image search for peppadew peppers and see what I mean.
The cheese stuffing for these was based on the stuffing for the oven baked jalapeno poppers from a previous post with a few modifications. First, nix the bacon. I’ll give you a second to wrap your mind around that. Seriously though, not everything needs bacon in it, and on this particular night we were also grilling so we could get that great smoky flavor in another course. Next, it needs to be a little thinner as a mixture so you can easily pipe the mixture into the peppers. To that end, I added a little bit of milk and olive oil.
- 4 oz. (1/2 brick) cream cheese, room temp
- ~5 oz. (1 log) goat cheese, any kind you like
- 2 cloves garlic, pasted
- 1 tbsp minced herbs (basil, oregano, chives, and tarragon are all good choices)
- 1 tsp extra virgin olive oil
- 1/2 tsp red wine vinegar
- salt and pepper to taste
- 1-2 tbsp milk, added as needed to thin out the mixture
Mix the above ingredients together in a bowl, then use a rubber spatula to scoop all of it into a bag you can use to pipe it into the peppers. For our more bourgeois readers, you have a pastry bag with your choice of piping tips. For the rest of us, grab a ziploc bag and snip off one of the corners. Be sure to start out with a small hole in the bag; you can always make it a bit bigger but you can’t make it any smaller and it is a pain to try to take the cheese mixture from one bag to another.
Pipe the mixture into the peppers, then figure out how you want to serve them. They would be just fine by themselves I think, but this time I served them with some hot capocollo which was a nice compliment. Next time I think I’m going to slice out some ribbons of pruscutto and wrap those around the peppers.
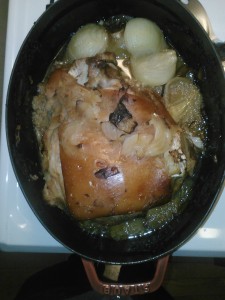 After a late start to Sunday at DUB Pies, Iggy and I made our way down to the super market to pick-up something for dinner.  Right away I headed to the meat section to see if today was a cheap roast day.  I wasn’t disappointed; pork shoulder was only $1.19 a pound.  I’ve seen $0.89 a pound, but $1.19 is still a good deal.  I grabbed a smaller, eight pound, slab of meat.  Right away, I knew what the rest of the simple recipe would be.
I came-up with this a few years ago when I was home visiting Minnesota and at mother’s house without a car.  My mom had left me a pork loin and a recipe.  Though she seemed to over look the fact that the house was missing half the ingredients in that recipe.  Undeterred, I found some apples, onions, a bit of garlic, and a bit of apple cider vinegar.  Put it all together in a ceramic roasting pan covered it and let the flavors come together.  The result was a moist piece of meat, with a sweet apple sauce on the side, that has become my template for many a meal.
What You’ll Need:
- Some pork (shoulder, butt, loin, or whatever cut you’re in the mood for)
- A bunch of apples
- A bunch of onions
- Cider vinegar
- Fish sauce
How to Cook It:
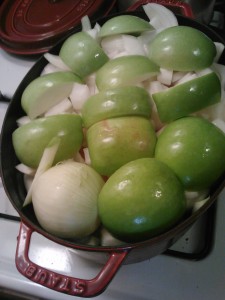
Put the meat in a dutch oven (or some other heavy roasting device with a lid). Â If you have a pork shoulder, or other fatty cut of meat, be sure to put the fatty side-up so that the juices run down over the meat over the hours of cooking.
Cut some big chunks of apple and onions and fill in the sides and the space above the meat.  It’ll be packed in there, but everything is going to cook way down.  Throw in a bit of apple cider vinegar, maybe a quarter to half a cup.  Add a little fish sauce.  This is some what optional, but the umami in the fish sauce will help bring out the flavors.  Tread lightly with this stuff though, while a few tablespoons will bring out the flavors, too much will be a disaster (take a wiff of the bottle and you’ll know what I mean).  Give the garlic a rough chop and mix it in on the sides of the meat.
Now cover this bad boy, put it in the oven, and let it cook for hours. Â For a pork shoulder, target maybe 45 minutes a pound. Â Uncover for the last 30-45 minutes or so to give the meat a nice crisp.
The Result:
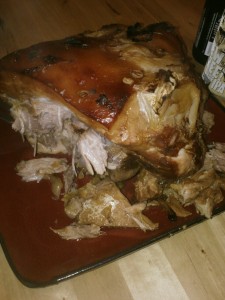
The apple and onion cook way down and fall apart and mix with the pork dripping to form a sweet and savory apple sauce perfect for pork. Â After hours of cooking, the meat falls off the bone and practically shreds itself. Â As an added benefit, your home will be filled with wonderful Sunday cooking smells.
After the Sunday night meal, you’re almost sure to have left overs.  The shredded pork and sauce can then easily become a great pulled pork sandwich (just add some BBQ sauce) or some pulled pork taco.  The Sunday meal that keeps on giving.
Sloppy Joes always remind me of grandfather–it’s where I got “Untidy Josephs.”  I can picture myself, as a child, at a table, Untidy Joseph in hand over a plate of baked beans, laughing at his cheesy jokes.
But, while this cooking stirred-up memories of my grandfather, I think its inspiration came from my healthy lunch.  After eating a nice modest salad, my mind and stomach conspired to balance everything out with some meat packed bread. After a little internet hunting, I stumbled on the following.
What you’ll need:
1 pound extra-lean ground beef
1 onion, diced
4 cloves garlic, minced
1 jalapeno, minced
1 red pepper, diced
1 can small red beans or pinto beans, preferably low sodium drained and rinsed
1 1/2 cups no-salt-added tomato sauce
2 tablespoons tomato paste
1 tablespoon red wine vinegar
1 tablespoon molasses
1 tablespoon Worcestershire sauce
1 teaspoon mustard powder
3/4 teaspoon salt
8 Â burger buns (or bread)
Directions:
Brown the meat and the onion in a large skillet over medium-high heat for 5 minutes. Â Drain the pan. Â Add the garlic, jalapeno, and red pepper and cook 5 minutes more, stirring occasionally. Â Stir in the rest of the ingredients, reduce heat to low, and simmer for 5 minutes more.
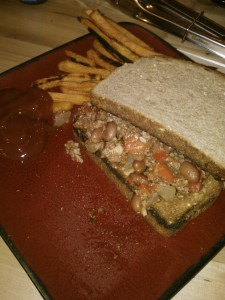
The Result:
Well, I made a slight error.  I was wrongly convinced that we had a tomato sauce at home.  Since it was already 9:20 or so by the time I discovered my mistake, I decided to improvise by putting a can of diced tomatoes into the food processor.  I think I was on the right track, but I didn’t adjust the amount of “sauce” and the mix was a little under sauced.  We managed to fix the under sauce problem somewhat adequately with ketchup.
Overall, paired up with some baked sweet potato fries, the Untidy Josephs were pretty good.  The recipe is on the path to being a chili, but the molasses adds that needed sweetness.  The red pepper and jalapeno gives nice little busts of fresh and sweet.  Forget that Manwich!
When I try this again, in addition to making sure that I have tomato sauce, I want to try turning up the spice just a bit with something more that jalapenos.  I think those two things would take this dish from a solid weekday meal to something I crave.
 Yesterday evening, with my TPS reports completed (correct covers and all), I left the office at a reasonable hour with embryonic cooking ideas in my head.  As I got to the store, I still had no solid idea of the menu.  But I had time to wander the aisles and ponder fish vs poultry, grilling vs the oven, salad vs pasta… In the end I decide to make-up a new chicken recipe.
Union Market has a hot pepper jelly that has been taunting me for months. Â As my mind settled on roasting a chicken, I knew I had to make use of this jelly. Â But what else… Â then the universal truth came to me: bacon makes everything better (and perhaps thinking back to Meg’s butterfly chicken). Â And Union Market just happens to have some pretty fine looking bacon. Â Some carrots, celery, onions, and potatoes fell into my basket for side dishes. Â Finally, I grabbed a thing of cilantro to top everything off.
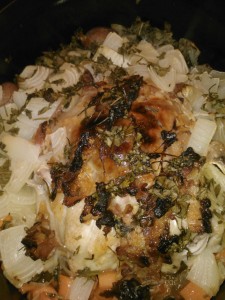
Now this dish takes a bit of time, but almost all of that is passively letting everything cook. Â You need about 20 minutes of prep. Â I put the chicken in a dutch over, peeled and chopped the veggies and put them in along with the potatoes. Â Next I took my pound of bacon, gave it a fine chop, and mixed it in a bowl with maybe a half cup of the hot pepper jam. Â About a third of the bacon pepper jam went into the bird’s cavity, about third under the skin, and about a third on the top-side skin. Â For good measure, any extra little bacon pieces on the cutting board were put on the potatoes.
With the lid on, and the oven at 375, I just let everything cook for maybe a bit more than 90 minutes–after about 30 the smells of onions, chicken, and bacon were wafting through the apartment.  I took the lid of for the last 15 or so minutes, as I made some quinoa, just to help the onions brown a bit; because of the sugars in the jelly, the chicken was already there.
And how did this improvised concoction turn out?  Well, between Nick, Fayaz, and I, we took down almost the whole bird and all the veggies.  There was a little sweet and heat from pepper jelly and bacon added all the savory you could hope for.  I realized, after it was in the oven, that I had forgotten to add garlic.  But, I think this error might have been for the best.  [You can pick your jaw up off the floor.]  There was plenty of flavor that worked well together.  I feel that the garlic might have just gotten in the way.  If I were going to add something else, it would be more heat, probably by adding diced hot pepper to the bacon jelly mix.
More than just the food, it was nice to sit down  at a table mid-week with my roommates and chat–much better than the usual take-out in front of the TV with the work laptop going.
So after a prolonged hiatus, I’m finally getting up a post!  It’s been a little crazy, so this lazy curry recipe that I’ve made a couple of times in the interim seems highly appropriate.  It’s a great low cost alternative to take-out that takes less time than the delivery boy.
Here is what you’ll need:
- 6 scallions
- 1 tbsp vegetable oil
- 1 lb boneless chicken breasts
- 3/4 cup coconut cream
- 3 tbsp Thai green curry paste
- 3 tbsp chopped cilantro
- Noodles, rice, or (my personal preference quinoa)
As your rice or noodles finish cooking: Just cut the scallions in to approximately half inch slices and cube the chicken.  Heat the oil in a pan throw in the scallions and chicken for about 3 to 4 minutes until the chicken is browned.  If you like heat, add a couple Thai chilies in with the scallions and chicken.  Stir in the coconut cream and curry paste and cook for another five minutes or so.  Turn off the heat and stir in the chopped cilantro.
Now I like quinoa, but rice or noodle are a great pairing as well. Â But whatever you use, in 15 minutes you’ll have a meal as good as your usual Thai take-out, only hotter and fresher.
This was the first time I ever tried to make risotto, probably because I have always heard that it was a pain to constantly have to stir it for a ~30 minute cook time. That level of attention is usually not conducive to making other courses to go along with dinner. Silly me, I should have known that America’s Test Kitchen would have figured out a more user friendly version of the recipe. To make this gooey, cheesy, white winey goodness, you will need:
- 3.5 cups of low-sodium chicken broth
- 3 cups water
- 6 tablespoons butter
- 1 onion, minced
- Salt & pepper
- 2 cups Arborio Rice
- 1 cup dry white wine
- 2 oz Parmesan cheese, grated (1 cup)
- 2 cloves garlic, minced
- fresh thyme
- 1 lb cremini mushrooms, trimmed & cut into small wedges
- 1/3 oz of dried porcini mushrooms (optional)
Bring the broth and water to a boil over medium-high heat. Cover and keep warm on the lowest possible stove setting. Â Melt 4 tablespoons of the butter in a large saucepan over medium heat, add the onion and 1/2 teaspoon salt and cook until lightly browned, about 9 minutes. The original recipe also calls for you to stir in 1/3 oz of dried porcini mushrooms, “thoroughly rinsed and minced”, to the onion mixture in this step. I forgot this step, despite scouring the grocery store for dried porcini mushrooms that day, and really didn’t think the recipe was lacking in any way. I would try the dried mushrooms if you want, but don’t stress yourself out looking for this ingredient. I kind of like the way it turned out where the mushroom flavor was in the mushrooms themselves and sort of contrasted with the brothy-wine flavor in the rice.
At roughly the same time that you start cooking the onion, melt the other 2 tablespoons of butter in a large skillet over medium high heat and add the mushrooms and 1/2 teaspoon salt. Cook until the mushrooms are browned, about 10 minutes. Stir in the minced garlic and about 1/2 teaspoon of minced fresh thyme. The garlic and herbs really only need to cook until they are fragrant, about 15 seconds or so. Finally, transfer the mushrooms to an oven safe container, cover them, and keep them warm in a 200 degree oven until the risotto is basically done. One final note about the mushroom cookery: you want these to brown, not steam. If too much liquid comes out of the mushrooms while cooking, enough liquid to cover the bottom of the pan, drain that off into the broth/water mixture you have going on the stove. It will add some good mushroom flavor to the final product.
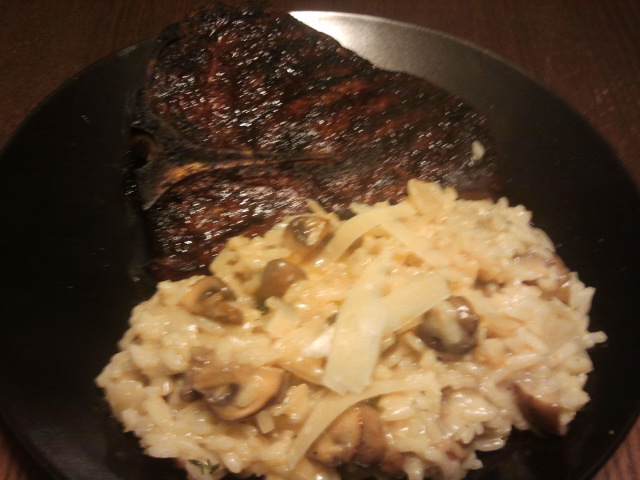
Stir the rice into the onions and cook until the edges of the grains turn translucent which takes about 3 minutes. Add the wine and cook, stirring frequently, until the wine is completely absorbed. Then add 3 cups of the warm broth mixture and bring to a simmer. Cook, stirring occasionally, until all the liquid has been absorbed. It will be very helpful for this recipe to have a ladle on hand so you don’t have to pour hot liquid from the pot into a measuring cup and then from the measuring cup into the rice. Continue to cook the rice, stirring in 1/2 cup of the broth every few minutes, allowing each addition of broth to be absorbed completely before adding more. Continue this process until the rice is cooked through but still somewhat firm in the center, about 11 minutes. Stir in the mushrooms and the parmesan, season with salt and pepper to taste. As always, buy real parmesan wedges and grate it yourself for the best result. Luckily, my brother Danny gave me a two pound wedge of parmesan for Christmas, so this recipe was a perfect way to use part of it.Serve the risotto next to a beautiful peice of grilled meat, and garnish with some parmesan shavings and maybe some minced flat leaf parsley or chives.
The final dish was everything I hoped it would be. The rice was soft but firm, the broth and wine combined to make some great layers of flavor, and the parmesan made everything that much more creamy and salty. By adding half of the liquid immediately and allowing it to cook down for a while, you really cut down on the amount of time during which you have to devote lots of effort and attention to the risotto to keep it from burning. What I really love about this recipe is that it’s fairly easy to keep all the ingredients in your head, and the steps are not exact science. Once you have added and reduced the 3 cups of water/broth, you pretty much just keeping adding liquid and stirring and reducing and adding liquid and stirring until the risotto tastes and feels just right in your mouth. After making this recipe just one time, I’m pretty confident I could recreate the final product without having the recipe around to follow.
Becca, Nick’s girlfriend, pulled off an amazing Super Bowl creation: the edible stadium. Constructed primarily of cardboard and tinfoil, this stadium held an epic amount guacamole for the field with queso and salsa for the end zones.  Pure awesomeness!
