Other
This morning, as I was eating a simple little breakfast at home, I heard a great little song:  Memphis Minnie – Keep on Eat’n.  It’s a classic female blues artist singing about feeding her man.
It’s a bit hard to find online, but I wanted to drop a post on it to keep it on my radar. Â If you like blues, add this little ditty to a cooking or dinner play list.
——
On another note, I’m out of excuses when it comes to my lack of posts over the last few weeks. Â Any excuses I had have been erased by hurricane Sandy. Â Despite the trouble in much of the region, my little corner of Brooklyn was safe and sound with power, water, and internet. Â The storm just lulled me into minimal productivity.
As the weekend starts, and power is being restored to Manhattan, I’m getting back to the key board. Â There are two posts I’ve been struggling with for months on two of my favorite spots. Â Fingers crossed on finally being able to get the words out.
 One of the best pizzas at my favorite pizza place introduced me to this strange ingredient.  The bartender told me had to order the Smoked Pancetta pizza just to give the black garlic topping a try.  And he was right.  Each blackened clove was delicious.
So how does black garlic get its color?  There are false rumors that the darkness is imparted through a balsamic vinegar infusion.  Though the infusion theory is believable from the flavor, the real secret is fermentation.  South Korea pioneered its use and chefs here in the good old US of A have started integrating it into their dishes.
The black garlic’s flavor is subdued relative to its raw, or even cooked, relations.  The closest approximation is roasted garlic.  But with a similar mellow flavor and hints of sweetness,  the black garlic also offers up some elusive savoriness.
Every time I order the Smoked Panchetta, I dream of a little dish filled with these black diamonds, some freshly toasted bread, and a knife for spreading.  Thankfully I just thought to look through the great series of tubes that is the internet and have found the stuff is widely available.  Black garlic bread, here I come!
New research shows that the shape of your beer glass might influence how fast you drink your cold one:
[R]esearchers surmise that while drinking alcohol, people pace themselves based on when they reach the halfway point of a glass. (When participants drank soda instead of beer, the shape of the glass had no significant effect on drinking speed.) But drinkers failed to accurately estimate the halfway point on curved-edge drinking glasses, and so they slurped up a greater quantity of alcohol faster.
Read the whole article at Discover Magazine. Any bets on how long it takes Mayor Bloomberg to legislates strait glass in NYC bars?
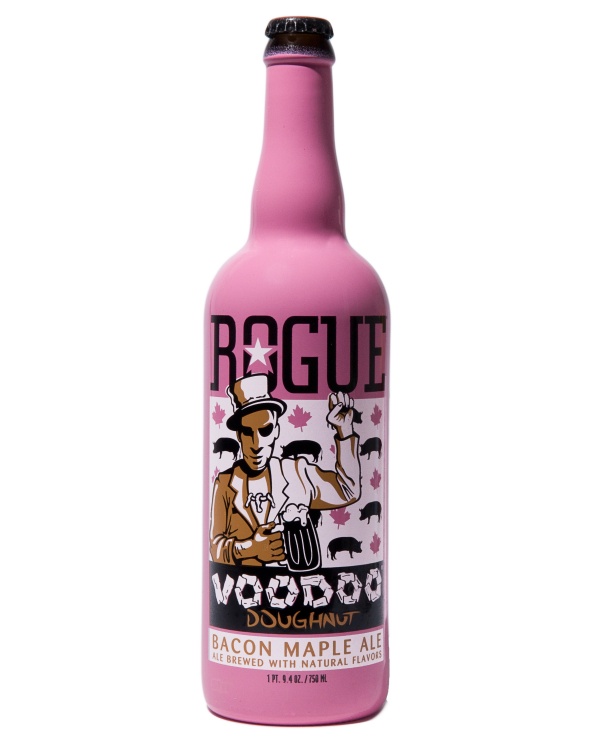
 There are very few I would trust to make a drinkable bacon beer. Â The beer nuts over at Rouge Ales are among of those few.
Much like Dogfish Head, Rouge Ales is willing nurture and execute insane beer ideas.  While the mad scientist concoctions may not fit my everyday drinking style (or budget),  I’m constantly impressed by the expanded conceptions of beer.  The Bacon Maple Ale–ingredients including Briess Cherrywood Smoked Malt, Weyermann Beechwood Smoked Malt, House-smoked Hickory Malt, and Applewood-Smoked Bacon–was no exception.
—–
Appearance: Â Rusty haze.
Smell: Â Maple and a lot of smoke. Â Like opening a pack of quality thick-cut smoked bacon.
Taste: Â My first thought actually wasn’t bacon, but breakfast sausage drizzled in maple syrup. Â As I tasted and smelled the bacon flavor grew into a sweet and savory combo. Â However, as the beer warmed, a sharp bitter finish began to develop.
Mouth: Â Medium carbonation. Â A little creamy.
Overall: Â This beer is a ton of fun. Â Though the bitter finish rains on the parade a bit. Â I can’t see myself drinking this often, but feel it would make a great morning beer with a plate of eggs.
Ah, the summer has been great.  Insanely busy, but great.  Lots of travel, social activity, that whole real job thing keeping me off the blog.  But after next weekend things should calm down a bit.  Almost perfectly, the Fifth Annual Minnesota State Fair Day is coming up on August 18th to mark the wind down of summer–just as the real MN State Fair marked the wind down of my childhood summers.
Last year’s MN State Fair Day was fantastic.  And, having been involved in the 2012 planning, I know this year is going awesome:  Sweet Martha’s Cookies,  cheese curds, Midwest beer, fried pickles, corn dogs, fried Twinkies, fried Oreos, and funnel cakes!  I can feel my arteries clogging just thinking about.
So CLICK HERE and buy your 2012Â Minnesota State Fair Day tickets. Â The fun starts at 2:00 PM on Saturday, August 18.

Note the crispy bottoms.
A good while back, I saw a link on a friends gchat status for www.skillshare.com.  It’s a great site that has a ton of local classes on everything from entrepreneurship to art to cooking.  After putting up gmail filters so Groupon, Living Social, and their brethren no longer dominate my in box, I started noticing the Skill Share emails again and decided it was time to sign-up for a cooking class.
I picked the dumpling making class in part because it fit well in my weekly schedule and in part because I’ve never made dumplings.The instructor Cathy Erway, a food blogger and author of The Art of Eating In (a chronicle of her two years of not dining out in NYC), taught the class from her Brooklyn apartment.  She was a great instructor and the class was a great break from the usual week night activities.
How to Make Dumpling Skin
Cathy first showed the eight or so of us how to make the the wrapper dough from scratch: Start with two cups of stifted flour and one cup of warm water and about a 3/4 teaspoon of salt.  Put it all together in a big bowl and  mix with a wooden spoon or your hands until you get a ball.  Transfer to lightly floured surface and knead until smooth and shiny.  Knead the ball.  Break off pieces and roll them out into about four inch diameter circles, nice and thin.  (Making them as thin as possible to handle is an art that makes magic dumplings.)
How to Buy Dumpling Skin
Though, as Cathy told us, unless you’re making only a handful of dumplings, you might go insane making them from scratch. Â Making the wrappers seems to be a simple, Â but time consuming process that can be replaced with store bough dumpling wrapper with minimal harm. Â When you buy the wrappers, be sure to get the white, round dumpling wrappers. Â The yellow ones are usually wonton wrapers and square shapes will just be trouble when you get to the filling stage.
How to Make the Stuff that Goes in Dumplings
The biggest lesson from this class was don’t be afraid to go a little crazy with your fillings.  You can keep it simple and traditional or create concoctions that will have deceased Chinese grandmothers spinning in their graves.
[DDET Classic Pork, Shrimp & Chive Dumpling Filling]
Makes 38.
- 1 lb ground pork
- ¼ lb shrimp, shelled, de-veined and finely chopped (optional)
- 1 bunch chives or scallions, chopped
- 1 cup finely shredded napa cabbage, packed
- 1 ½ tablespoons corn starch
- 1 tablespoon soy sauce
1 teaspoon sesame oil
- 1 tablespoon freshly grated ginger
- ¼ teaspoon white pepper
[/DDET]
[DDET Asparagus, Mint and Feta Dumplings with Balsamic Vinegar]
- 15 round dumpling wrappers
- 1 bunch asparagus, tough ends trimmed, finely chopped
- 1-2 tablespoons chopped mint
- ½ cup crumbled feta cheese
- pinch of salt
- black pepper to taste
Combine all ingredients. Swap in other raw seasonal veggies such as zucchini or summer squash shredded with a box grater.
[/DDET]
[DDET Cheeseburger/White Castle Dumplings ]
- 1 lb ground beef
- 1 teaspoon salt
- 1/2 teaspoon black pepper
- 2-3 teaspoons Worcestershire sauce
- 2 teaspoons mustard
- 1/4 cup finely chopped onion
- 3 oz. grated sharp cheddar (or any cheese you prefer)
Mix everything but the cheese together, then fold the cheese in.
[/DDET]
We made the above in class and all were really tasty. Â My favorite was the classic. Though the cheeseburger dumplings were really fun and made me want to experiment.
How to Fold Dumplings
So you have your dumpling skin and a great filling how do make a dumpling?  Lay the dumpling skin in your hand and put a spoonful of your filing in the middle.  If you’re using the purchased skins, you’ll need to dip your finger in water and trace a wet ring on the outside of the skin–this what will make it stick together in the next steps.   Fold the wrapper in half and pinch (so the two sides stick together) at the top.  Then pull a piece of the edge about half an inch to the right of the pinch over to the pinch, repeat down the side of the dumpling and do the same for the other side.  It’s a little hard to visualize, but the result should look like crescent moon.  Place the dumpling seal side-up while you make some more.
How to Cook the Dumplings
Cathy explained that the cooking process is really a combo of steaming/boiling and frying the dumplings. Â The frying is what gives dumplings that crispiness we all know and love from our favorite takeout. Â The steam is what gets the dumplings cooked through and through.
Heat oil in a large pan. Â Once the oil is hot, place the dumplings, unsealed side down, into the pan. Â Cooking unsealed side down, rather than on their side, will help get the awesome crisp you want. Â Cook the little guys in the oil for two minutes or so. Â Add enough water to the pan to cover about one quarter of the height of the dumplings, reduce heat to medium, and cover for four minutes. (It’s time to give ’em a steam bath!) When the water is gone, crackling sounds are a clue, the dumplings should be ready to scrape out onto a plate.
Serve with some soy sauce, maybe mixed with a bit of rice vinegar, and enjoy!
So, I figured out why all of my phone pictures were turning out so, so incredibly terrible. Some genius at Samsung made the default picture size 640×480. So, even though my phone has a 5 megapixel camera, it was taking .3 megapixel pictures. Awesome.
Well, now that I figured that out, I can take MUCH better pictures when I don’t neccesarily have my digital camera with me. Like maybe when there is a special chef’s exhibition table in the cafe at work. Case in point:

THAT, my friends, is a grilled skirt steak, rubbed with Ancho chili and cocoa powder, on top of a sweetcorn griddle cake, topped with a shrimp-avacado salsa. It was amazing, and it was $6. I love where I work.
That is also clearly a much, much better picture than the one of the venison tenderloin you can see in the post below. And if you click on the picture to see the full version, you can really tell the difference. Its like I’m living in the future or something!

I wish I had some fancy camera to capture this for you instead of my phone camera.
No recipe with this one today, just a picture and an exhortation: Go kill yourself a deer. Or, if you find all of your fall weekends occupied with debate tournaments – quit laughing, I’m giving back to the community – find yourself some family and friends with a surplus of this tasty critter in their freezer. This particular chunk of bambi came from my cousin Suzi and her wonderful, generous husband Ben. Now, if you take this latter option you will occasionally have to improvise your meal based on what cut of meat you get. If all you know how to do is make venison steaks you might be SOL when you end up with sausages or a roast. Luckily, all venison tastes amazing as long as you don’t overcook it.
This time I lucked out and got a package of venison tenderloin. Tenderloin! Maybe the best cut of meat on the whole animal! Quick side note – This is an uncomfortable fact that most hunters don’t share with people who eat venison but don’t want to hear about where it came from: the younger the deer, the better the meat. You can definitely tell the difference between a young buck with his first pair of velvet antlers and an old grizzled bastard that’s been dodging bullets since the last days of the Clinton presidency. Not saying you should only aim for fawns with spots, but it is a fact nonetheless. Back to the meat – if you should be lucky enough to get some tenderloin, keep it simple. This was rubbed with some sea salt, olive oil, fresh cracked black pepper, and chili powder. Cooked over some roaring hardwood charcoal, it develops a fantastic crust on the outside while staying tender and juicy in the middle.
 Before this week, I had a wine guy and a whiskey guy. Â But I was missing a beer guy. Â A man who not only knows his stuff, but has the stock to back it up. No more. Â Today, on my walk home from the train, with a little guidance from my beer guy, I picked-up a new (to me) IPA.
10% ABV and 100 IBU.  Like Dale’s Ale, with also comes to us from Oskar Blue Brewery in Colorado, this bad boy comes in a can.
—
Appearance: Â A golden orange.
Smell: Â Very light in this department. Hops and a little someth’n sweet.
Taste: Â Hoppy. Â Very little sweet. Â The hops are strong, though not over the top, but the lack of sweetness emphasizes them. Â A long and strong bitter finish which makes you want to keep sipping.
Mouth:  Good carbonation that foams nicely in the mouth.  Easy to drink.
Overall:  A solid IPA which at first reminded of Harpoon IPA, one of my go-to beers.  I would love for Toby’s Public House to have this around. Unless you’re on a mission to try new IPAs, it’s not worth going out of your way to find; you can find equally good beers without the effort.  But if you see it, drink it.


ABOUT
Good Food, Good Drink, Great Living
RECENT POSTS
| M | T | W | T | F | S | S |
|---|---|---|---|---|---|---|
| 1 | 2 | 3 | 4 | |||
| 5 | 6 | 7 | 8 | 9 | 10 | 11 |
| 12 | 13 | 14 | 15 | 16 | 17 | 18 |
| 19 | 20 | 21 | 22 | 23 | 24 | 25 |
| 26 | 27 | 28 | 29 | 30 | 31 | |
Tags
Archives
- November 2014 (1)
- October 2014 (2)
- September 2014 (1)
- April 2014 (1)
- March 2014 (1)
- February 2014 (1)
- January 2014 (1)
- December 2013 (4)
- November 2013 (2)
- October 2013 (1)
- September 2013 (1)
- August 2013 (4)
- July 2013 (4)
- June 2013 (6)
- April 2013 (5)
- March 2013 (5)
- February 2013 (1)
- January 2013 (3)
- December 2012 (2)
- November 2012 (13)
- October 2012 (4)
- September 2012 (6)
- August 2012 (3)
- July 2012 (4)
- June 2012 (6)
- May 2012 (10)
- April 2012 (13)
- March 2012 (5)
- February 2012 (5)
- January 2012 (2)
- December 2011 (16)
- November 2011 (8)
- October 2011 (10)
- September 2011 (10)
- August 2011 (12)
- April 2011 (2)
- March 2011 (8)
- February 2011 (7)
- January 2011 (7)
- October 2010 (5)
- September 2010 (8)
- August 2010 (12)
- July 2010 (5)