Archive for August, 2010
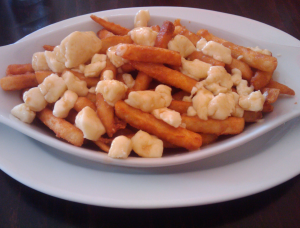
Canada is probably one of the last places that come to mind of when you think of culinary achievements and contributions. But sometimes our instincts are wrong. While apartment hunting in Park Slope Brooklyn, I ran across Corner Burger, a restaurant with a large sign in the window advertising poutine. Having seen poutine (pronounced PUT-SIN in its native Quebec French) on some food television show, I had to try this potentially delicious dish.
The sign in the window made poutine sound like a meal that just can’t go wrong: a layer of French Fries (I love fries), topped with fresh cheese curds (I’m from the Midwest so I can’t say no to cheese), smothered in gravy (goes great with pretty much anything savory).
Unfortunately, the reality of Corner Burger’s poutine didn’t live up to its potential. The poutine just didn’t have that level of decadence that seemed so promising. The main problem was the gravy—thin and runny, it settled on the bottom instead of coating the cheese curds and fries. Something was also not right with the cheese curds. Not being a poutine connoisseur, I can’t say for sure, but it seemed the cheese curds should have melted some. There are probably some crazy health code requirements about storing the cheese curds in a refrigerator, which means that the hot French fries only make them warm, not melty.
 In addition to the standard poutine, Corner Burger offers additional intriguing toppings such as pulled pork and barbecue sauce. Since I am now going to be living in the neighborhood, I may have to make a return trip to try one of the variety of toppings or one of the great-looking burgers.
—–
Corner Burger
381 5th Avenue
Brooklyn, NY 11215
(718) 360-4622
http://www.cornerburger.com/
Honestly, I decided on posting this next recipe only partly because of how delicious it is. Mostly, I friggin love this headline photo and wanted to re-use it.
This dish comes from my aunt, by way of my mother, and god only knows where it first originated. BUT it is one of the tastiest meals that you can make given how absurdly simple it is. It takes about 5 minutes to make the fresh tomato sauce, and 4 minutes to cook the pasta and toast the pine nuts.
The name for this recipe does make me somewhat self-conscious of the whirlwind of Scandinavian white-ness which is my heritage; it’s called “Mexican pastaâ€. That always seemed such a natural name for it, like it just fit perfectly. Now it seems as contrite and overly broad as calling hamburgers “American meat†or referring to Coq-au-Vin as “French Birdâ€. But there you have it. Call it what you may, just try it.
You will need:
- 3 small ripe tomatoes
- 2 tbsp olive oil
- 1 tbsp lime juice
- 3 tbsp chopped cilantro
- 2 Jalapenos, with seeds and ribs removed, finely minced
- 4 cloves garlic, minced
- 1/4 tsp salt
- 1/2 tsp chili powder
- 1/4 tsp white pepper
Note: this recipe will make 3-4 servings. If you want leftovers (which you will, trust me) double the recipe.
For the sauce: dice the tomatoes, and add to a large bowl. Not aluminum though, I remember hearing something about how the acidity of tomatoes reacts poorly with aluminum bowls and gives the tomatoes an odd flavor. No, I don’t remember where I heard it but it sounds like something Alton Brown would say, and so I go with it. Throw the rest of the ingredients in the bowl.  Mix that up well to make sure you aren’t going to get a random mouthful of raw garlic or jalapeño.
Ideally, I like to let it sit for at least an hour so the flavors can mend, and the salt can bring out the tomato juices. Its really the combination of the olive oil and the tomato juice which carries the flavor of the spices and makes this a workable pasta sauce as opposed to just tomato chunks on top of pasta.  If you’re in a rush you can use it immediately, or you can make it up to 24 hours in advance.
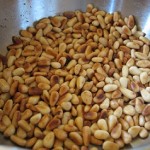
I know, I know. Another recipe with pine nuts. God help me, I do love the overpriced little bastards.
Now there are only three more ingredients to make this complete: angel hair pasta, shredded white cheese (I usually use Mozz, but you could go for Monterey Jack, or goat cheese, or queso fresco to be more authentic) and lastly some toasted pine nuts.
When the pasta is cooked to al-dente plate it up, throw on some cheese while the pasta is still hot enough to melt it, top with the tomato sauce and sprinkle with toasted pine nuts. Â A word to the wise: anytime you have a recipe this simple and fresh, the quality of ingredients you use will really shine through. If you can, find some heirloom tomatoes, fresh squeezed lime juice and a nice bottle of extra virgin olive oil.
In addition to blogging about food I also do a little legal blogging.  But some days the stars align and a blog post touches on both the legal and culinary. Today is one of those days.
Because the fine people at the Law Insider actually pay me a bit for my writings I can’t just re-post it here.  But my food/law post, full of recipe insanity and espionage, can be found at The Law Insider.
Please accept my double dipping while I enter the final days of apartment hunting (yes, I am still looking for an apartment for September 1, aka 10 days from now). An all original post involving French Fries, cheese curds, and gravy is in the works!
The Country Club
The Bushwick Country Club is Classy. That’s right: “classy†with a capital C.
For those you of you unfamiliar with Bushwick, it’s a Brooklyn neighborhood southeast of hipster Williamsburg. Bushwick is famous for a lot of things, with safety and high incomes probably rounding out the bottom of the list. Still, the Bushwick Country Club name doesn’t disappoint.
True to its name, the Bushwick Country Club even has a small golf course—a miniature golf course if you will. The mini-golf course is complete with a windmill made out of old PBR cans! As you might guess from the PBR cans, this fine establishment is near the Williamsburg border.
But the fun doesn’t stop with the golf. Specials drinks included two slushie machines, one always filled with Jim Beam & Coke slushies and one currently pumping out homemade Sweet Tea Vodka slushies.
.
The Pickle Back
The real novel drink at the Bushwick Country Club is the Pickle Back: a PBR tall boy, a shot of whiskey, and a shot of garlicky pickle brine. It sounds disgusting, at first, but that’s only before you realize the secret. You don’t shoot the whiskey and brine; they need to be sipped with the beer. If you like pickles and salty things, you’ll love this combination.
(I know, I know. In my Dale’s Ale post I knocked PBR, but sometimes glorified mineral water is the right beer—the Pickle Back is one of those times.)
After trying the Pickle Back at the Country Club, I decided it was time to make it at home. Tall boy PBRs are cheap enough and they give you rail whiskey at the Country Club, so no need to spend the big bucks on the brown for the home version. For the pickle brine you can buy a jar of pickles. Or just ask if you can get some at the deli counter – my local grocery store was happy to give me a bunch for free (it turns out they just throw it out anyway)!
However you get your hands on it, this unique drink is a must try.
—–
The Bushwick Country Club
618 Grand Street (between Leonard & Lorimer)
New York, NY 11211
(718) 388-2114
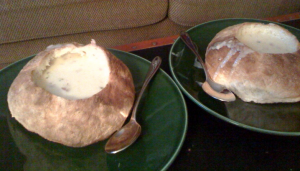 It might not have been the best idea for the middle-of-July heat, but one day Meg woke up with what I still think was a brilliant idea: bread bowls. (Yeah, this post is being written a little after the actual events, but don’t think about it as me being lazy, think about it as an exciting time machine!) The whole summer Meg had been turning out amazing fresh breads. Her idea this day was simple: make two half-sized peasant breads, cut off the top, pull out some of the bread, insert soup, and eat.
I was excited until she told me she wanted to use canned tomato soup. Not only is it fundamentally and morally wrong to serve tomato soup without grilled cheese, but I knew we could do better. Si se puede!
My idea: beer cheese soup. Sure it was about 95 degrees out, but if people can do Christmas in July I didn’t see why we couldn’t do beer cheese soup in July.
I found two recipes online at www.foodtv.com. Each recipe had its own good things going on: The first was nice and creamy, calling for a good deal of milk. The second didn’t have the milk but it had kielbasa sausage and a roux to thicken things up (Both recipes are included below). Not wanting to miss either the creamy or the meaty, I decided to combine the deliciousness into one recipe:
.
The Creamy-Meaty Beer Cheese Soup
Ingredients
• 1/2 pound kielbasa sausage, finely chopped or processed until crumbly
• 3 tablespoons olive oil
• 1 cup minced onions
• 1/4 cup minced celery
• 2 bay leaves
• 3 tablespoons minced garlic
• 4 ounces butter
• 1/2 cup flour
• 1 (12-ounce) bottle light beer
• 4 cups chicken stock
• 2 cups whole milk
• 1 teaspoon salt
• 1/2 teaspoon freshly ground black pepper
• 3 cups grated Cheddar (about 12 ounces)
• 2 tablespoons minced fresh chives, for garnish
Cook the kielbasa in the olive oil in a large, heavy soup pot over high heat until golden brown, 5 to 6 minutes. Add the onions, celery, salt, pepper, and bay leaves and cook, stirring, until the onions are slightly caramelized, 12 to 15 minutes. Add the garlic and cook, stirring, until fragrant, about 1 minute. While the onions cook, in another large saucepan, over medium heat, melt the butter and stir in the flour and cook, stirring constantly for 4 minutes to make a blond roux. When both the roux and kielbasa mix are ready, pour the roux into the kielbasa mixture. Gradually whisk in the stock and the beer.  Bring to a boil. Reduce the heat to medium-low and simmer uncovered, stirring occasionally, for 45 minutes.  Gradually add the milk.  Continue to cook for 10 minutes. Add the cheese a little at a time, stirring until nearly completely melted after each addition. Remove from heat and ladle into the bread bowls (When I make it again I might try to add just a bit of sherry with the beer).
The result might be one of the most densely caloric meals I’ve ever had, which was great, even in the heat of summer.  But, as we approach the fall, this will become an even better choice!
—–
[DDET See the Creamy Beer Cheese Soup Recipe]
Creamy Beer Cheese Soup
.
Ingredients
4 ounces butter
1/2 cup flour
1/2 cup minced onions
1/4 cup minced celery
Salt
Cayenne
1 (12-ounce) bottle light beer
4 cups chicken stock
2 cups whole milk
1 pound sharp cheddar, grated
Dash hot red pepper sauce
1 tablespoon finely chopped fresh parsley leaves
.
Directions
In a large saucepan, over medium heat, melt the butter. Stir in the flour and cook, stirring constantly for 4 minutes to make a blond roux. Add the onions and celery. Season with salt and pepper. Continue to cook for 2 minutes or until the vegetables are wilted. Stir in the beer and stock. Bring the mixture to a boil, reduce to a simmer and cook for 30 minutes. Stir in the milk and cheese. Continue to cook for 10 minutes. Season with salt and hot sauce. Reduce the heat and keep warm.
[/DDET]
[DDET See the Meaty Beer Cheese Soup Recipe]
Meaty Beer Cheese Soup
.
Ingredients
1/2 pound kielbasa sausage, finely chopped or processed until crumbly
3 tablespoons olive oil
2 cups chopped yellow onions
1 teaspoon salt
1/2 teaspoon freshly ground black pepper
2 bay leaves
3 tablespoons minced garlic
8 tablespoons all-purpose flour
6 cups chicken stock
2 cups lager beer, preferably amber
1 1/2 teaspoons chopped thyme
3 cups grated Cheddar (about 12 ounces)
2 tablespoons minced fresh chives, for garnish
.
Directions
Cook the kielbasa in the olive oil in a large, heavy soup pot over high heat until golden brown, 5 to 6 minutes. Add the onions, salt, pepper, and bay leaves and cook, stirring, until the onions are slightly caramelized, 12 to 15 minutes. Add the garlic and cook, stirring, until fragrant, about 1 minute. Sprinkle the flour over the onions and cook, stirring constantly, for 2 minutes. Gradually whisk in the stock and the beer. Add the thyme and bring to a boil. Reduce the heat to medium-low and simmer uncovered, stirring occasionally, for 1 hour. Add the cheese a little at a time, stirring until nearly completely melted after each addition. Remove from the heat, taste, and adjust seasoning if necessary.
[/DDET]
Despite being of distinctly Scandinavian heritage, I absolutely love Mexican food. Something about the combination of spicy peppers, lime juice, and cilantro makes just about anything taste pretty damn good. Mexican food also plays very nicely with margaritas and beer, making it a great meal before hitting the town (if you can refrain stuffing your face with delicious tacos that is).
Mexican night at my place is somewhat of an endeavor since I make everything but the tortillas from scratch. Homemade black beans, onion salsa, beefy-chorizo goodness. But you can always make the sides beforehand and then just make the meat and beans before eating. Whatever, figure out the timing yourself, just get your ass to the store and buy these ingredients:
- 1 lb ground beef (Relatively lean)
- ¾ lb chorizo. Try to find the stuff that was ground in-house by the butchers. That stuff that comes in the high pressure plastic casings is basically a giant Mexican flavored Slim Jim.
- Package of tortillas
- Sharp cheddar cheese
- 1 can of black beans
- 1 can of Rotel chili peppers+tomatoes
- 2 large red onions
- 1 head of garlic
- 3 Jalapenos
- 1 bunch of cilantro
- 2 limes
- Lettuce or cabbage
- 1 avocado
- Either beef stock, or beef bullion
- Spices :cumin, chili powder, dried oregano, salt and pepper
So we’ve got three separate recipes here. The meat, the beans and the salsa. You’ll have to find your own recipe for margaritas for now.
The salsa is pretty simple. Take 1.5 diced red onions (save the other half for the bean recipe); add it to a mixing or serving bowl.  Add the juice of 3 lime halves, ¼ cup of minced cilantro, 2-3 cloves of minced garlic and 2 minced jalapenos. If you like your food spicy then leave some to most of the white ribbing from the pepper in there when you clean out the seeds. If not, make sure to scrape it all off. Add a few shakes of cumin and chili powder (I like to be precise with my measurements), a tablespoon of extra virgin olive oil, and a good pinch of salt and pepper. Mix it all together and taste, see if it needs a bit more salt, pepper, lime juice, etc. Throw that in the fridge for an hour or so to let the flavors mingle. No, there are no tomatoes in this salsa. They make salsa too watery for tacos, although perfect for chips. Finally, don’t be reluctant to try this even if you dislike raw onion. The lime juice pretty much neutralized the sharp onion flavor.
For the beans: throw a medium saucepot on the stove over medium heat. Let it preheat for a bit then add a 1 tbsp of olive oil and the remaining half of the diced red onion, with a pinch of salt and a few grinds of pepper. Let the onions sweat for a minute or two, turn the heat down if they start to brown. Then add 3 cloves of minced garlic and stir. After about 30 seconds add the can of Rotel, but drain off most of the excess liquid first.  Then add the can black beans which have been rinsed and drained. That needs to cook for 5-10 minutes on low heat, stirring occasionally. Leave the cover off because some of the liquid needs to cook away, but don’t let it get too dry. When the beans soften up, add 2 tablespoons of minced cilantro and the juice of half a lime then take it off the heat and mash it together.  I use a potato masher for this; works great. If you don’t have a tato masher, you could probably use forks or spoons or something similarly primitive, but I will think less of you. Just go buy one.
For the meat: preheat a large sauté pan on medium high heat. Add the beef and break it up in the pan then let it sit until it gets nicely browned on one side. Flip it over then add the chorizo and mix it up. Before starting the meat you should make this little spice slurry: take 1/3 cup of the beef stock; add ¼ tsp of cumin and ½ tsp of chili powder and oregano. You could also add 1 tbsp of minced poblano or chipotle peppers, if you wanted to. Top it off with 1/8 tsp of corn starch powder for a thickener, and then mix the slurry together. I tried to think of a less appetizing phrase than spice slurry but came up short. Anyways, drain the meat of most of its grease once the chorizo is cooked, then add the spice slurry and mix to coat the meat.
DONE!
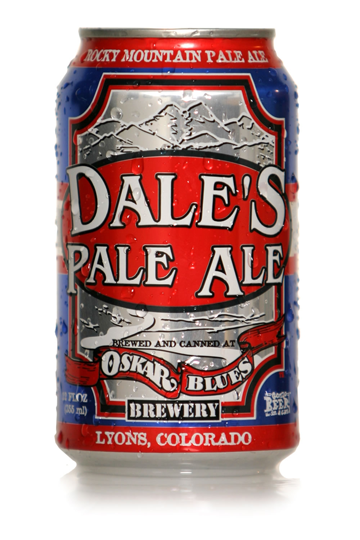 Ok, so the official name is Dale’s Pale Ale, but I like to keep it simple with Dale’s Ale. I know what you’re thinking when you see the picture: but Arthur, this comes in a can so it must be swill? All I can say you’ve got to try it!  This is hands down the best beer I’ve ever had out of a can and definitely in the top 10% of beers overall.
To be fair, when I first saw it when I moved to New York two years ago I had the same thought. But Matt, the bartender at my favorite watering hole, the City Tavern, made me see the light.
The beer is an awesome IPA—a truly hoppy but really well-balanced IPA. The great part is that the sweet balances the hops almost without letting you know it’s there; like a magic invisible fairy it just makes everything right with the world.
And for the hipsters, there is the added benefit of being able to drink out of a “cool†looking can without having to drink the glorified mineral water found in PBR cans (though I still recommend a glass).
 Yesterday I made the trek down to Chinatown. But this time was different; I wasn’t on my usual hunt for cheap-yet-delicious dumplings or pastries. I was on the hunt for dragon fruit. I had seen dragon fruit on my many other trips to Chinatown over this summer and decided to finally try some.
Dragon fruit is a strange but beautiful-looking fruit grown in Southeast Asia, Mexico, Central and South America, and Israel. The plant is a type of cactus, and the fruit comes in 3 colors: 2 have pink skin, but with different-colored flesh (one white, one red), while the other is yellow color with white flesh.
I’ve could only find the pink skinned fruits but wanted to try both colors of flesh. I correctly guessed that the slightly differently shades of pink skin and prices indicated the difference in flesh color. The white-fleshed fruit has a slightly lighter skin and is a little cheaper.
The white dragon fruit had a very light and subtle flavor. The fruit had almost no sweetness with a dominant grassy flavor. If the fresh grass flavor were any stronger it might be unpleasant, but, as it was, it was kind of refreshing on a hot day. Besides that, I really enjoyed the texture. The small black seeds throughout were like the seeds in a kiwi and gave it a pleasant crunchiness.
The flesh color of the “red”-fleshed fruit is actually an amazingly bright purple with magenta juice (that stained my fingers pink all day!). The flavor is subtle, but is a little sweeter and with a fainter grass flavors than the white- fleshed fruit. The texture also is different from the white: it seems a little softer and the seeds don’t provide the same satisfying crunch.
.
Dragon Fruit Sorbet
After sampling both fruits I decided that it was time to try out a sorbet. The bright colors and the subtle sweet flavors of the red fleshed fruit just screamed for it. [DDET (Click if you want to see the sorbet recipe.)]
—
INGREDIENTS:
2 red-fleshed dragon fruits
3/4Â cup cold water
1 tbsp lemon juice
2 tbsp sugar
DIRECTIONS:
Cut the dragon fruit in half lengthwise. Scoop out the flesh with a spoon.
Place the pulp of the dragon fruit in the food processor along with the water, lemon juice, and sugar. Pulse until smooth. Pour into the ice cream maker and churn until frozen.  Freeze the sorbet until ready to serve.
For added flair you can use the halves of the dragon fruit skins as bowls when serving; if you do, freeze them first.
—
[/DDET]
The sorbet turned out great. As expected, the color was amazing -Â though somehow a deeper purple than the flesh itself. The flavor was fresh, a little sweeter than the fruit alone, and the grassy taste was gone. The texture also became more like that of the plain white fruit with a pleasant crunch from the seeds.
As with watermelon sorbet, I think that the blended mixture has a good chance as a cocktail. Here I would recommend Hendricks gin and maybe a flamed lemon peel. The freshness of the Hendricks would complement the freshness of the dragon fruit nicely.
A few weeks ago, I found myself in a bit of a predicament. My dad informed me, with 5 days notice (only 1 of which was during the weekend), that he had signed me up to provide treats during the coffee hour following the main service at my parents’ church. The problem was not necessarily the short notice – I’ve already proved I can handle a church-treats function with a minimum of planning ahead. The problem was my mother’s decree, put in place this summer as soon as the weather turned warm: that I would not be allowed to use her oven unless it’s below 68 degrees outside.
“Why not use your own oven?†you might ask. I’d consider telling you to shut your face. Then I would think better of it, and explain why your question is cruel and well met with a curt response.
Unfortunately, I am no longer a member of grown-up society. I traded in my apartment and all my precious junk (now residing in storage) for a twin bed I slept in when I was a grade-schooler and a tiny room off the side of my parents’ dining room, in order to go to culinary school and turn my obsession with cooking and eating into a career.
While I have been blundering my way through cooking for the family with no oven for a few months now, the church treats were a crystallizing experience. What I learned that weekend is best revealed in the following list of Dos and Don’ts. I find this list is useful both for summer cooking and cooking for groups (who am I kidding these are life lessons right here):
- DO make sure there is enough room in the fridge or freezer before you walk up to them with an ungainly container of food expecting to be able to cram it in there. Especially if the appliance in question is not yours (not-at-all-pathetically roomy), but your mom’s (stuffed with what must be supplies for a possible nuclear holocaust).
- DON’T, when facing a time crunch, use that leftover homemade ice cream your family won’t eat or allow you to throw away. Maybe the people you’re feeding won’t know it’s past its prime, but you will, and you will be ashamed.
- DO make sure you fit your ice cream scoop to the cones you’re trying to serve. Tiny cones + regular-sized ice cream scoop = spills, long waits, & the sneaking suspicion in the minds of your customers that you don’t know what you’re doing.
- DON’T assume that because it’s written that way in a recipe, you can avoid some of the unbendable cooking rules because the all-knowing “test kitchen†did. For example, if you’re covering cookies with chocolate, make sure you temper it beforehand (or, in my case, learn how to temper chocolate, then employ said knowledge)! Otherwise, the cookies may taste fine, but will be covered with an embarrassing white bloom.
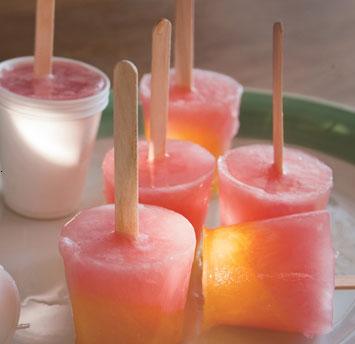
- DO plan ahead a little with fruit juice popsicles. If they’re supposed to have 2 layers of different juice, you’ll have to wait for the first layer to freeze before you move on to the second. Popsicles are also quite informed by the first “DO†in this list. Finally, if your 2 layers are supposed to be different colors, perhaps employ a little food coloring. Especially if you would prefer neither of the layers be pee-colored.
- DON’T hang around long enough afterward for anyone in charge of keeping the church atrium clean to notice you’re the cause of the ice cream drips everywhere.
I hope these lessons are as helpful to others as they have been for me. They’ll be on my mind as I prepare a hopefully less stressful no-bake feast for churchgoers again this week! And if you’re eager to improve on my beautiful yellow popsicles, here’s the recipe:
[DDET Passion Fruit-Guava Popsicles]
Passion Fruit-Guava Popsicles
I got this recipe from the July issue of Bon Appetit and warped it into what you see below. The beautiful picture accompanying it is from the magazine, but I’m sure it’s possible to create pretty popsicles without the help of a food stylist, even if I wasn’t able to the first time around! Be warned: I was not able to find popsicle sticks in any of the grocery stores I tried. I had to go to a craft store. And even then, I just barely was able to get away with only 50, instead of the 1000 they wanted me to buy.
Makes 8
2 T fresh lime juice, divided
11.5 oz passion fruit juice or nectar
11.5 oz guava nectar
8 3-oz disposable plastic cups
8 popsicle sticks
Stir passion fruit juice or nectar, 3 T sugar, and 1 T lime juice in a 2-C measuring cup (or bowl, if you’re good at pouring) until sugar dissolves. Divide mixture among the 8 plastic cups. Cover the cups with squares of tinfoil and put a popsicle stick through each tinfoil cover all the way into the cups. Put the cups in a muffin pan or on a tray, and freeze in the freezer until the juice is frozen, about 3 hours.
Meanwhile, stir guava nectar, remaining 3 T sugar, and remaining 1 T lime juice in another measuring cup or bowl and chill in the refrigerator until the passion fruit juice is frozen.
Carefully remove the tinfoil covers from your (now-frozen) popsicle cups. Divide the chilled guava mixture evenly among the cups, then put the tinfoil tops back on. Freeze the popsicles until completely frozen, about 4 hours.
To serve, run a little warm water around the outside of the plastic cups (if the popsicles won’t come off on their own) and remove the cups.
Notes
According to Bon Appetit, these keep for about 4 days. I served mine on the first day, so I don’t have any information about that. As far as color goes, mine ended up light yellow, with no real distinction between the layers. I wonder if adding a few drops of food coloring in either of the juice mixtures would improve the color? If you’re not sure where to get juice nectars, I find them in cans like pop cans in the Hispanic aisle or sometimes the juice aisle at the grocery store.
[/DDET]
Mentioning beer in four out of six of my first posts might not have given it away, but I like beer. I mean I could be a doctor in a 50s television ad when it comes to the stuff: it relaxes you when you are overworked, picks you up when you’re down, cools you in the heat of summer, and warms you in the cold of winter. So when I found out the Brooklyn Brewery was walking distance from my front door and that it has FREE tours I had to go.
The tour is short but informative. There are some funny anecdotes about the brewery getting started in 1987 and an overview on the brewing process.
After the tour there is $4 beer. Yeah, that’s only about a buck or two off the Brooklyn Lager you can get at the bar. But, what makes it great is you can get some hard to find beers. This summer I’ve been experimenting with this concept called “moderation†so I only tried two brews. My first was the Brooklyn Blast. Dark gold in appearance with a light white head, the Brooklyn Blast is hop forward but balanced with malty caramel. My second beverage was the Brooklyn Buzz Bomb. The light bodied taste has a nice amount of sweet malts and honey with enough hops for balance. The Buzz Bomb is actually a braggott (a blend of beer and mead). True to the best of the braggots the Buzz Bomb ferments both the grains and honey together to make a must try summer brew. Clocking in at 8.2 and 8 ABV respectively, both pack a refreshing zing. Though don’t look for these at your corner store, as part of the draft-only Brewmaster’s Reserve Series they won’t be found in bottles.
#1 BREWERS ROW
79 North 11th Street
Brooklyn, NY
http://www.brooklynbrewery.com/events/
(For those in Minnesota I recommend the Summit Brewing tour. Not only do you get a great tour, but you get a free beer at the end!)
