Posts Tagged ‘grilling’
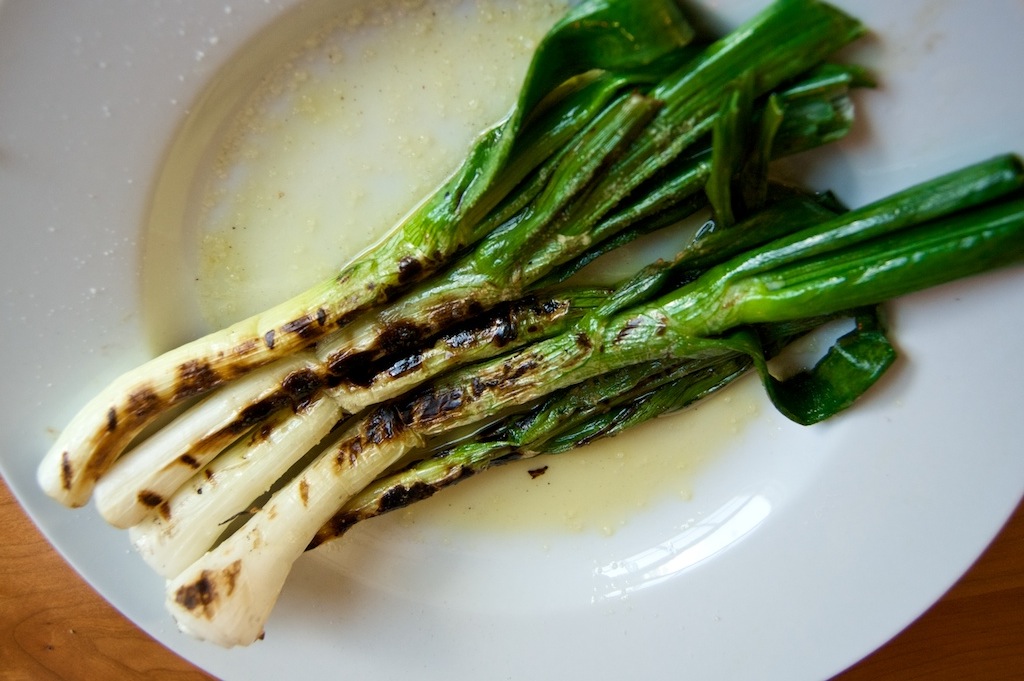
As almost any of my  local friends could tell you, I am hopelessly hooked on this recipe. I originally found it in a Splendid Table Summer Grilling handbook I got for joining Minnesota Public Radio (charitable brag), and I think I may have made it every single time I’ve grilled in the last 5 months. I’m not sure I’ve ever found another recipe which has such an insanely out of balance ratio of time, effort and money input for each unit of tastiness returned. This whole thing takes about 5 minutes to prep, it cooks on the same grill and at the same time as whatever else you might be grilling, and the end result is just fantastic. The only complaint I have with this recipe is that it may upstage whatever meat you’re grilling with it!
First prep the scallions by rinsing and drying all of them, then cutting off the roots at the bottom as well as the top 2 inches from the green end.  The asparagus  needs to be rinsed and trimmed as well. There’s a nifty trick for this, which ensures that you will always remove all the tough, fibrous part of the stem. Grasp the cut end of the asparagus in one hand, and then hold 2-3 inches up the stalk with your other. Bend the stalk until it snaps, and throw away the short end. There’s no consistent point that asparagus stems turn from tough to tender, and this method will allow each stalk to break naturally at that point.
Place all of the onions and asparagus on a platter or jellyroll pan, then drizzle on 2 tbsp or so of olive oil. The exact amount of each is not that important, but I usually do 2 bunches of scallions and 1 of asparagus. Also, if you’re able to find the smaller asparagus stalks, go for those. Asparagus, being much denser then scallions, takes significantly longer to cook. The small, thin ones seem to cook at roughly the same time, so those are ideal. Toss the veggies with the oil, and whatever seasoning you want. You could use just salt and pepper, or change it up for your tastes. I usually use Cavender’s Greek seasoning for this, it seems to work pretty well.
Don’t go nuts with seasoning the veggies, because after they grill you’re going to top with a balsamic vinaigrette. It doesn’t need to be perfectly executed, just mix balsamic, olive oil, Dijon mustard, garlic, and an herb or two. If you need a recipe to work off of, we’ve previously covered the America’s Test Kitchen vinaigrette recipe here, just make sure you don’t use the full amount. 1/2 cup or so of vinaigrette will be plenty.
Grill the veggies for 5 minutes or so, depending on how hot you have the coals. If they start to burn just move to a cooler part of the grill. When everything has a bit of color and has gone slightly limp, it should be ready. Toss the veggies with the balsamic mixture and serve immediately. You can top with some shaved Parmesan if you like, but its damn good as it is.
Unlike many of my fellow Tundra inhabitants, I happen to enjoy living in Minnesota. I’ve got a 4×4 Jeep Cherokee (and a nice layer of insulation) to get me through the winter, fishing and swimming to get me through the summer, and hunting of all kinds to entertain me during the fall. Pheasant hunting is one of my favorite ways to spend a weekend. What could be better than a weekend with family, dogs and guns? Not to mention that because we spend all day walking the fields, we can justify having huge breakfasts with eggs, bacon and cornbread!
The weekend before Thanksgiving, I hit the fields with my brother Dan, my uncle Craig and my cousin’s husband, Ben. We had ourselves a grand old time and possibly our most bountiful harvest yet. There was one point where we let two pheasants get away because most of us were out of shells in our guns. But after the fun of actually hunting, you’re left with a lot of pheasant meat which can be very tricky to do well. I find that most of the time I have pheasant it turns out pretty dry, almost without regard to the manner in which it was cooked. So you can either serve it in stew, serve it with a rich gravy, or brine it. Having never tried that last option with a pheasant, that’s the way I decided to go and I may never go back again. The recipe for the brine is:
- 8 cups water
- 1/2 cup kosher salt
- 1 cup brown sugar
- 1/4 cup real maple syrup
- 1 onion, chopped
- 4 cloves garlic, smashed
- 1 tsp black pepper corns, whole
- 1-2 dashes of worcestershire sauce
- 1 pinch ground cloves (I used whole because that’s what I had)
- Juice of 1/2 lemon
- 1 dash cayenne pepper
Combine the water and the salt in a large pot, and heat it up on the stove until the salt dissolves. Then you need to cool of that liquid, so if you live in a similarly arctic environment just put the pot outside. Once it’s cool, bring it back inside and add all of the other ingredients, and the pheasant(s). I would imagine this could cover up to two whole pheasants as long as you separated the pieces, for me it was just enough to cover three large breasts. You’ll want to brine the pheasants for 8-12 hours. At this point, you can do all sorts of things with them. You can still roast it in the oven, bread it and fry it, whatever you like. But if you want dangerously good pheasant, read on…
Take the pheasant breasts and debone them. If you haven’t done this before, you’ll need a sharp knife and a good youtube video of deboning a whole chicken (skip to about 1:30). Now that you’ve got your boneless pheasant breasts, cut them diagonally in half. The point of the diagonal cut is that you don’t want one piece being short and fat while the other is long and thin or they obviously won’t cook evenly. Now pat the meat dry and toss with just a bit of olive oil and a sprinkling of some kind of seasoning. You could use cajun seasoning, garlic & herb, whatever, I used some chicago steak seasoning blend. Just remember to go easy on both things because excess olive oil is going to cause flares on the grill and 12 hours of brining kind of obviates the need for tons of seasoning on the outside of the bird.
Now’s when the real fun starts: you’ll need a pack of bacon! Wrap the pheasant breast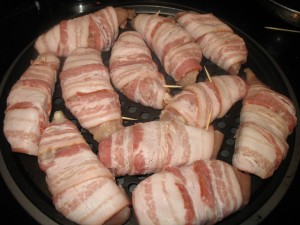 sections in bacon, using toothpicks to hold everything together. If you can, try to hide at least one end of the toothpick in the meat so it doesn’t burn. You’ll probably need to move the meat around the grill quite a bit because the bacon fat will cause flareups and there’s pretty much nothing you can do about it. Just keep moving the pheasant so the meat doesn’t get scorched or covered in soot. Cook the meat to an internal temperature of 165 degrees then remove from the grill and let rest for 5 minutes or so.
So, why is this recipe dangerously good? Well, if you’ve never eaten game birds before there is one critically important thing which you must not forget: you may bite into a piece of shot at any time. Depending on the size of shot, that will be anywhere between the size of a peppercorn and a pin head but regardless of the size, it will hurt like a son of a bitch if you bite down on one. Because of that, you have to chew the meat very slowly and concentrate on feeling for any peices of shot. When I first made this recipe last weekend, the combination of the brined pheasant with the bacon flavoring and the smoke of the charcoal was such an amazing combination that I continually forgot that I needed to eat it slowly and just started scarfing. Try this recipe at your own risk!
Yes, yes, as Loren so eloquently pointed out in his last post: it’s football season once gain.  Like Loren, I slowly developed a serious interest in the Vikings and was lured in to the game all together by my first fantasy team last year.  This year, without homework to fill my Saturdays, I’m hoping to develop a casual following of college ball.  It’s not the NFL and, having gone to Macalester College, I never experienced seriously cheering for my alma mater’s team–but I’m always up for a chance to watch a good game with a good beer and some great food.
For this weekend’s NFL opener it was time to fire up the grill for some burgers.  Lately Nick has been mixing some BBQ sauce (among other undisclosed ingredients) into the burger meat before forming the patties.  The result is a flavorful moist burger with little caramelization.  But there is a problem:  the patty become too moist and falls apart easily during grilling.
My thought on Sunday was to use a little honey, some onion, and some dry spices to get a similar flavor without the structural problems.  But when I went to the spices I got distracted and decided to try something crazy and went the curry route.  That’s right, curry hamburgers.  The result was a mean tasting burger.  I just kind of threw stuff together, but here is an approximation of a recipe:
- 1 lbs ground beef
- 3 table spoons of honey
- 1/2 a small onion finely chopped/diced on the large side
- 1-2 table spoons of red pepper flakes
- 1/4 cup of curry powder
The long furlough is over and we are back at it. Our apologies for the delay, Arthur was studying for the Bar Exam and I was in the middle of changing jobs and apartments. Now that these things are out of the way, we’re hoping that we can once again get into a regular rhythm of new recipes and restaurant reviews.
I’m happy to say that my new residence is far more conducive to culinary advenutures and the documentation thereof. The kitchen is much bigger, the stove /oven is much better and I also moved in the with my buddy Tyler, whom our readers may remember from the Lasagna Files. I’m sure some of Tyler’s own cooking experiments will be featured at some point, as he has some nifty recipes of his own like soy-pickled jalapenos, pickled northern pike, creamed cucumbers and other things.
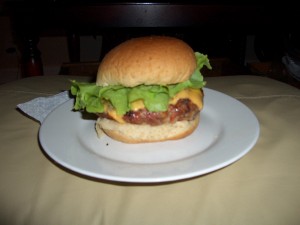
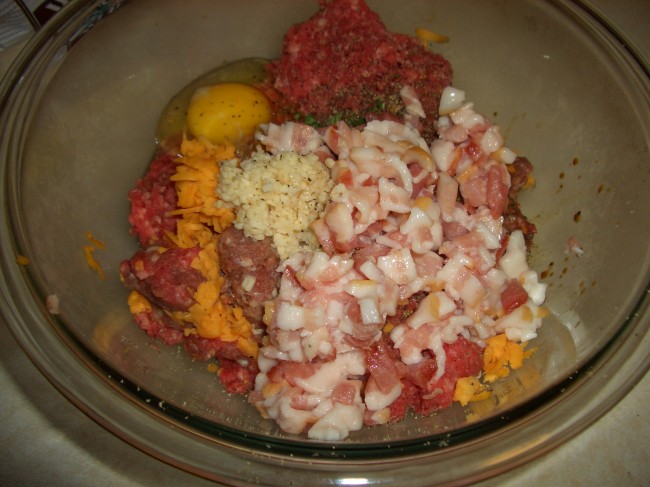
Today’s recipe was inspired by two things. First, my new place has a grill, something I’ve been missing for the last year. Second, we were in the middle of a horrid heat wave at the time. With temperatures hovering around 95-100 with outrageous humidity, we were doing our very best to not do any cooking inside. Thus were born the cheddar-bacon cheeseburgers.  And because that sounds a bit too simple, we’re gonna go for internal cheddar and bacon. You’ll need:
- 1.5 lbs of ground beef
- 3 strips of thick cut bacon, chopped
- 1/2 cup of shredded cheese, like a sharp or smoked cheddar
- 3 large cloves of minced garlic
- 3-4 dashes of Worcester sauce
- 1 egg
- American cheese slices
- Salt and pepper to taste
- Maybe a little something else. I threw in a bit of minced oregano and rosemary, mainly because we have a huge herb garden outside the back door. Chili pepper flakes would not be a bad idea either.
Mix all of that together with your hands, then separate and form the patties. We got 5 burgers out of the batch, and they seemed to be a good size. Throw them on the grill for a few minutes per side. Because these burgers have raw pork in them I cooked them a little more than the medium/medium-rare I usually prefer. By the time I took them off  the grill there was almost no pink in them, but because of the bacon the burgers were still incredibly juicy. Add the (fake) cheese slices  about a minute before you take the burgers off the grill, then let them rest post-grilling for a few minutes before eating. Top your burger with whatever you normally prefer. Unless that happens to be mayo; don’t do that to any burger.
P.S. FOOTBALL SEASON IS RIGHT AROUND THE GODDAMN CORNER! Its a cruel irony how much football makes me look forward to the end of the summer. 
Especially when this pantload is no longer whiffing blocks all game long. Anyways, we’ll have some more great appetizers and grazing food here on ECL once the season officially starts, including beer-cheese dip and fresh spring rolls with jalapeno syrup dipping sauce!
 Things have settled down after the move-in and real cooking in the new apartment has begun. Posts are coming on the indoor cooking, but today it’s time to talk about grilling.
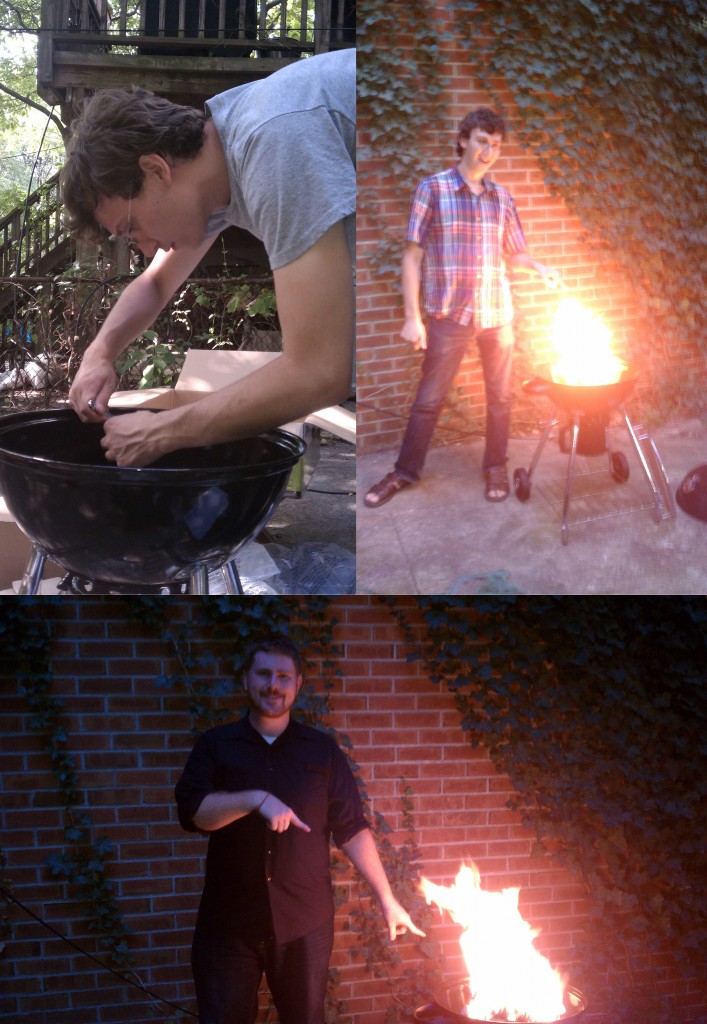
The first part of this cooking adventure begins with getting the grill itself. Back in Minnesota this wouldn’t be a problem, but here in Brooklyn, in order to get the grill Nick and I had to walk about a mile to Home Depot. Actually, the walk there wasn’t bad - it was the walk home with a grill and a giant bag of charcoal that was a little more of a struggle. The main problem is that to get to and from Home Depot and the apartment we had to walk on what is basically a highway offramp. Unlike the skilled Mexicans pushing carts up the hilly off ramp in the middle of a lane, we not-so-artfully walked on the curb that was about two feet from a cement wall. But we made it home with body and grill unharmed.
Our next job was to set up the grill. I know, I know, it’s not rocket science, but it’s been about two years since I’ve built anything even as simple as an Ikea bookshelf.
It wasn’t in the instructions, but I’m pretty sure that the first step of building a grill is opening a beer. So with some Brooklyn Lagers in hand we set to work and successfully assembled a fine grill (Yes, the handle somehow ended up on the side instead of the front, but I like to think it adds character).
Finally, it was time to grill. Since it was Labor Day weekend, burgers and brats seemed right. Unfortunately, here in New York, brats are not as ubiquitous as they are in the Midwest and we were forced to settle for some hot Italian sausages.
On our second grilling day, Labor Day proper, Meg was hit with a brilliant idea: cheese inside the burgers! Having experimented with putting various herbs and spices in the burgers we decided to mix some Chipotle Tabasco sauce in with the meat. To get the cheese inside, I basically made a smaller-and flatter-than-normal burger with a dent in the middle which I filled with cheese, and then I put a similarly-sized beef patty on top. Softly pinching and massaging sides of the burger makes the patty whole, with the delicious cheese trapped inside.
With an heirloom tomato, a red onion, and some mizuan (a lettuce with spiky dark green leaves that has surprisingly delicate texture, but a good crunch), it was time for meat to meet fire.
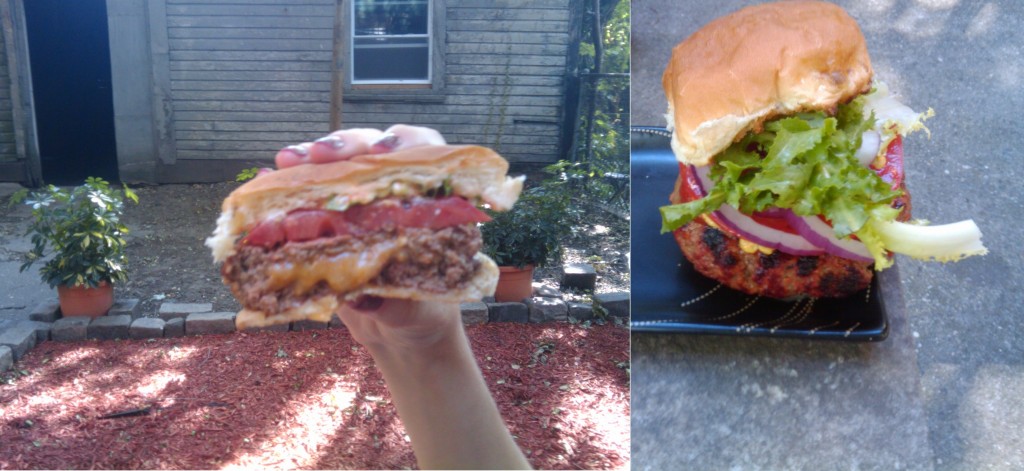 One especially large and juicy burger became what I call an open legs burger (No, it’s not an open legs burger because as we all know great food is the way to a woman’s, um, heart). It’s an open legs burger because it’s so deliciously juicy that the only way to take it on and not ruin your clothing is to sit down, open legs, lean forward, put your elbows on your knees, and eat so any drippings fall cleanly on the ground in front of you.
After the meat was cooked I threw a few ears of corn (husk and all) onto the grill that, after about 20 to 30 minutes, were so sweet and savory, with a hint of smoke, butter was unnecessary.
With the grill now safely broken in, new proteins are on the horizon. My recent trips to the store have me eyeing great looking racks of ribs.
