Posts Tagged ‘Asian’

In case you’re not in Minnesota, or have been intentionally avoiding television news for the last 3 weeks, let me bring you up to speed; it is brutally cold up north here. I usually pride myself on being someone who doesn’t mind the winters, as though the ability to survive a 6 month period spent entirely indoors somehow grants me a moral high ground. Well, this winter is close to breaking me. A few things to put this winter in context: Over the entirety of my K-12 education, I got two days off; one for snow, and one for cold weather. Halfway through this winter, school has been cancelled three five times for cold weather (cancelled twice more between the time I started and finished this post!).  More than once this winter, it has been -20 when I walked out to my car in the morning. NEGATIVE. TWENTY. So cold that the moisture in my breath freezes on my mustache instantly. So cold that my car creaks and groans when I get in every morning, and the heater doesn’t start putting out warm air until I’m basically turning into my work parking lot. So cold that your eyes water involuntarily, and then your tears freeze to your face.
Suffice it to say, I’m pretty damn sick of this winter, and I needed something to take me away, even if just for the evening. Enter the Asian glazed ribs. This was the perfect recipe for what I needed. The rich, juicy meat was hardy enough for a winter evening, but the south Asian flavors made me feel like I was someplace warm. Also, while you can finish these ribs on a grill (and I am on the record as being an advocate of winter grilling), they work just fine in the oven. This is another winner from the carnivore’s bible, Good Meat.
1 rack of baby back ribs (about 2 lbs)
For the marinade:
1/3 cup soy sauce
1/3 cup bourbon
3 tbsp honey
1 tbsp grated peeled fresh ginger – I ended up mincing the ginger once i realized how slowly it was grating on my microplane.
Freshly ground black pepper
1/2 tsp sesame oil
1/4 tsp ground cinnamon
1/8 tsp freshly grated nutmeg
For the glaze/dipping sauce:
3 tbsp honey
1 tbsp hot water
1 tbsp dark brown sugar
Freshly squeezed juice of 1 lime
2 tbsp fish sauce
2 tbsp soy sauce
1 tsp crushed red pepper
1/3 cup chopped fresh cilantro
You’ll need something large enough to hold the ribs while they marinate, and it needs to be non reactive (so nothing aluminum). I didn’t have a glass dish large enough, so I bought a pair of large tupperwareesque things to hold them. You can also cut the rack in half to squeeze it into the marinating dish. They should marinate at least overnight, preferably for 24 hours. Combine all the marinade ingredients and pour them over the meat. Turn the meat to coat, then refrigerate until ready to cook.
The next day, heat the oven to 300 degrees. Line a large sheet pan with aluminum foil, and place a wire rack on top. Put the ribs on the rack, meat side up, blotting off any excess marinade with some paper towels. Roast the ribs for 2 hours, or until tender.
Meanwhile, make the glaze. Combine the honey and warm water, then add the brown sugar, stirring until it is dissolved. Then add the lime juice, fish sauce, soy sauce, red pepper and cilantro. Reserve half the glaze to use for dipping at the table. Note: this is a great dipping sauce for practically any kind of Asian food. I’ll be making it the next time I have potstickers.
Baste the nearly cooked ribs and roast for another 15 minutes, or until the surface s browned and glossy. Turn the ribs, bone side up, and glaze them again, then put them under the broiler or on a hot grill until they are lightly charred. Watch them very closely on this step – Â there is a lot of sugar in the glaze which will burn quickly. Â Cut the ribs into individual pieces, if desired, and serve them warm, with the dipping sauce on the side.
Enjoy!
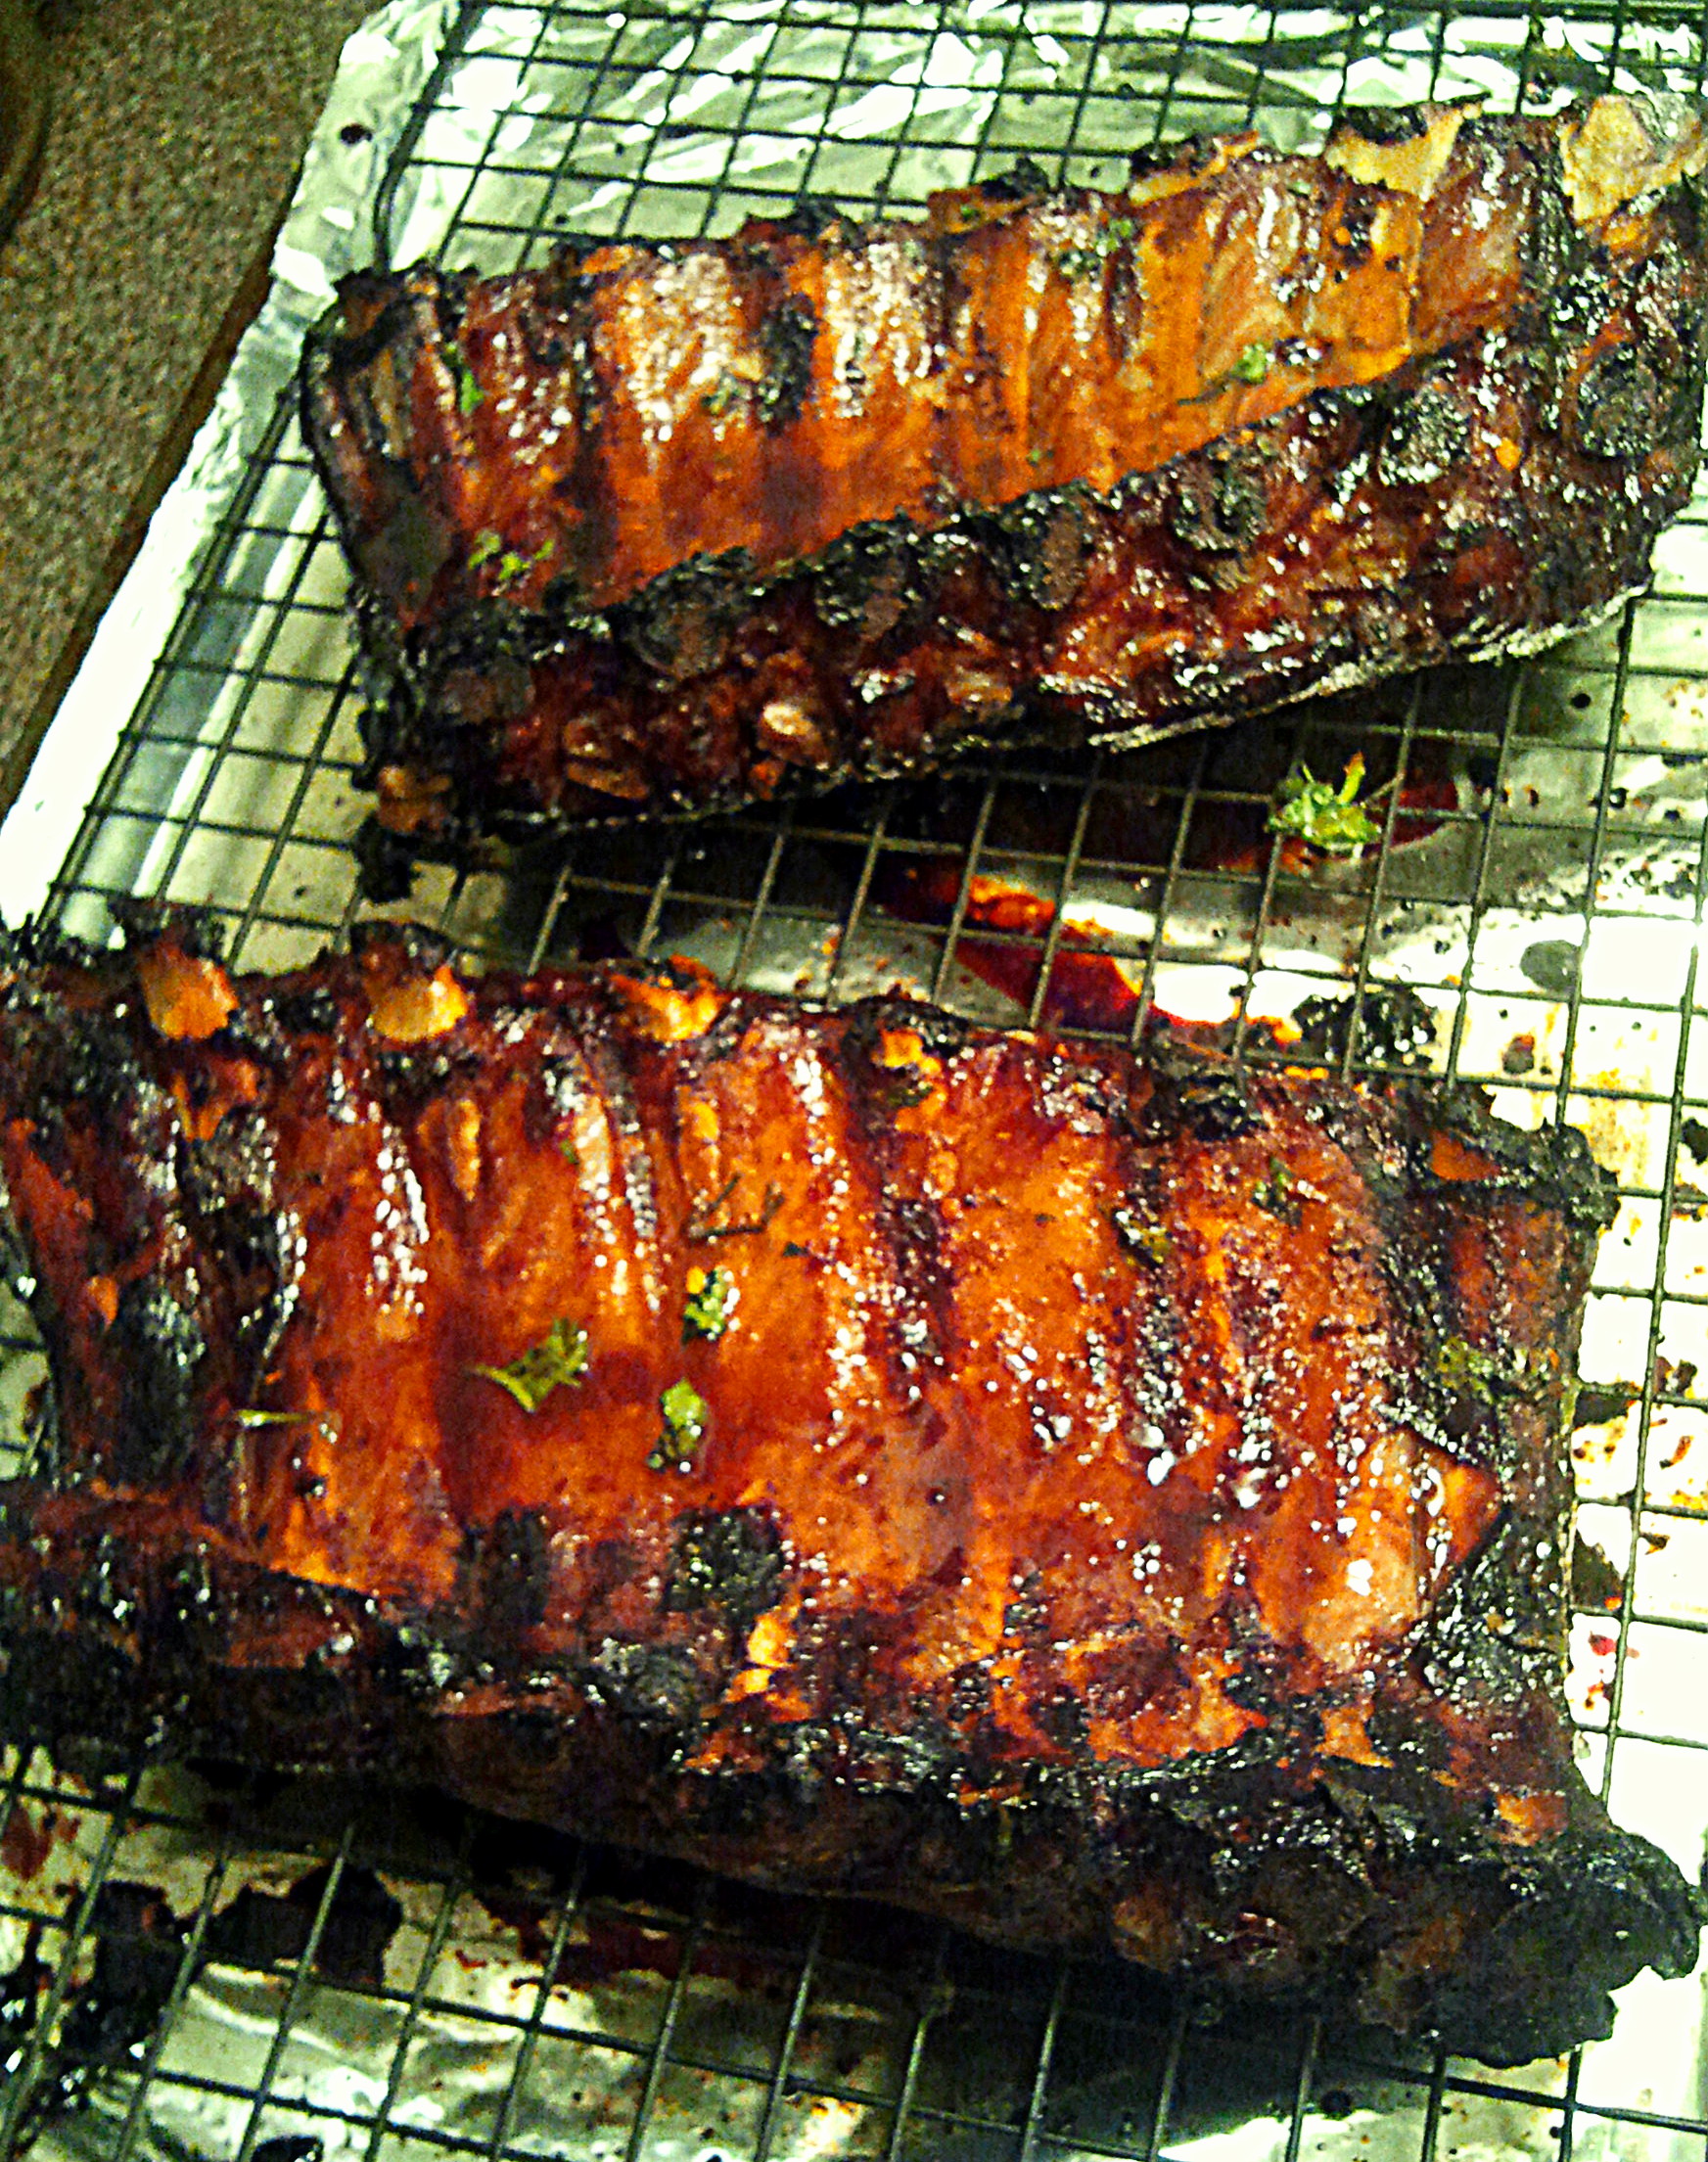

Note the crispy bottoms.
A good while back, I saw a link on a friends gchat status for www.skillshare.com.  It’s a great site that has a ton of local classes on everything from entrepreneurship to art to cooking.  After putting up gmail filters so Groupon, Living Social, and their brethren no longer dominate my in box, I started noticing the Skill Share emails again and decided it was time to sign-up for a cooking class.
I picked the dumpling making class in part because it fit well in my weekly schedule and in part because I’ve never made dumplings.The instructor Cathy Erway, a food blogger and author of The Art of Eating In (a chronicle of her two years of not dining out in NYC), taught the class from her Brooklyn apartment.  She was a great instructor and the class was a great break from the usual week night activities.
How to Make Dumpling Skin
Cathy first showed the eight or so of us how to make the the wrapper dough from scratch: Start with two cups of stifted flour and one cup of warm water and about a 3/4 teaspoon of salt.  Put it all together in a big bowl and  mix with a wooden spoon or your hands until you get a ball.  Transfer to lightly floured surface and knead until smooth and shiny.  Knead the ball.  Break off pieces and roll them out into about four inch diameter circles, nice and thin.  (Making them as thin as possible to handle is an art that makes magic dumplings.)
How to Buy Dumpling Skin
Though, as Cathy told us, unless you’re making only a handful of dumplings, you might go insane making them from scratch. Â Making the wrappers seems to be a simple, Â but time consuming process that can be replaced with store bough dumpling wrapper with minimal harm. Â When you buy the wrappers, be sure to get the white, round dumpling wrappers. Â The yellow ones are usually wonton wrapers and square shapes will just be trouble when you get to the filling stage.
How to Make the Stuff that Goes in Dumplings
The biggest lesson from this class was don’t be afraid to go a little crazy with your fillings.  You can keep it simple and traditional or create concoctions that will have deceased Chinese grandmothers spinning in their graves.
[DDET Classic Pork, Shrimp & Chive Dumpling Filling]
Makes 38.
- 1 lb ground pork
- ¼ lb shrimp, shelled, de-veined and finely chopped (optional)
- 1 bunch chives or scallions, chopped
- 1 cup finely shredded napa cabbage, packed
- 1 ½ tablespoons corn starch
- 1 tablespoon soy sauce
1 teaspoon sesame oil
- 1 tablespoon freshly grated ginger
- ¼ teaspoon white pepper
[/DDET]
[DDET Asparagus, Mint and Feta Dumplings with Balsamic Vinegar]
- 15 round dumpling wrappers
- 1 bunch asparagus, tough ends trimmed, finely chopped
- 1-2 tablespoons chopped mint
- ½ cup crumbled feta cheese
- pinch of salt
- black pepper to taste
Combine all ingredients. Swap in other raw seasonal veggies such as zucchini or summer squash shredded with a box grater.
[/DDET]
[DDET Cheeseburger/White Castle Dumplings ]
- 1 lb ground beef
- 1 teaspoon salt
- 1/2 teaspoon black pepper
- 2-3 teaspoons Worcestershire sauce
- 2 teaspoons mustard
- 1/4 cup finely chopped onion
- 3 oz. grated sharp cheddar (or any cheese you prefer)
Mix everything but the cheese together, then fold the cheese in.
[/DDET]
We made the above in class and all were really tasty. Â My favorite was the classic. Though the cheeseburger dumplings were really fun and made me want to experiment.
How to Fold Dumplings
So you have your dumpling skin and a great filling how do make a dumpling?  Lay the dumpling skin in your hand and put a spoonful of your filing in the middle.  If you’re using the purchased skins, you’ll need to dip your finger in water and trace a wet ring on the outside of the skin–this what will make it stick together in the next steps.   Fold the wrapper in half and pinch (so the two sides stick together) at the top.  Then pull a piece of the edge about half an inch to the right of the pinch over to the pinch, repeat down the side of the dumpling and do the same for the other side.  It’s a little hard to visualize, but the result should look like crescent moon.  Place the dumpling seal side-up while you make some more.
How to Cook the Dumplings
Cathy explained that the cooking process is really a combo of steaming/boiling and frying the dumplings. Â The frying is what gives dumplings that crispiness we all know and love from our favorite takeout. Â The steam is what gets the dumplings cooked through and through.
Heat oil in a large pan. Â Once the oil is hot, place the dumplings, unsealed side down, into the pan. Â Cooking unsealed side down, rather than on their side, will help get the awesome crisp you want. Â Cook the little guys in the oil for two minutes or so. Â Add enough water to the pan to cover about one quarter of the height of the dumplings, reduce heat to medium, and cover for four minutes. (It’s time to give ’em a steam bath!) When the water is gone, crackling sounds are a clue, the dumplings should be ready to scrape out onto a plate.
Serve with some soy sauce, maybe mixed with a bit of rice vinegar, and enjoy!
I was first introduced to hot pot a few years back by my roommate Nick.  For the uninitiated, hot pot, does, as the name suggests, involve a hot pot.  On the table, you have a pot of broth or oil (or both) simmering away into which you dip all manner of raw veggies, meats, and seafood.  As the dipped food cooks, it absorbs the flavor of the broth.  Personally, I can’t get enough of anything cooked in the spicy broth that imparts a slow satisfying burn.  Not only is hot pot delicious, but it’s fun–a great time for everyone seated around the table.  True interactive eating.  So when a group of co-workers decided to  it was time to head down to Chinatown for some of this stuff I had to say yes.
Our dining location was XO Taste.  What I first noticed about the place was it’s size.  The dining room is spacious and well lit, the tables far enough apart that you don’t feel on top of your neighbor.  The hot pot was in an all-you-can style, including non-alcoholic beverages, appetizers, the hot pot (of course), and desert for just $27.
We were fortunate to have Sarina, and her impeccable Chinese language skills, to guide us through the ordering and describe items as they came out.  The first wave of food, served as the pots worked their way up to a simmer, were fried dumplings and a scallop dish.  The dumpling were good, better than the standard affair–more crispy with big pieces of ingredients inside.  The scallop came in a way I’ve never encountered before: on the half-shell with a layer of mayo and covering of melted cheese.  XO tasty, I would say, and incredibly rich.
The food rolled out in waves of beef, pork, veggies, and fish.  One of my favorite items were what Sarina called omega balls.  Similar to dumplings, the casing is made from fish skin, these balls pack a strong fishy flavor. We ate and ate until we could eat no more.  We were, tragically, beyond satiated before we got into the real seafood portion of the buffet.  And then came desert.  Bowls of ice cream (green tea, red bean, and vanilla were passed around), a Chinese custard (picture a gelatinous falan), a hot red bean dish, and a peanut sesame past dumpling (a fantastically savory dessert).
I have to admit that Little Lamb Hot Pot in the Flushings Chinatown still leads as my belly’s number one love for hot pot.  In fairness to XO Taste, I didn’t get really try their seafood.  Even with seafood aside, Little Lamb seemed to have a wider array of vegetables and proteins, in addition to having a sauce bar where you came invent concoctions in which to dunk your freshly cooked treats.   But, all-in-all, XO is good, cheap, fun, and conveniently located.  I see return trips to XO in my future.

One of my favorite dishes at asian restaurants is always fresh spring rolls. The beauty of the thing comes from it’s simplicity and contrasts. The perfect spring roll has fresh, crisp vegetables wrapped in smooth and silky rice paper wrapper and a dipping sauce that’s subtle enough to not overpower those less pronounced flavors. There is also a certain challenge to the aesthetic of the spring roll (read: it’s a stone cold bitch to roll them and make them look good) which adds to your enjoyment when you finally get to chow down.
You can make these with almost any variation of ingredients but I find it generally boils down to these groups:
- Protein
You can use shrimp, pork, chicken or beef pretty much. And it doesn’t really matter how you cook it either. I’ve had my best successes by marinating one of the above and grilling it as the grill flavor really comes through in the end.
- Leafy greens
Usually lettuce or cabbage of some kind, cut into strips.
- Â Herb
Typically Thai basil or mint leaves, but normal basil and cilantro are also good choices.
- Crispy veggie


Take your pick: carrots, cucumbers, celerey, bean sprouts, bell peppers, eggplant maybe. Anything along those lines, julienned.
- Sometimes noodles
You can omit these if you want a more veggie filled spring roll, otherwise get some thin asian noodles like mai fun/cellophane noodles/glass noodles.
You’ll want to get everything prepared beforehand so once you get a rice paper wrapper moistened you can turn it into a spring roll asap. Get the protein cooked and sliced, all the veggies julienned, and the noodles boiled. Then set everything up assembly line style.
Spring roll wrappers start out as very stiff and fragile, and they also curl up on themselves when they hit water, so to soak them you really need a vessel which is wider than the wrapper and fairly shallow so it’s easy to get out of the water. I use a large dinner plate and it’s just big enough for the job. Pour some boiling water in the plate and let it sit for a minute or so until it’s cool enough you can get the wrapper in and out without burning yourself. It only needs 10-20 seconds under the water to get properly moistened, then take it out and try to keep it from a) tearing or b) sticking to itself. Lay it on a flat surface which is slightly wet, to keep the wrapper from sticking. Then start adding the ingredients. You will want to make a little pile of the filling about a third of the way up the wrapper, not right in the middle.
The order of how to place the filling doesn’t really matter, but whatever you want to show through the rice paper is what should go down first. If you’re using shrimp, they look good on the outside, otherwise maybe start with the herbs. You really don’t want to overfill these or it will be close to impossible to wrap them. After rolling a few of them you will get a good idea of the appropriate amount of filling.
 Once you have everything piled up, take that bit of wrapper closest to you and start to roll that up on top of the filling. Once you have basically covered the filling with that piece of wrapper, fold in the two sides kind of like a burrito. After that, finish rolling the whole thing up and you are good to go. The wrapper will stick to itself so no need to use any kind of food adhesive to close it up. I know these are served as appetizers at most restaurants, but these things are so good I usually just end up making a meal out of them. One last thing to consider: the wrappers will dry out slowly if left in the open air. Usually when I’m making these for other people I try to finish making them as close as possible to when they will be eaten. Otherwise you could try keeping them in a tupperware with a moistened paper towel draped over them, that would probably help them keep for another hour or two.
The only other thing to figure out is what you’ll be dipping them in. Peanut sauce is a good choice, as is sweet and sour sauce.  The Food Network has some good recipes for dipping sauces. Or if you happen to live with someone who makes a killer jalapeno jelly/syrup concoction, use that. That’s what I did.
It took me a long time to try Ramen Takumi. I lived off of ramen in college. You know the plastic wrapped square of noodles with the little seasoning packet. It costs about 5 cents and while filling isn’t exactly a pillar of culinary excellence. Or so I thought until Ramen Takumi changed my mind. Ramen Takumi translates to artisan ramen, and the name delivers on its promise.
Every time I walked by Ramen Takumi, I couldn’t help but wonder how it was a restaurant could be dedicated to ramen. Day-by-day my curiosity slowly wore me down. I had to taste these noodles for myself. When I finally walked through their door, everything I thought I knew about ramen was blown away. After this first trip I was hooked and I had no choice but to throw the place into the regular lunch rotation.
From almost any seat you can see into the open kitchen where giant pots boil and simmer away with broths for the various dishes. When sitting at the bar you can see the cook setting timers and dropping baskets of noodle into boiling water as he handles slices of meat on the grill.
Ramen Takumi offers up 11 varieties of its namesake dish with flavors including curry, miso, and sweet soy sauce. Served with a ladle like spoon and a pair of chopsticks, each dish has its own flavor and mix of ingredients. Unlike the bowls of ramen I knew before, Ramen Takumi’s come full of veggies, meats, and egg. The curry ramen, with scallion, chicken, bamboo shoots, and ginger pickles, packs a great spicy punch. The miso ramen is completed by slices of pork, scallion, bamboo shoots, bean sprouts, and corn, and has fantastically savory flavor. Every heaping bowl is a delicious treat that satiates without leveling me in a food coma for afternoon class.
Finally, in addition to the ramen, the mochi ice cream is a must try.
——————————
Ramen Takumi
90 University Pl
(between 11th St & 12th St)
New York, NY 10003

The Dream
This will be more of a rant than a coherent post, but I have reason to be frustrated. Again I’ve been tricked into trying a Cream Cheese Puff here in New York in hopes of re-connecting with my cheesy Minnesota roots. As I talked about in my Delights Missing From New York I can’t seem to find a pure cream cheese wonton. Today, I thought my luck had finally changed. Walking home through Park Slope I saw a hand written sign outside a Chinese restaurant advertising cream cheese puffs. No mention of crab or ragu polluting the glorious cream cheese. But when I got home and opened the bag and took my first bite… wait for it…. FAKE FREAK”N CRAB! And the hunt continues.

Mochi Ice Cream
Yes, even food bloggers can live under a proverbial rock. This week when I went out to lunch with Stu to a ramen place near school. No, this isn’t the stuff I’ve live on off and on my whole life–a more detailed post of the ramen is coming when I get in a few more visits.  On the latest trip, after slurping down our bowls of deliciousness, Stu suggested something that I haven’t had before: mochi ice cream.
Now I would say that over the last 28 years I’ve developed some familiarity with ice cream, but I had no idea about this Mochi thing. I love Japanese food and I’m not sure how I missed this one. Well, it turns out that Mochi is, basically, rice ground into a paste that can be formed into shapes.

A View Inside
When it comes to mochi ice cream, the mochi is wrapped around an ice cream flavor of your choosing and put into a deep freeze. As you hold it the outer layer of mochi softens, and by the third or fourth (and final) bite the ice cream itself starts to melt. The mochi adds a little texture and lets you pick-up the ice cream like an awesome Asian ice cream sandwich. If I liked it this much now, I can’t wait to take some more of these down when summer finally comes around.

Doesn't it look fantastic?
Apologies to Meg, who apparently wants my mustard-crusted chicken recipe, but you’ll have to wait a few days. The other night, I made an interpretation of chicken stir-fried with Chinese long beans. It was probably my best re-creation of Asian cuisine so far. My favorite part of this recipe is the incorporation of dark soy sauce to raise the sugar content of the chicken marinade. When the chicken hits the pan the extra sugar will help the caramelization and develop a deep, rich flavor.
For any chicken stir frying, I prefer using thighs. There’s a little more fat in them, so there’s more flavor to stand up to spicy Asian sauces, and they’re definitely more forgiving of being slightly overcooked. So buy some boneless, skinless chicken thighs or, if you have a nice boning/fillet knife, save yourself a few bucks per  pound and buy the normal chicken thighs and bone them yourself. Cut 4 chicken thighs into roughly 1-2 inch chunks and add to a dish or plastic bag to marinate them.
For the marinade, mix together:
- 4 tbsp soy sauce
- 2 tbsp dark soy sauce (you can substitute some sugar or honey, but really, go buy a bottle of dark soy sauce. You will find yourself putting it in everything)
- ¼ tsp sesame oil
- 1 tsp  EVOO
- 1 tsp rice wine vinegar
- 1/2 tsp sriracha hot sauce
- 2 cloves minced garlic

You just can't fail with these ingredients.
- a few dashes of white pepper

Mix it up, add it to the chicken, toss to combine and let it marinate for 1-2 hours.
Next, get a large pot of salted water to a boil. Then par-boil about 3 cups of green beans for just a few minutes, until they are bright green. Â Then take them out and shock them either in ice water or under a cold tap. Set aside.
Mix 2 tablespoons of oyster sauce with 2 tablespoons of water, set that aside as well.
Pre-heat 1 tbsp of light oil in a skillet over medium high heat. While that is warming up, take the chicken out of the marinade and (important) pat the chicken dry with paper towels. This will help the chicken get some browning in the pan, and will also remove most of the garlic which might burn in the pan. When the oil is shimmering, add the chicken and cook for 3-5 minutes per side or until there is some serious browning on each side. Don’t overcrowd the pan; you will probably have to separate the chicken into two batches unless you have a pretty decent size pan. When the chicken is almost done, add 3 cloves of minced garlic and a minced serrano pepper and stir it around. Let the garlic cook for 30-40 second, then add in the green beans and the oyster sauce mixture.  Cover the pan and let it cook for 3-4 minutes. If the sauce is not thick enough, you can either take the top off and let it reduce or mix up a little water/soy sauce/cornstarch slurry and mix it in. Serve over rice or rice noodles or whatever floats your boat.
Later this week: the last football post of the year. We’re breaking out the best of the best for the SUPERBOWL! It’s times like these I really wish Arty was back in the tundra, but Rick and I will have to step up and perform in his absence. Â I’m hoping to have about 3 appetizer recipes and maybe a review of my favorite football beers or someother such nonsense.

ABOUT
Good Food, Good Drink, Great Living
RECENT POSTS
| M | T | W | T | F | S | S |
|---|---|---|---|---|---|---|
| 1 | 2 | 3 | 4 | 5 | 6 | 7 |
| 8 | 9 | 10 | 11 | 12 | 13 | 14 |
| 15 | 16 | 17 | 18 | 19 | 20 | 21 |
| 22 | 23 | 24 | 25 | 26 | 27 | 28 |
| 29 | 30 | |||||
Tags
Archives
- November 2014 (1)
- October 2014 (2)
- September 2014 (1)
- April 2014 (1)
- March 2014 (1)
- February 2014 (1)
- January 2014 (1)
- December 2013 (4)
- November 2013 (2)
- October 2013 (1)
- September 2013 (1)
- August 2013 (4)
- July 2013 (4)
- June 2013 (6)
- April 2013 (5)
- March 2013 (5)
- February 2013 (1)
- January 2013 (3)
- December 2012 (2)
- November 2012 (13)
- October 2012 (4)
- September 2012 (6)
- August 2012 (3)
- July 2012 (4)
- June 2012 (6)
- May 2012 (10)
- April 2012 (13)
- March 2012 (5)
- February 2012 (5)
- January 2012 (2)
- December 2011 (16)
- November 2011 (8)
- October 2011 (10)
- September 2011 (10)
- August 2011 (12)
- April 2011 (2)
- March 2011 (8)
- February 2011 (7)
- January 2011 (7)
- October 2010 (5)
- September 2010 (8)
- August 2010 (12)
- July 2010 (5)